|
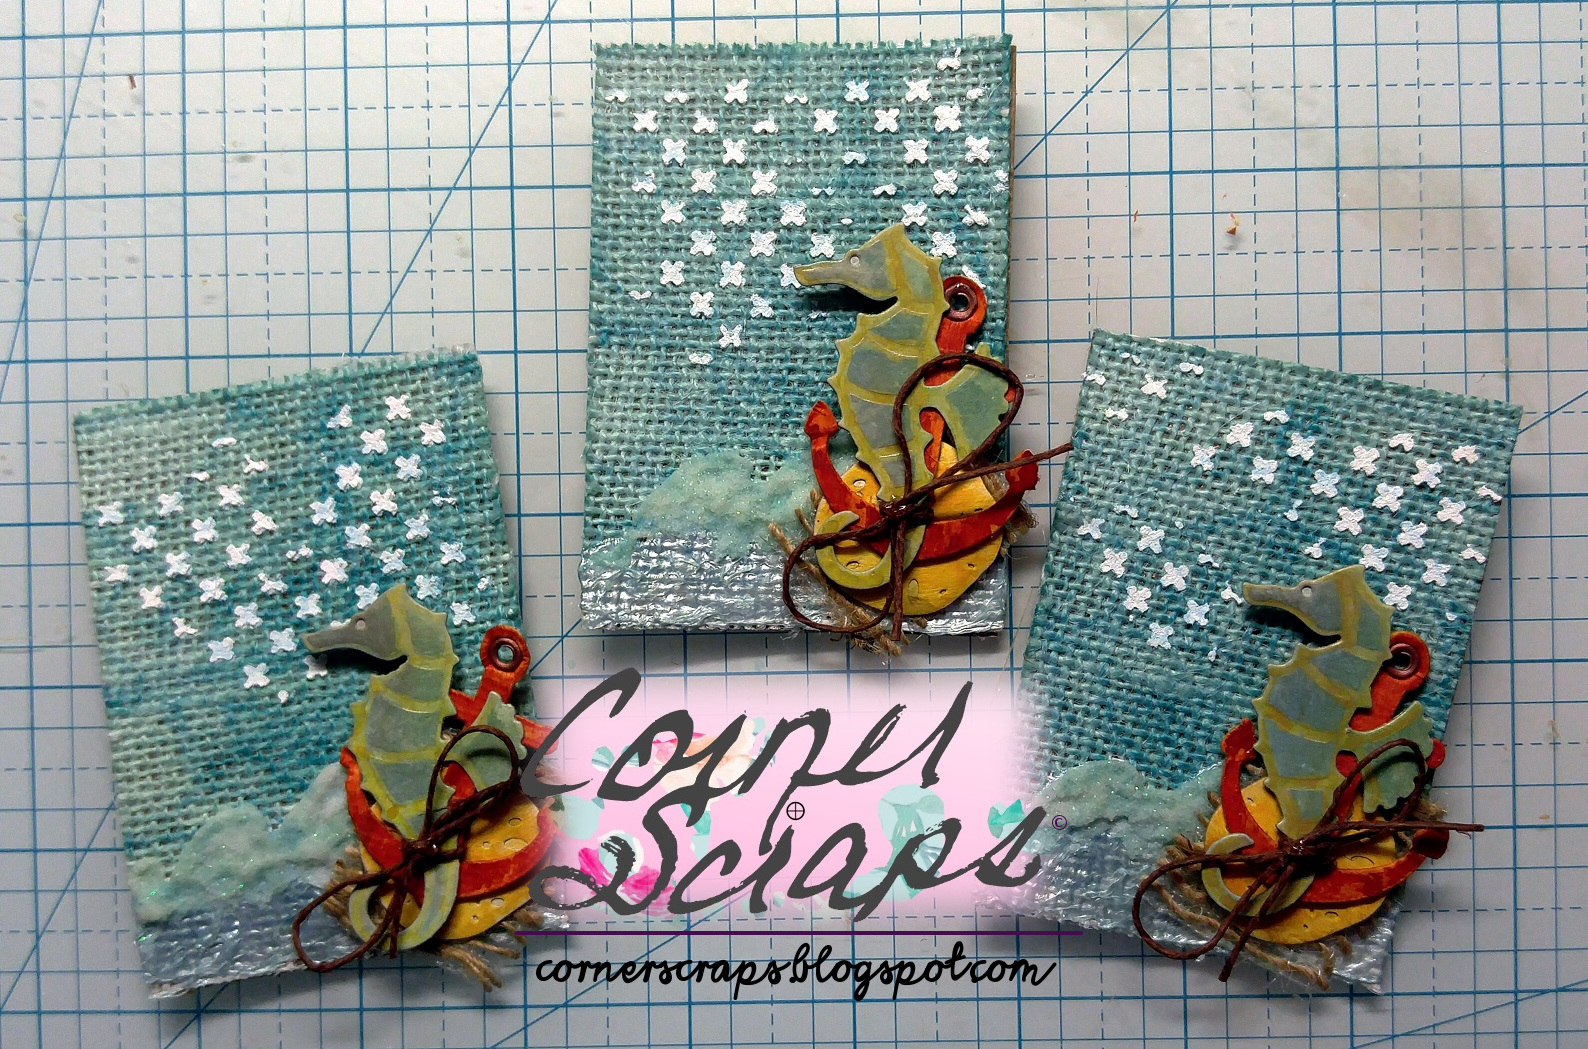
| Teal(ish) Flower ATCs |
Over at scrapbook.com “MarciLB” hosts a monthly ATC swap with four categories. For July, “Flowers” was one of those categories, and these are the ATCs that popped into my little head! I’m also entering in the Simon Says Stamp Wednesday “Anything Goes” Challenge! The background is some thin, self-adhesive cork that I didn’t even remember owning until I went digging through my stash looking for inspiration! (I believe I bought it at Hobby Lobby)
That “fishnet” ribbon got a total make-over! I’ve had it for years, and had used the majority of it previously. It was originally a dark teal and green with glitter. I changed that. I could have worked with the dark teal piece, but I didn’t have enough for all four ATCs! I slapped on some Tim Holtz Distress Grit-Paste pressed the ribbon into it and used Tim Holtz’s Tiny Attacher to hold the ends in place. After it dried I started painting the background with white acrylic paint! I used paint instead of gesso because it is thicker, and I needed coverage! (As for the origins of the ribbon, I know I received it in one of my first kits from “Birds of a Feather,” and I received kits for close to 18 months I believe. Unfortunately as of February 2016 kits were no longer offered.)
 |
| Some old bits of fishnet “ribbon” that got a make-over! |
The flowers are made up of a combination of Prima E-line flowers and flowers from Prima’s Wildflower Pillar Pack. The gems came in the same kit as the ribbon.
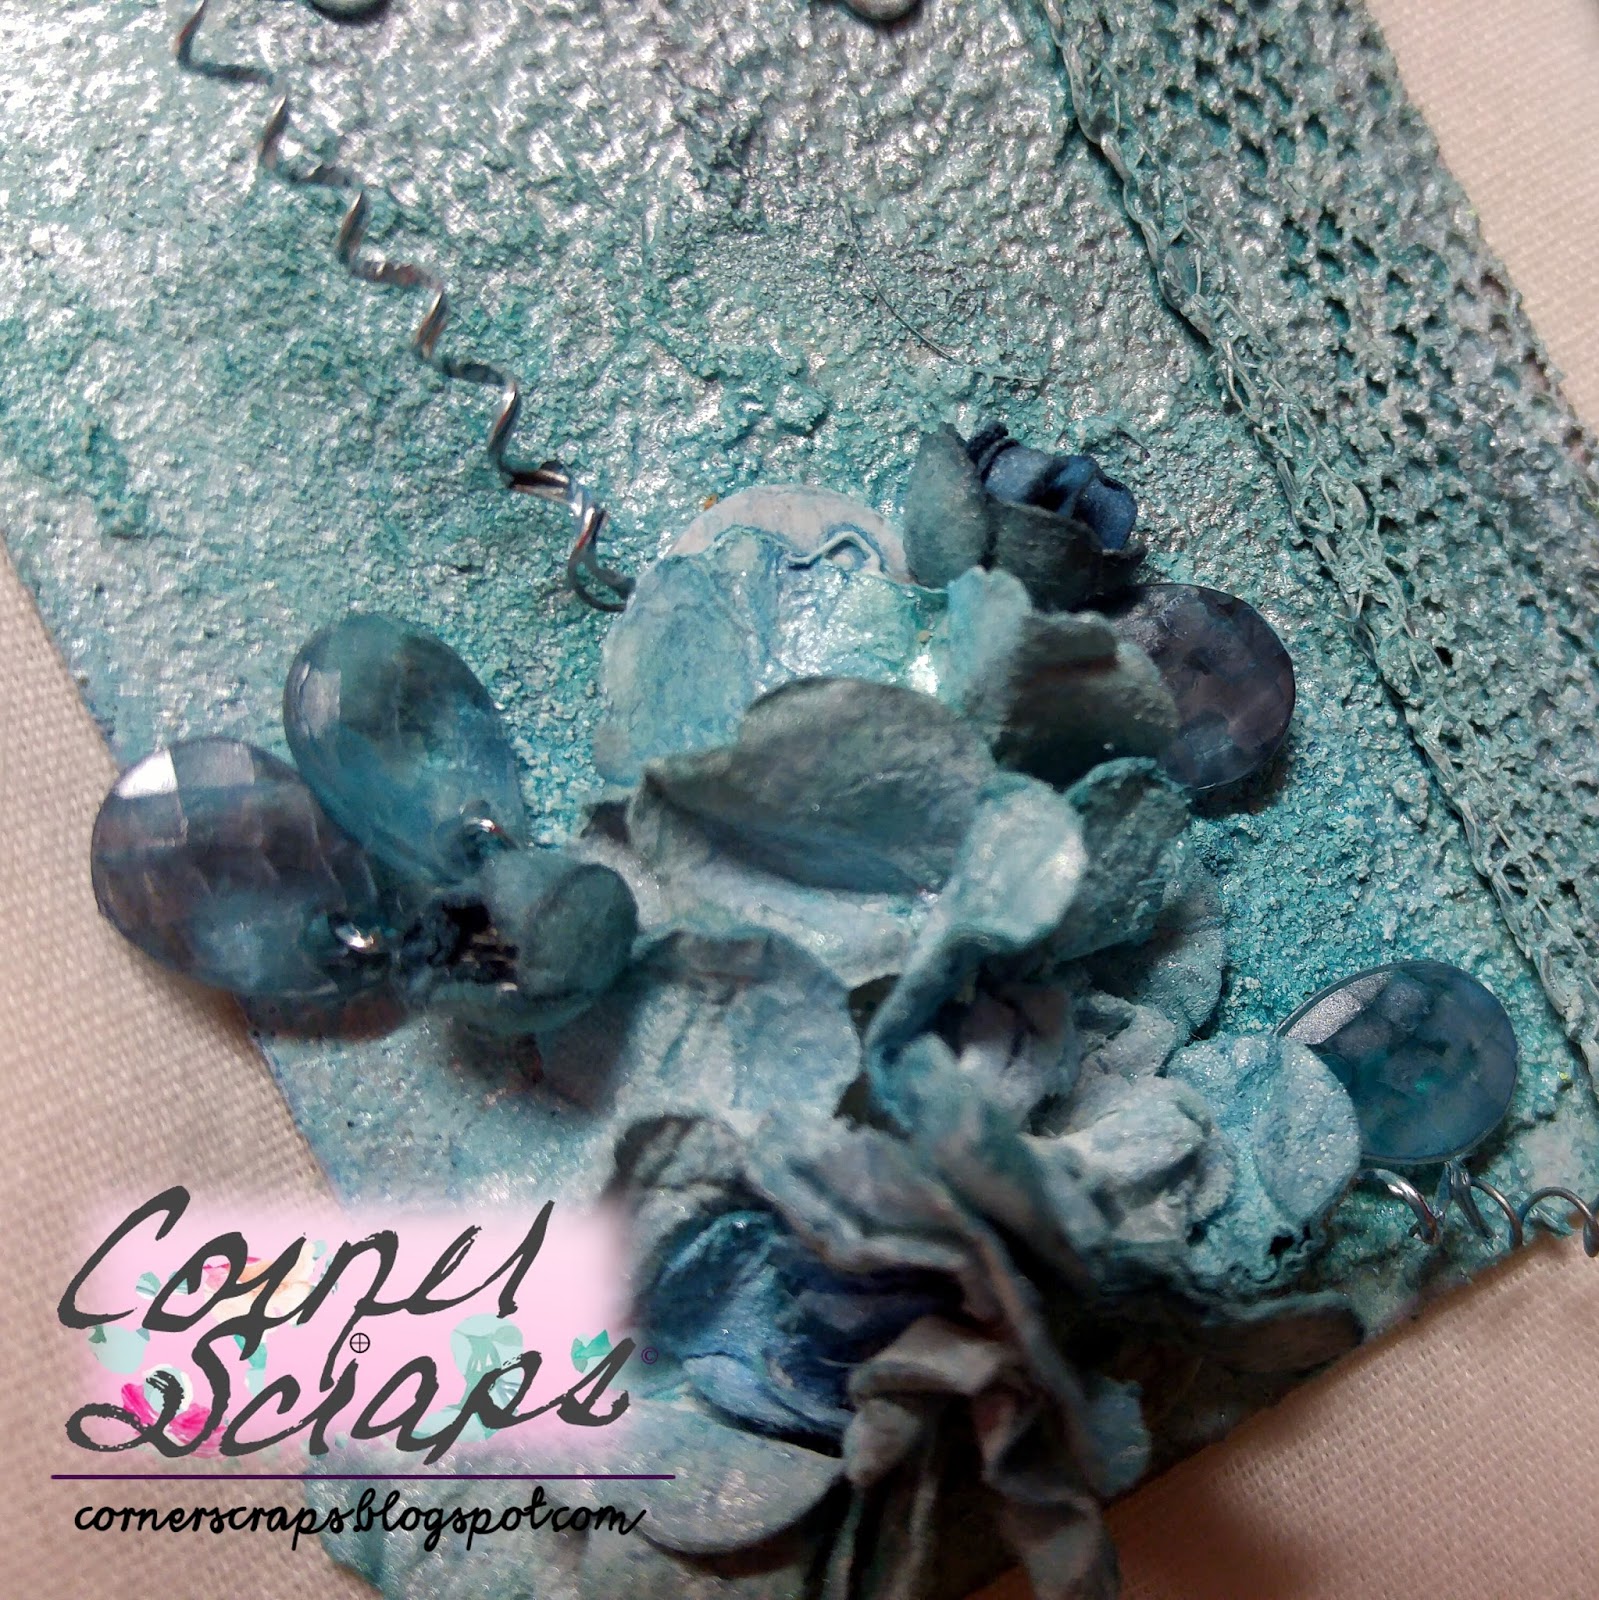 |
| A closer look at the flower cluster! |


Those two metal filigree pieces are even older that the ribbon and gems! After I added them I painted them with the white acrylic paint as well.

After everything was glued down and coated with some acrylic paint (The gems are the only parts I didn’t put paint on!) I started spritzing on some Heidi Swapp Color Shine in “Tinsel” and “Sweet Mint,” and some Shimmerz Vibez “Jeni B Bleu.”
List of Products:
- White acrylic paint
- Tim Holtz Distress Grit-Paste
- Heidi Swapp Color Shine: Tinsel and Sweet Mint
- Shimmerz Vibez: Jeni B Bleu
- Prima Flowers: white E-line mix and Wildflower Pillar Pack
- Unknown: Filigree, ribbon, gems
- Cork Background: Probably from Hobby Lobby