peace & joy

peace & joy Christmas card

A Christmas card I made specifically for my best friend! She has a “thing” for moose. Her Great Dane is named Moose, she has about six pieces of moose art in her home, a moose hook in her kitchen … you get the idea! She LOVES moose!!

**The moose cut and the font (Aubrey) are from the Silhouette Store!**

Product List:

  • Ranger 
    • “Emboss It” Pen
    • Glossy Accents
  • Tim Holtz 
    • Grit-Paste
    • Distress Glitter: Clear Rock Candy
    • Distress Oxide: Candied Apple
    • Distress Paint: Candied Apple
    • Paper Distresser
  • WOW Embossing Powder 
    • Cloud 9 
  • Poppy 
    • Small Blooming Poinsettia (die) 
  • Simon Says Stamp 
    • the cream card stock for the card base & poinsettias 
  • Me & My Big Ideas 
    • Red & white flourish paper 
  • Silhouette
    • Cameo
    • Curio
  • Sizzix
    • Big Shot Plus
  • Unknown 
    • the glitter for the moose (it was in a little baggy, I don’t know where it came from!) 
    • the burgundy card stock 
    • the red seed beads 
  • Mod Podge 
    • Acrylic sealer (it’s how I keep the glitter from falling off after it’s all said & done! Just a quick coat on top!)

    the morning after

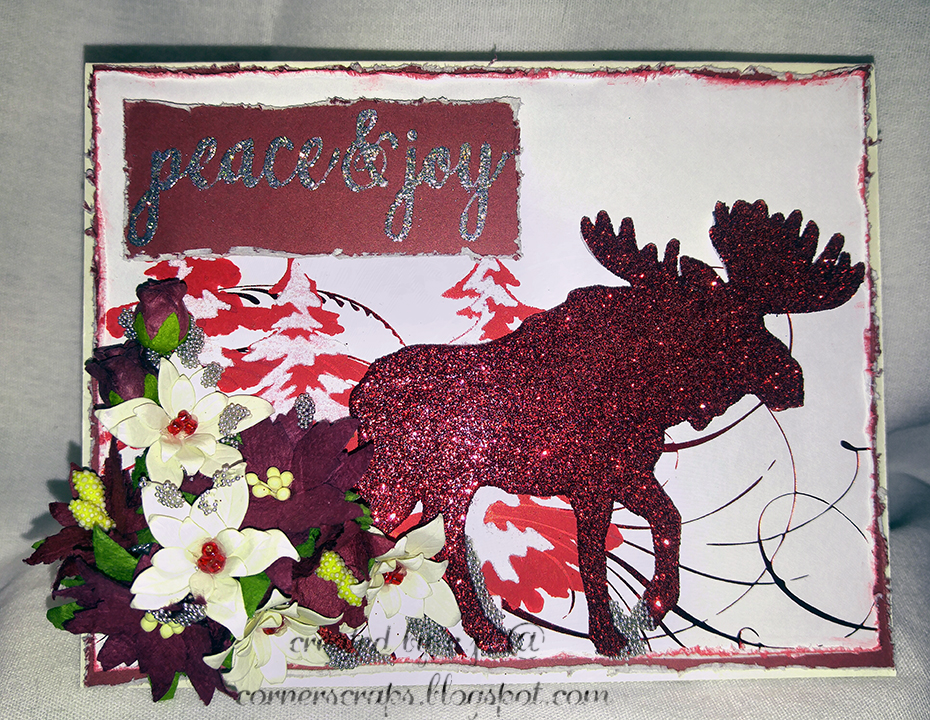
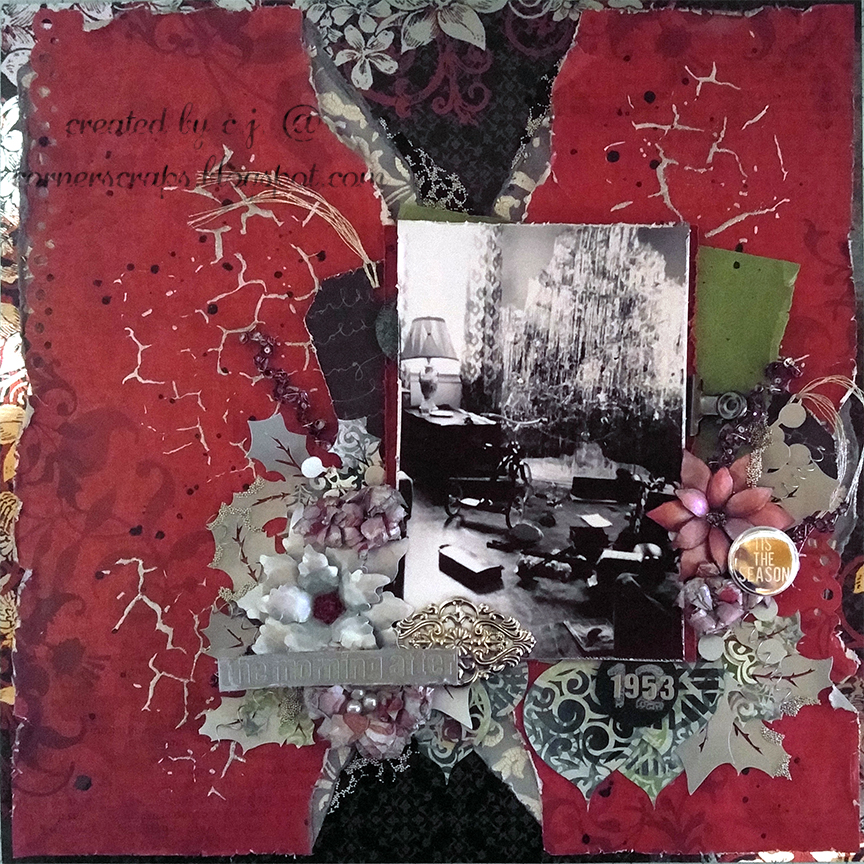
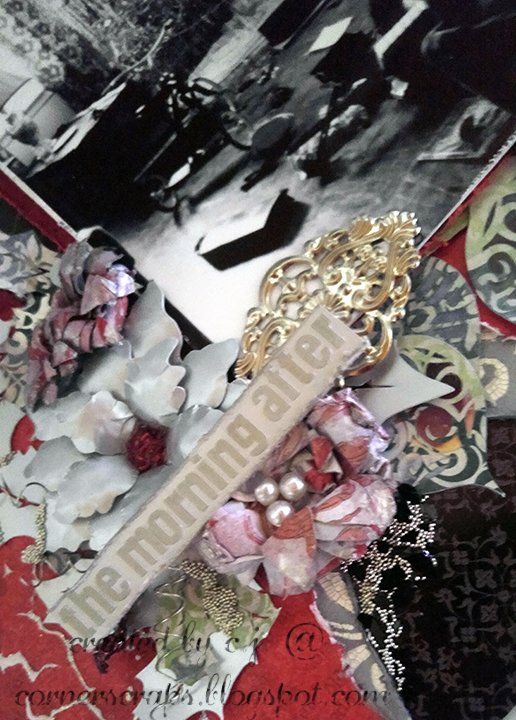
    the morning after – 1953

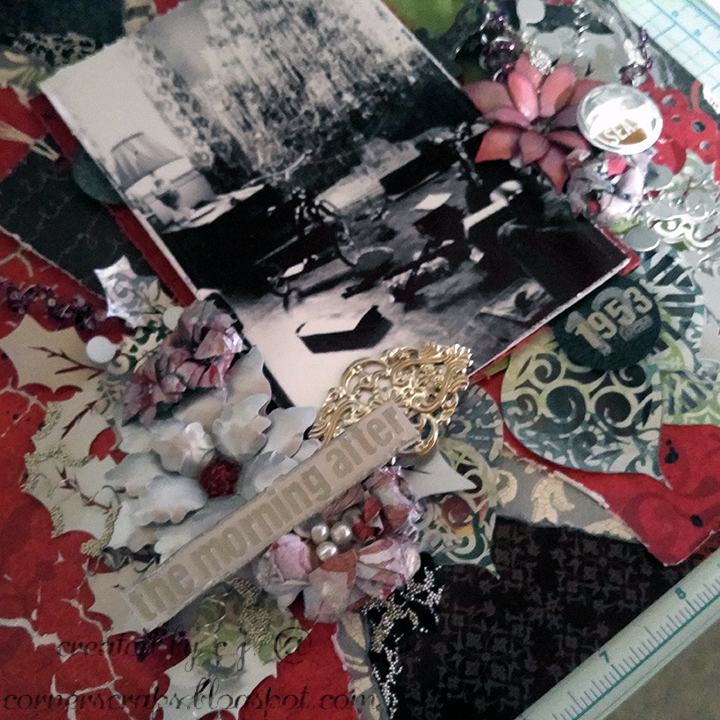
    Recently, while combing through old photos my grandma had kept over the years, I came across this photo, and I fell in love with it! I find it to be hauntingly beautiful. The remnants of packaging are scattered among the new toys that had arrived the day before. Even the lamp shade is crooked! This moment in life was captured forever by my grandma, she even provided the title! “The Morning After” had been written at the bottom of the photo.

    Over at scrapbook.com, I host “The Ugly Games.” (formally known as “The Ugly Paper Challenge,” we had a vote!). Anywho…the object of the challenge is to use the two papers and the embellishment(s) (optional) that you are sent at the beginning of the month to create a layout! (I give out addresses on the 1st, & in short, you send a set, you receive a set). Now for my disclaimer, I’m not saying the products are themselves “ugly,” the whole point of the challenge is to use papers sent to you that you may or may not have ever considered trying to combine, or they may or may not be your “style.” Back in September, I received the following papers:

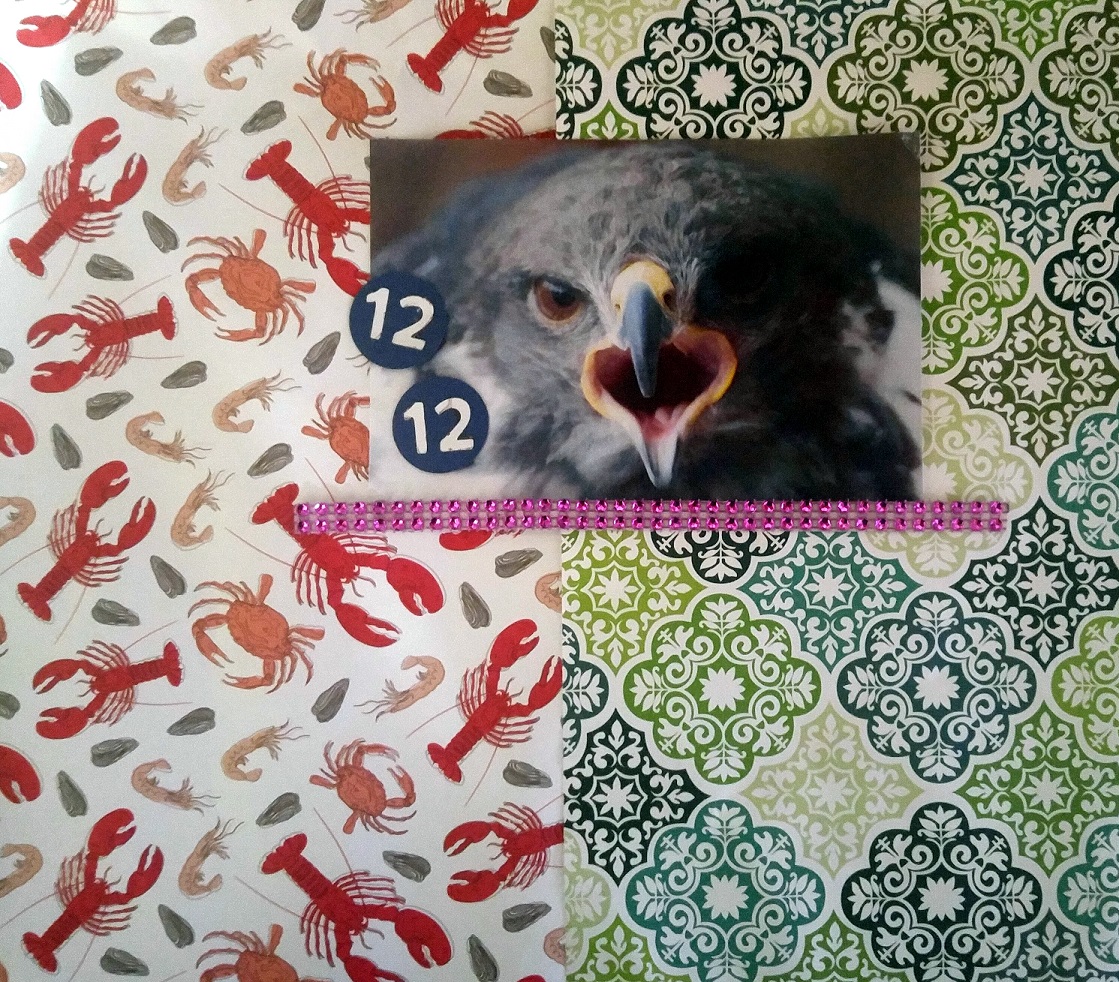
    “The Ugly Games” papers I received in September

    First, a short explanation, because these papers were sent to me during football season! I am a Kansas City Chiefs fan, and another football “nut” in the group is a Seattle Seahawks fan, and she has been patiently waiting for me to be on the receiving end during football season since the spring! The mascot for the Seahawks is Tamia the Hawk, hence the photo, and Seahawks fans are the “12th Man Army,” hence the two “12” circles (apparently the Seahawks can’t play without an extra person 😏) Anyhow, I normally get my layouts completed on time, but September was a draining month for me, and it seemed to affect my creative process. I knew what I wanted to create, I was just constantly running into a mental roadblock! I had actually put a layout together most of the way, but it just wasn’t right! It was dull, and the lobster paper poinsettias just wouldn’t blend in! I was frustrated, and that certainly didn’t help my roadblock, then, as luck would have it, I saw this layout by Phyllis on the ReneaBouquet’s Facebook Page, and I knew it was the inspiration I needed to get those papers used! It embodied the direction I had been trying to go, and stepped it up a notch! I actually dismantled the layout I had started, very carefully, given I couldn’t replace any of the elements I had received in The Ugly Games and started anew! In fact, the Bazzill “Ash” cardstock with the Prima Crackle Paste was part of the original! (In addition to the parts created from the papers and embellishments I received.)

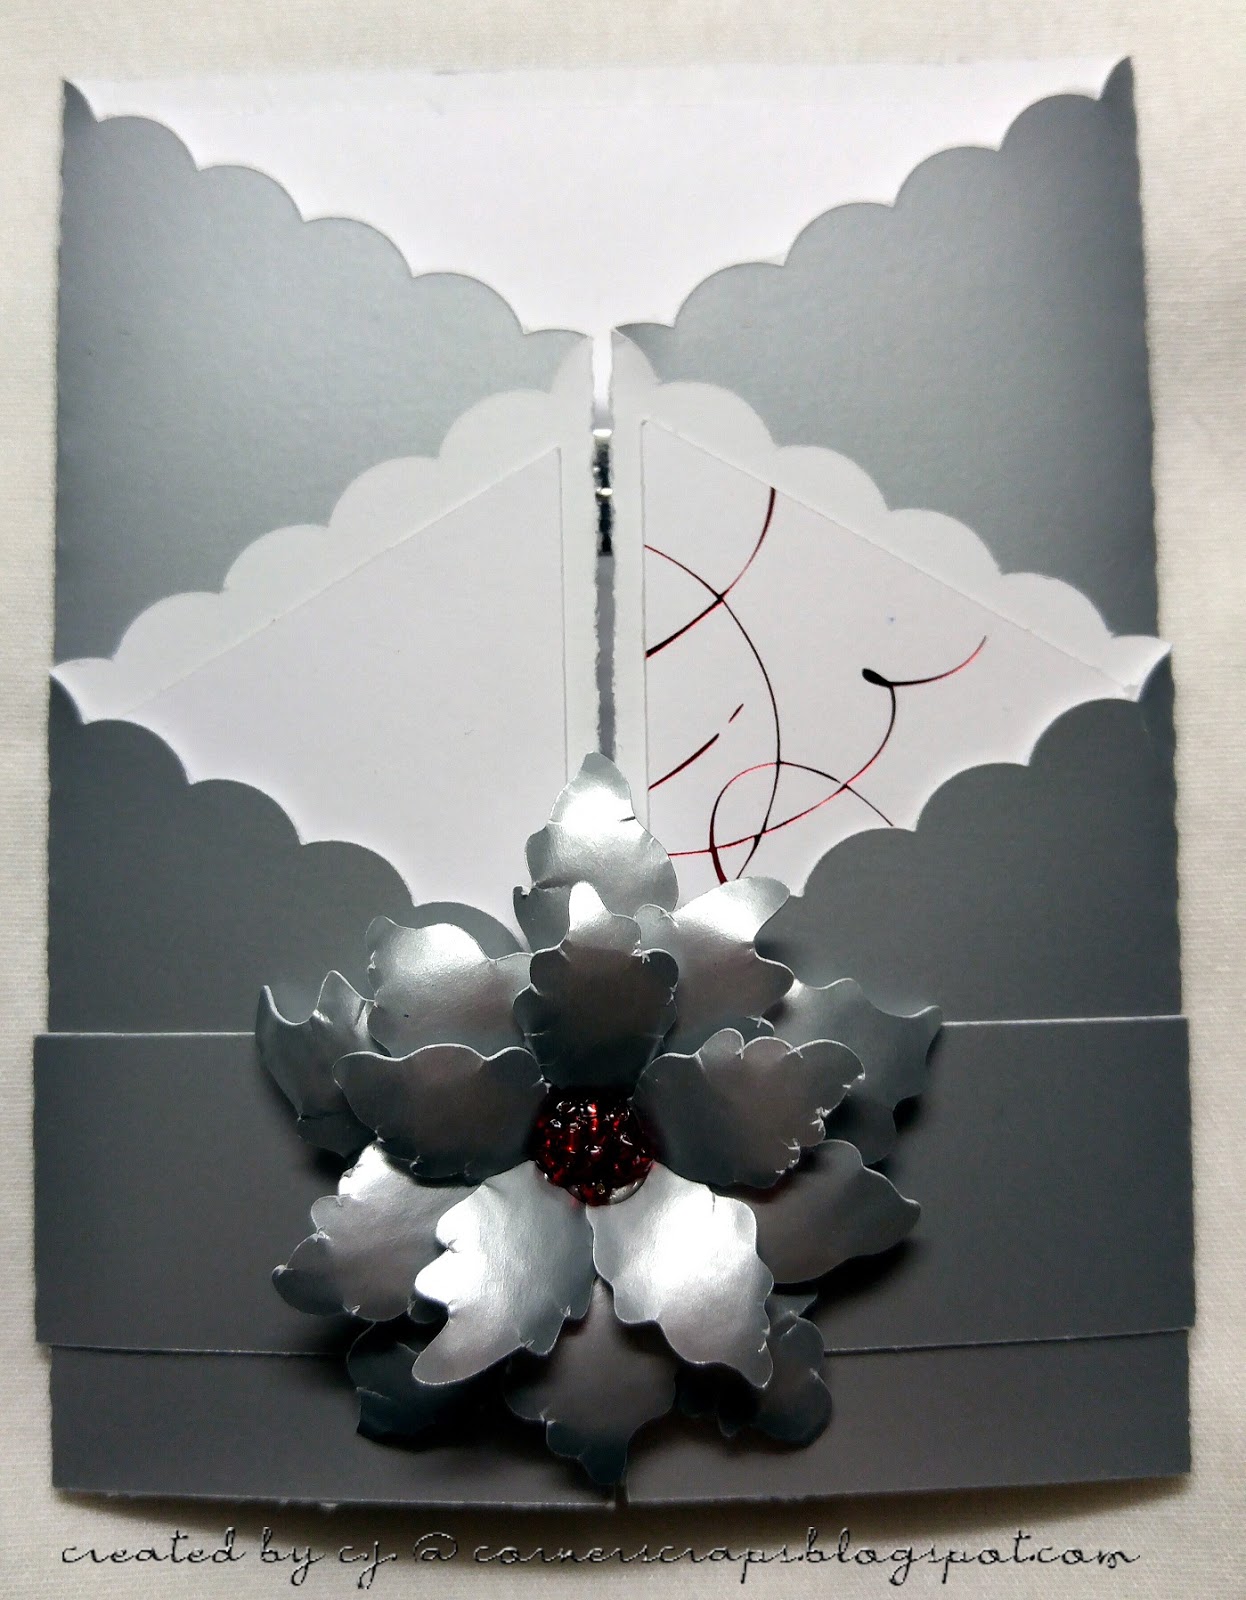
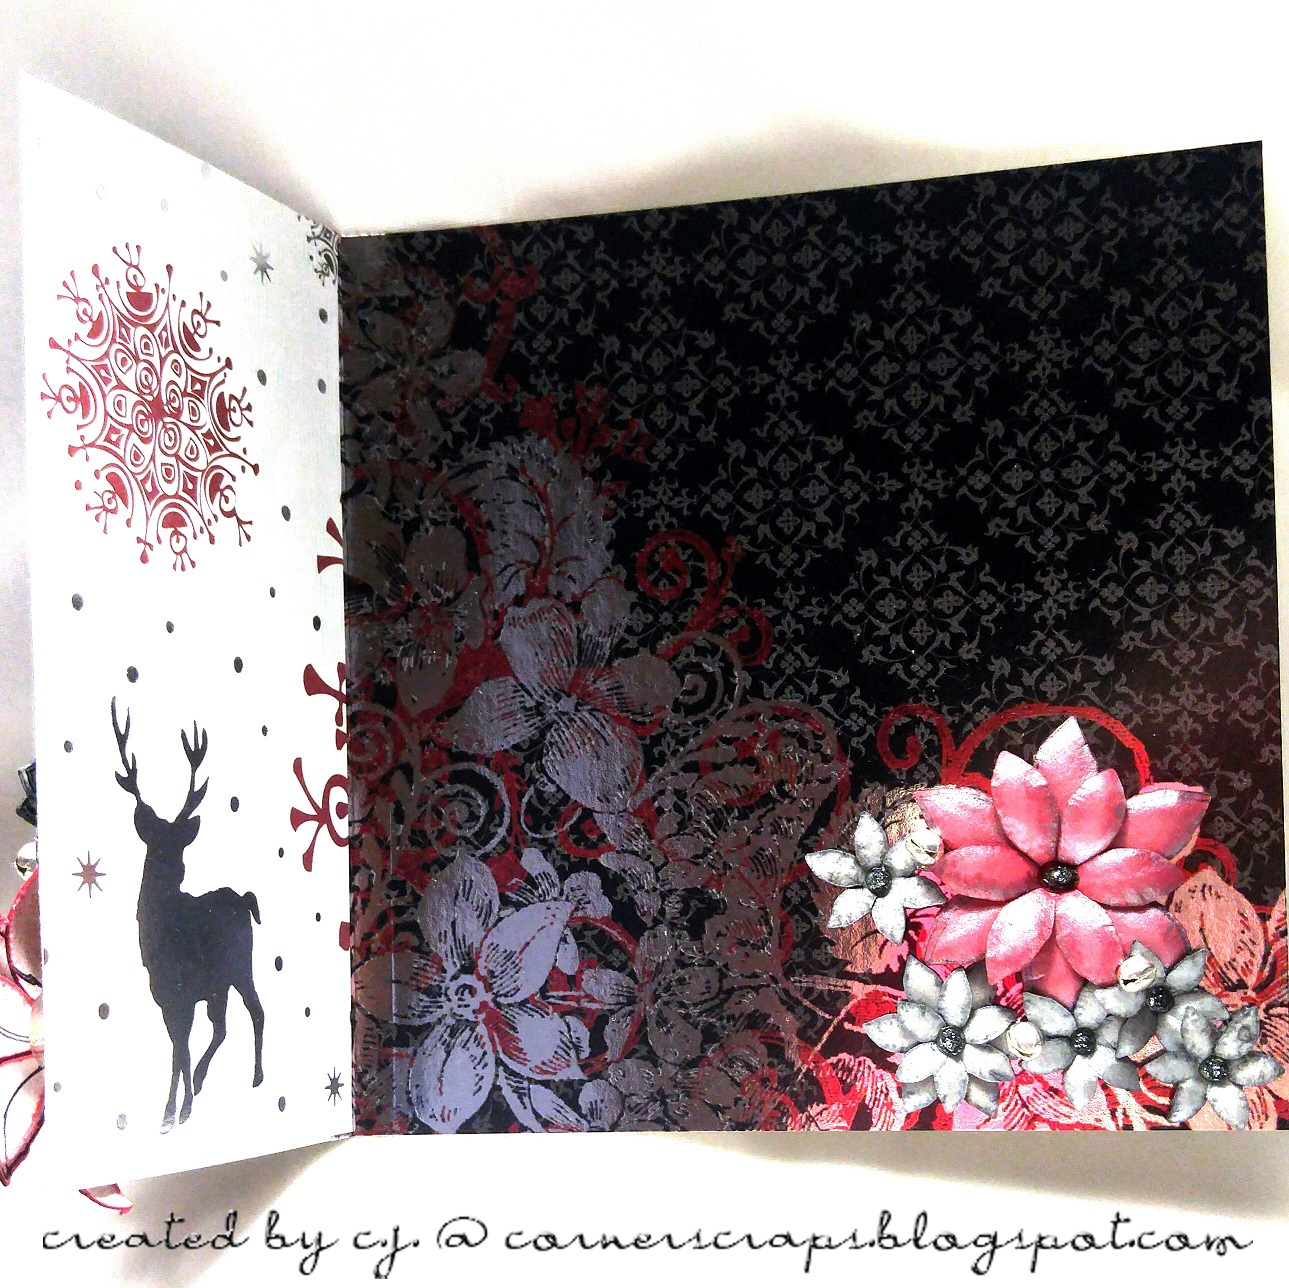
    A closer look at the flower cluster and ReneaBouquet Silver Microbeads & Black Shard Glitter Glass (both linked at end of post) under the title!
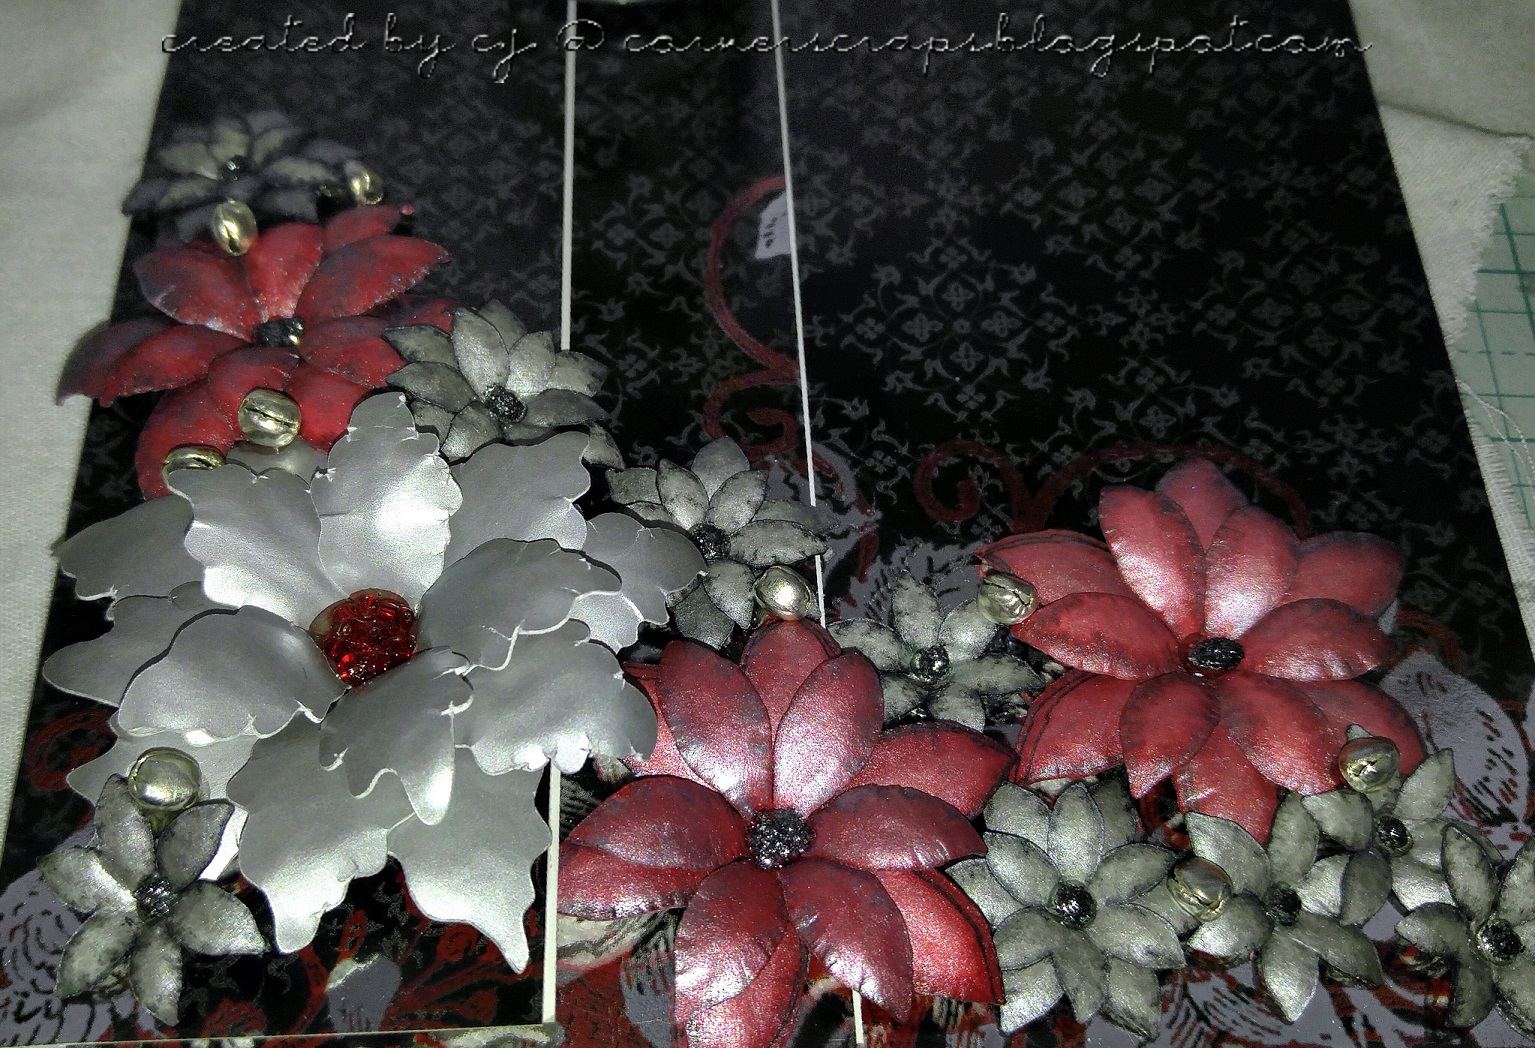
    Closer look at the cluster on the right side showcasing the flair from {A flair for buttons} (link at end of post)

    Just another angle.
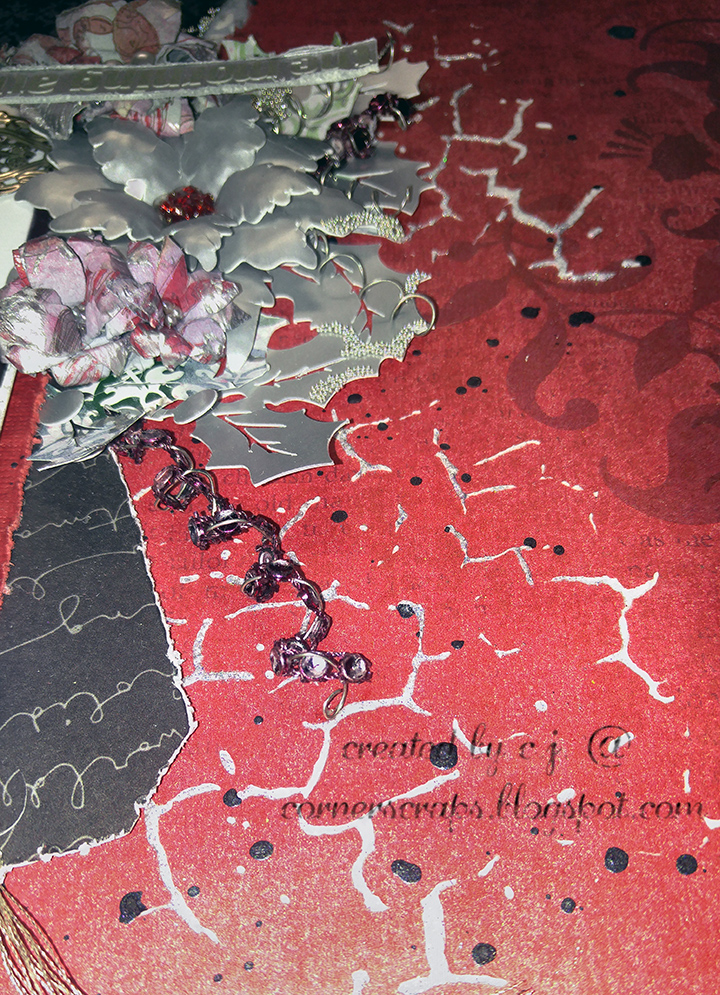
    A close up of the Silver Glass Microbeads on some of the holly leaves! (I am seriously in love with those beads!)

    Another angle!
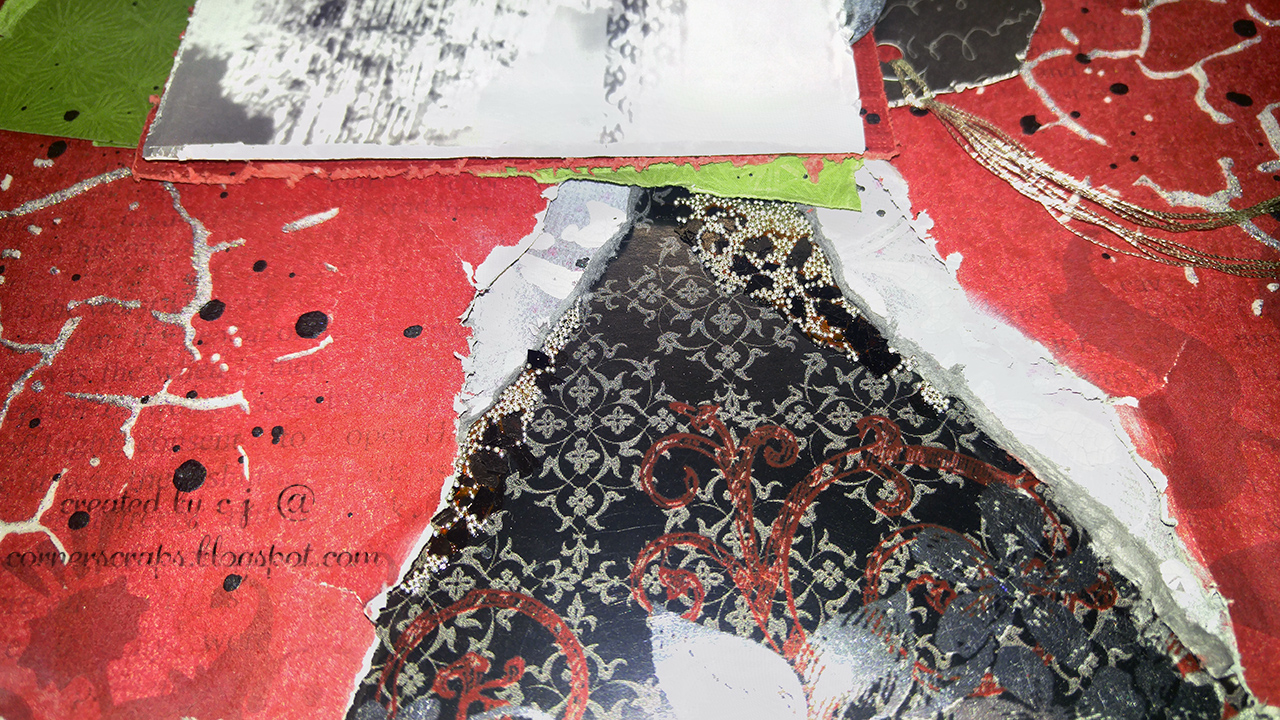
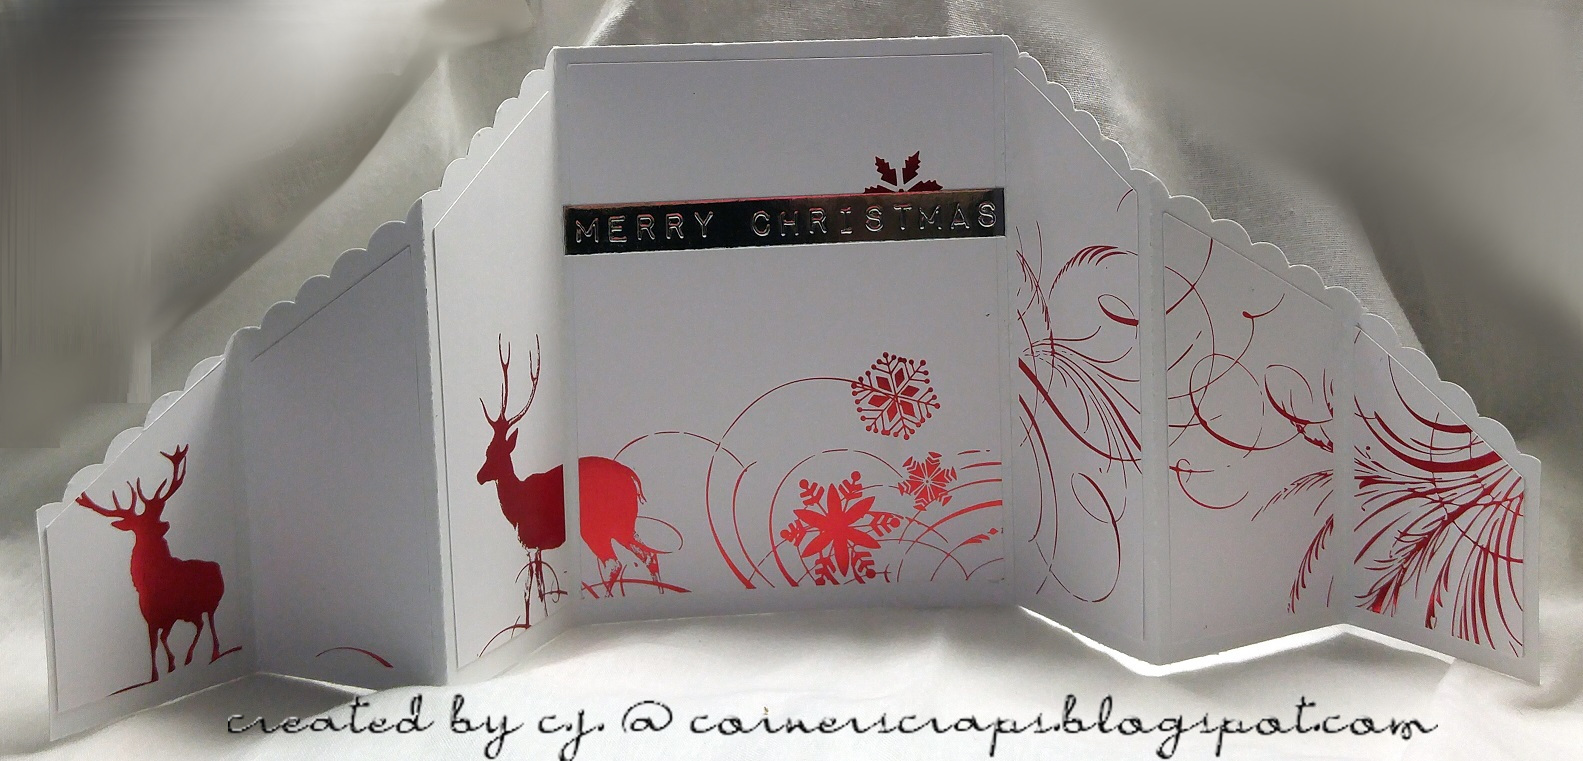
    The photo was taken from the top of the page looking down, with a good look at what I did to the pink rhinestone strip I had received! I used alcohol inks on it to change the color, dabbed on some “Foiled Again” Shimmerz Dazzlerz, and ran a wire through it so I could shape it!

    Looking down at the Black Glitter Glass and Silver Microbeads that are at the top of the page.

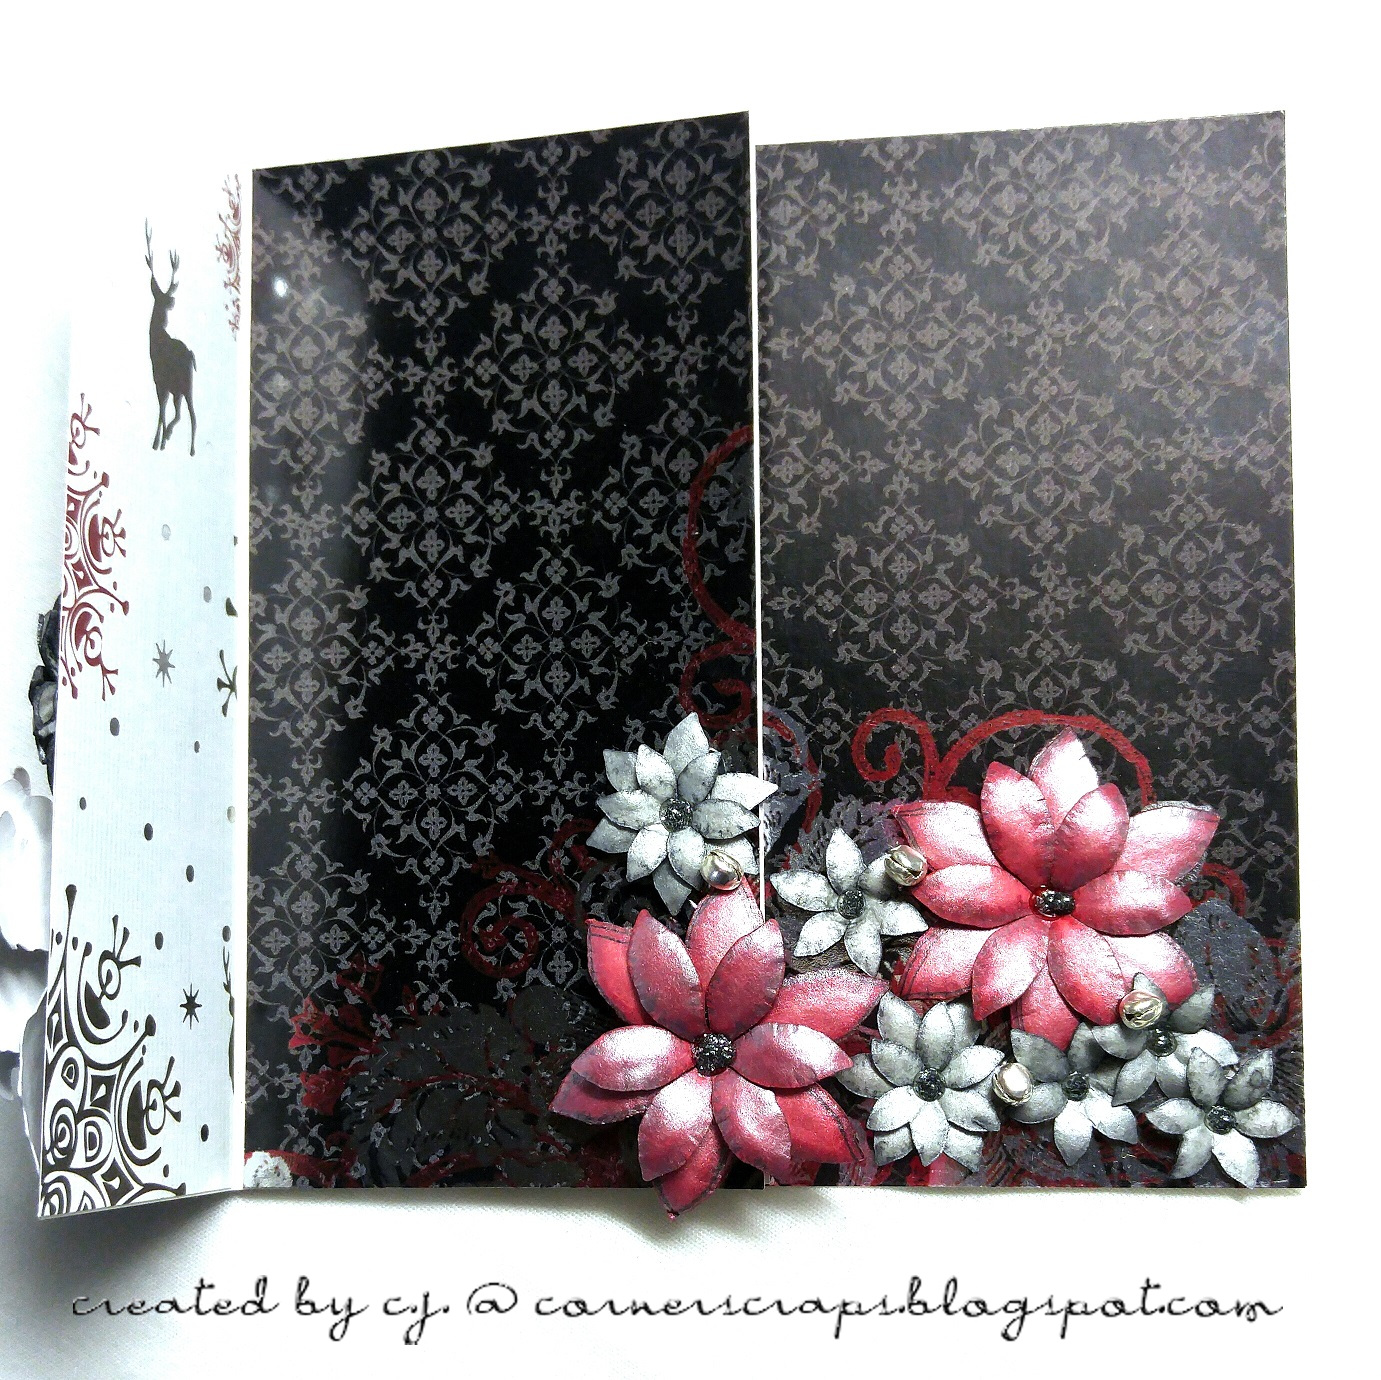
    Looking down at the cluster found on the left side of the photo!

    **All of the cuts (poinsettia’s, holly, ornaments) came from the Silhouette Store!**

    Product List:

  • Shimmerz
    • “Coal” Paint
    • “Foiled Again” Dazzlerz
  • {a flair for buttons} “Tis The Season” Flair
  • Hot off the Press: Black Silver Floral Foil Cardstock
  • Bazzill
    • “Ash” Cardstock
    • Silver Metallic Cardstock
  • Basic Grey: Juniper Berry “Lump of Coal” Paper
  • Fancy Pants Designs
    • “Collecting Moments” Sticker Fundamentals
  • Tim Holtz:
    • Flourish Stencil
    • Distress Spray Stains: Candied Apple, Iced Spruce, & Weathered Wood
    • Distress Ink: Iced Spruce
    • Distress Oxide: Iced Spruce
    • Paper Distresser
    • Hinge Clip
    • Mini Ink Blending Tool – Round
    • Alcohol Inks: Cranberry & Silver
  • Ranger:
    • Texture Paste
    • Transparent Gloss Texture Paste
    • Glossy Accents
    • “Gunsmoke” Stickles
    • “Perfect Pearl” Perfect Pearls
  • WOW Embossing Powder: Cloud 9
  • Martha Stewart “Scallop Dot” Edge Punch
  • Prima
    • “White Crackle” Texture Paste
    • “Crackle” Stencil
  • DMC Silver Embroidery Floss
  • a la mode clear embossing powder
  • Silhouette
    • Cameo
    • Curio
  • Unknown:
    • the red paper
    • the red cardstock (behind the photo)
    • the green paper behind the photo
    • Flat back pearls
    • Silver wire
    • Silver Metallic Marker
  • Homemade Alcohol Inks: Black (ish) & a light purple (ish)
  • Merry Christmas!

    Merry Christmas!
    All folded up!

    All of the cuts came from the Silhouette Store (the card base, the card panels, and the poinsettia).
    Product List:

    • Glossy Accents
    • Bazzill Basics Silver Foil Cardstock
    • Seed beads I’ve had forever!
    • Pink Paislee “Merry & Bright” stickers
    • The deer paper is from Me & My Big Ideas – no name given
    • Silhouette Cameo 

    Poinsettia Christmas Card!

    Poinsettia Christmas Card!

    I created the card base myself using Silhouette Studio. It’s a 6″x6″ flip fold. The colors aren’t exact because everything is so shiny getting the right angle was rough, it kept trying to reflect my camera, which really stood out since it’s pink! All of the poinsettia cuts came from the Silhouette Store. The biggest poinsettia is cut from a silver card stock and I used some red seed beads & Glossy Accents for the center. The rest of the poinsettias were done last year on water color paper, and I used Distress Spray Stain “Candy Apple” with some “Pewter” Perfect Pearls mixed in for the red poinsettias, and for the silver ones I used Heidi Swapp “Tinsel” Color Shine. The centers of the red and small silver poinsettias is some Glossy Accents that I used to “hold” a layer of Stickles “Gunsmoke” up (Stickles tend to dry flat, and Glossy Accents tend to dry 3D!). After all the flowers were in place I popped in a few little bells from Basic Grey’s “Juniper Berry” embellishment pack.

    This angle shows the colors the best!
    Colors aren’t exact here, but I had to lighten the photo a bit so the print on the card stock would show up!

    Colors aren’t exact here either, I had to lighten this photo a bit too so the print on the card stock would show up!

     Product List:

    • Hot Off The Press – Paper Pizazz – “Black Silver Floral Foil”
    • -Me & My Big Ideas – The deer print paper, didn’t have a “name” on it.
    • Heidi Swapp – Color Shine – “Tinsel”
    • Tim Holtz – Distress Spray Stain – “Candied Apple”
    • Ranger: Glossy Accents, “Gunsmoke” Stickles, “Pewter” Perfect Pearls, Mini Mister
    • Silhouette Cameo
    • BasicGrey – Juniper Berry – Embellishment Pack
    • Red sead beads I’ve had forever!
    • Bazzill Basics – 12 x 12 Silver Foil Cardstock
    • McGill – Paper Blossoms Collection – Tool Kit

    Winter Wonderland

    Winter Wonderland

    I was inspired by the “Sizzix Christmas In July” Challenge over at scrapbook.com to start some Christmas projects early! There was a lot of fussy cutting involved, but it was worth it in my opinion! Those birds and houses (Crate Paper “Snow and Cocoa” line) are just too darn cute!

    I don’t know if I should classify this as a card or as decoration, so I’m going to call it #Card_Deco! It put me in mind of my childhood. My parents had a string that hung across the beam in our living room, and every year they would hang the Christmas cards we received on it. Friends and family became part of our Christmas decor!

    The very front of the card is rather straight forward! The “Wonderland” piece is from Crate Paper, the card stock is American Crafts, everything else are Hip Kit Club Exclusives!
    Lots of fussy cutting found here (well not necessarily “lots,” but for me it is!) And if I haven’t said it before, I’ll say it now, I am IN LOVE with the Distress Oxides! I’ve had all these papers since November/December (2016), but I hadn’t figured out exactly how to use them. Apparently they were waiting for Tim Holtz’s Distress Oxides!

    That little fawn was cut from some scrap white card stock I had using the “Retro Deer” die from Simon Says Stamp. I just trimmed off the antlers and added some spots so he could match his Mama! (Hip Kit Club Exclusive Die Cuts – the doe & the mushrooms)
    Winter Wonderland CarDeco closed and ready for an envelope!

    Product List:

    • The card base/design I created myself in Silhouette Design Studio & used my Cameo to cut the pieces out.
    • American Crafts “Lollipop” card stock
    • Hip Kit Club Exclusive Papers & Die Cut Pack
    • Crate Paper “Snow and Cocoa” Collection (“Wonderland” and all the fussy cutting!)
    • Simon Says Stamp “Retro Deer” die for the fawn (I just trimmed off the antlers & added some spots!)
    • Tim Holtz Mini Snips, Mini “Woodland” Stencil (Mini Stencil Set #21), Distress Grit Paste, Distress Glitter “Clear Rock Candy,” Distress Marker “Tumbled Glass,” and Distress Oxides “Iced Spruce,” “Worn Lipstick,” “Fossilized Amber,” and “Cracked Pistachio.
    • Ranger “Opaque Matte” Texture Paste, Water Pen (Nib), & Blending Tools.

    Christmas Cards Set!

    Getting a head start with my Christmas Cards!

    Just because it’s 110 degrees outside doesn’t mean I can’t do Christmas! After all, in the Southern Hemisphere of this big blue marble we call home, Christmas is a summer holiday!

    Used my Silhouette Curio to write & fill in the greeting!

    That gold bow came in the Fuse (Gold? I think) Kit!

    Cute little deer, glitter paper, and twine!

    Love the retro Santa paper and “Swell Christmas” stamp set from Simon Says Stamp! (I fussy cut Santa out of watercolor paper after stamping & embossing!)

    Product List:

    • All of the card stock, printed papers (except the paper for the red & white deer), and glitter paper came from the Simon Says Stamp Limited Edition 2016 Holiday Card Kit, as did the deer die (“Retro Deer”) and the stamp set (“Swell Christmas”).
    • The paper for the red & white deer is from Me & My Big Ideas, and it’s so old I couldn’t even find it using the UPC code!!
    • Ranger Enchanted Gold Embossing Powder
    • Tim Holtz Mini Snips, Distress Embossing Ink, Distress Ink: Festive Berries, Antique Linen, and Tattered Rose, Distress Oxide: Fired Brick, and Vintage Photo
    • We R Memory Keepers: Fuse Tool & Gold Kit (I think!)
    • Martha Stewart Twine
    • Green & Gold Ribbon: Unknown
    • Sizzix Big Shot (Blue & Teal Starter Kit – for the label dies)
    • My Minds Eye: Christmas on Market Street Puffy Stickers
    • Silhouette Curio

    Christmas Gift Tags Set #2

    Set #2 of my Christmas Gift Tags

    My second set of Christmas Gift Tags, which, like the first set, was set in motion by AZAmy’s & Sizzix’s “Christmas In July Challenge” over at scrapbook.com. Like the first set, the tags, and most of the patterened paper came from the Simon Says Stamp Limited Edition 2016 Holiday Card kit.

    The stamp set used, “Swell Christmas,” is from Simon Says Stamp, and came in the Limited Edition 2016 Holiday Card Kit. The gold embossing powder is also from Simon Says Stamp, and I think it also came in the kit.

    I just started laying bits and pieces on for this tag! The ornament stamps are also in the “Swell Christmas” set.
    I like the idea of making a vintage-ish tag, and decided to use my trusty Tim Holtz tree from my “Happy Everything Blueprints” set! To color in the tree, I used a water brush and Distress Oxides, then to top it off I used the “Christmas Day” stamp from American Crafts! (To splatter the background I used a paint brush and the Distress Oxides)
    Once again, I used stamps from the “Swell Christmas” set! Simon Says Stamp gold embossing powder, some Heidi Swapp Color Shine in Bronze, some Distress Oxides, and some Prima Watercolors!

    Products Used:

    • Simon Says Stamp “Swell Christmas” Stamp Set, gold embossing powder, tags, papers from “Limited Edition 2016 Holiday Card Kit,
    • Tim Holtz “Blueprint Tree” from Happy Everything Blueprints Set & Tiny Attacher
    • American Crafts “Christmas Day” Stamp
    • Simple Stories “December Documented” 6 x 6 paper pad.
    • Ranger Water Brush & Black Archival Ink
    • Distress Marker: Candied Apple
    • Distress Oxides: Fossilized Amber, Iced Spruce, Broken China, Walnut Stain, & Fired Brick
    • Distress Ink: Festive Berries & Tattered Rose
    • Distress Embossing Ink Pad
    • a la mode clear embossing powder
    • Prima Watercolor Confections: Decadent Pies
    • My Minds Eye “Christmas On Market Street” Puffy Stickers
    • Martha Stewart “Scallop Dot” edge punch & red twine
    • Heidi Swapp Color Shine: Bronze
    • Stickles “Joyful”
    • Basic Grey Juniper Berry Embellishment Pack
    • We R Memory Keepers Crop-A-Dile

    Christmas Gift Tags Set #1

    Christmas Gift Tags Set #1

    Over at scrapbook.com “AZAmy & Sizzix are hosting a “Christmas In July Challenge”! And since I have an overwhelming amount of Christmas supplies I decided I would partake with some gift tags (to start)!!

    Rather simple tag, the deer came from a sheet in the SSS Limited Edition 2016 Kit, and I dug out my Fuse to make a little flip (the next card just has spots for “To” and “From”
    This one went together super fast! I just fringed the red cardstock, layered it up with some printed paper, put the “Joy” sticker on, and added my eyelet and twine! Very quick and easy, but it’s one of my faves!

    I fussy cut that ticket & circle cluster from a sheet of the Simple Stories paper, layered the washi from the Basic Grey Juniper Berry Embellishment kit, and slapped them on top of some red cardstock and some printed paper from Simon Says Stamp!

    Simple layering. The background paper is from Simon Says Stamp, and the rest was fussy cut from a sheet of the Simple Stories! (I really love my Tiny Attacher by the way!)

    Product List:

    • The tags, and some of the papers came from the Simon Says Stamp Limited Edition 2016 Holiday Card kit. (The MME stickers might have come from the kit too, not real sure…) 
    • The eyelets I’ve had forever
    • Tim Holtz Tiny Atacher
    • Martha Stewart Fringe Scissors & Bakers Twine
    • Basic Grey “Juniper Berry” Christmas Embellishment Pack
    • My Mind’s Eye “Christmas On Market Street” Puffy Stickers
    • Simple Stories “December Documented” 6 x 6 Paper Pad
    • We R Memory Keepers Crop-A-Dile and Fuse Tool Kit (Aqua)