Tres Jolie Kit Club-Cards, Cards, Cards!-July 2021 Cards, Tags, & More Kit

Hey, all! I hope you had a craft-astic July and we were able to inspire you to go out and create!
For my third Cards, Tags, & More Kit project, I have a few cards, a few different ways!

FRAMED-20210619_095329

Check out my video to see my thoughts and process for all these cards!


Video:


Now for the close-ups and a few details for each card!

FRAMED-20210619_095551

FRAMED-20210619_095609

These two cards are some basic, “flat” cards. The “Happy Birthday” card is a 4-3/4”x4-3/4” square with just a piece of the striped cardstock, a doily die cut, and a piece of vellum with the greeting embossed. The “Let’s Celebrate!” is just stamped straight on the cardstock. I used a die from my stash with the Sizzix Emboss & Transfer set to add a little dimension to those birds being “pushed through” the gold cardstock.

FRAMED-20210619_095448

FRAMED-20210619_095730

The flowers from the kit get featured with these two cards! The “Hooray” cards is a little more fun with the flourish coming out from under the flower! The vertical card is more elegant, with some bits of lace dangling with the leaves.

FRAMED-20210619_095628

FRAMED-20210619_095650

Both of these cards of pieced together background, using strips of cardstock I had leftover from my previous projects! I cut some rosettes for the slimline card—giving it the “Party” feeling. The “imagine” card is another “flat” card, but those stars are just perfect to “make a wish” on.

FRAMED-20210619_095423

FRAMED-20210619_095528

These two cards sum up my feelings about cake! Lucky and Yay!! For the card on the left I used the negative cuts from the sheet of cardstock from my first project and added in some doliy cuts to create the background. I used my hexagon punches and any bit of “scrap” cardstock I could find to create the background for the card on the right. To cards with the same greetings, but totally different looks!

FRAMED-20210619_095817

I hope you enjoyed this project, and all of the projects this month, and they gave you some ideas of what you can do with the July Kits from Tres Jolie!

Stay Crafty, Friends


Did you get a kit? Share what you made in our Facebook Group!

Thank you for joining us here at Tres Jolie Kits!


Tres Jolie can be found at the following places:

Tres Jolie Facebook

Tres Jolie Instagram

Tres Jolie Website

Tres Jolie Subscriptions

Tres Jolie Blog

Tres Jolie YouTube

Tres Jolie Pinterest


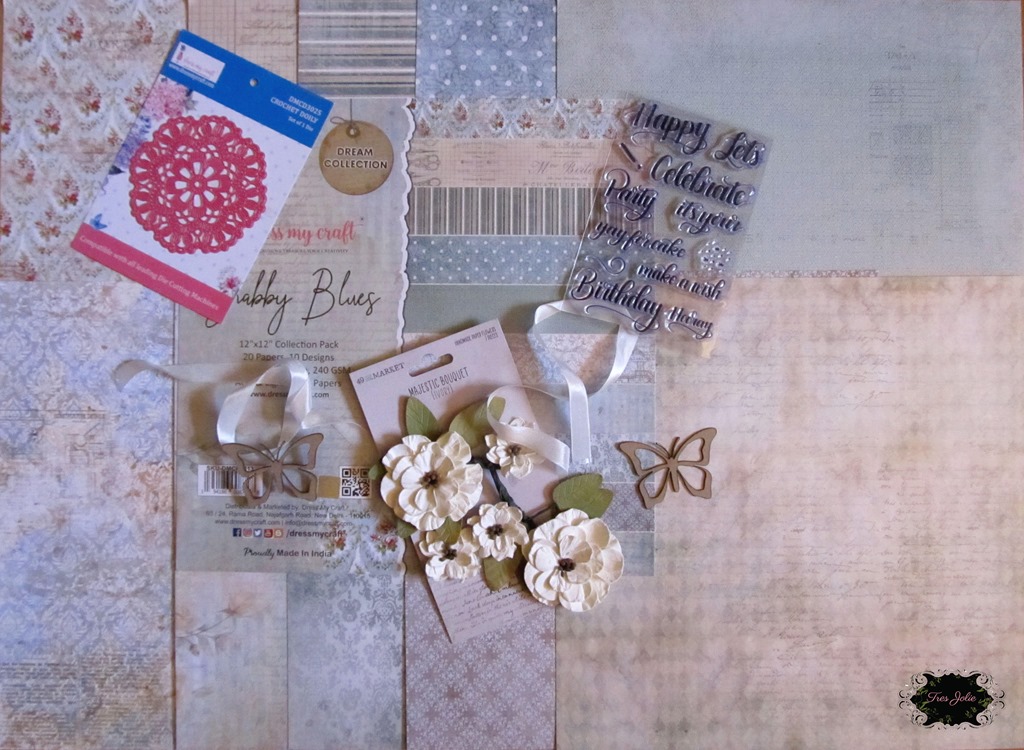
In addition to items from this month’s Cards, Tags, & More Kit (*from previous Tres Jolie Kits), I used:

*Prima Rub-On Foils, *lace trim, Spellbinders “Flower Garden” Die, Heidi Swapp “Imagine” Die, Concord & 9th “Lucky” Dies, Sizzix/Tim Holtz “Rosettes” & “Skeleton Leaves,” Fiskars Hexagon Punches 1” & 1-1/2”, Martha Stewart “Carnelian” Glitter, Sizzix Big Shot Plus, Sizzix Emboss & Transfer Set, Ranger Embossing Powders “White” & “Gold,” *Gary M. Burlin Co. “Patina Bronzed Copper” Embossing Powder, Simon Says Stamp Clear Embossing Ink, StazOn “Timber Brown,” Scotch ATG, hot glue gun, double-sided sticky foam squares, Tim Holtz Stamp Platform, Art Glitter Glue, FabriTac, Scrapbook Adhesives 12×12 Adhesive Sheets, Ranger Brayer, Spellbinders Tool ‘n One, EK Tools Scoreboard, various cardstock for card bases, orange sequins, Lawn Fawn Stamp Shammy, scrap vellum (some of it Bazzill), adhesive foam sheet

Christmas Teacup

My first tea cup art, just in time for Christmas!

Handle side, side view! This was a learning experience for me, and I learned that I need more Mod Podge to hold down the pieces against the strain of the Crackle Paint! You can also se some of the beautiful Shard Glitter Glass & Microbeads I added to the spoon!

The other side of the cup. Here I added some of the Microbeads to the pine cone & some Shard Glitter Glass & Microbeads just under the edge of the pine cone. Plus, in the center of the poinsettias are some more Microbeads.

A closer look at the spoon.

A closer look at the pine cone!

One of the poinsettias that has the Microbeads for the center.

One of the posies I made using the tutorial found at Live The Dream ….

A closer look at the bottom with the second posie I made.

A view from the top!

*The cut file for the teacup, saucer, and spoon can be found at svgcuts.com*

Product List:

  • Glass Microbeads in Champagne
  • Shard Glitter Glass in Silver
  • Beautiful Board Beautiful Bits – Star
  • Burgundy Roses, Poinsettias, & leaves
  • Hip Kit Club (November 2017 Main Kit)
    • Tis The Season by Kimberly Hutchison
    • Baby It’s Cold Outside (cup exterior)
  • Crate Paper
    • FALALA Collection
    • Twinkle
  • Ranger
    • Tim Holtz
    • Distress Ink
    • Tea Dye
    • Fossilized Amber
    • Seedless Preserves
    • Rusty Hinge
  • Distress Crackle Paint
    • Clear Rock Candy
  • Mini Round Blending Tool
  • Silhouette Cameo
  • Sizzix
    • Big Shot Plus
    • Precision Base Plate
    • Tim Holtz
    • Small Tattered Florals (the one little rosebud!)
  • Spellbinders
    • Shabby Posies
    • Layered Poinsettia
  • Simon Says Stamp
    • Pine Needles Trio
  • Poppy
    • Small Blooming Poinsettia
  • Mod Podge
    • Paper – Gloss
  • Beacon Fabri-Tac
  • Judi-Kins Diamond Glaze
  • White Card stock – American Crafts I think
  • Mulberry Bear 2
    • “Grass Green” Mulberry Paper – Pine Needles
  • The Paper Studio
    • White “Handmade” Paper (white poinsettias, posies, & rosebud)
  • Prima
    • Finnabair
    • Metallique Wax – Old Silver
    • Silicon Brushes – 1″ & 2″
  • 99¢ Store finds
    • Pine cones
    • Bottle brush tree
    • Green bead garland
  • Unbranded/Unknown
    • Stamen in large white poinsettia & posies
    • Holly berries (frosted red & green & red)

    Wedding Congratulations!

    Congratulations (A wedding card)

    This past weekend the husband and I went to a wedding of some very dear friends. We’ve known the groom for over 11 years, and about 6 1/2 years ago we met the bride. We knew that someday we would be going to their wedding, even if they didn’t know it at the time! It was a beautiful ceremony, and we were so honored and happy to be there with them for it!

    As for the card, it is rather straight forward. I did make the flowers myself, and was constantly reminded why I don’t do that! But, I needed those colors right NOW! So I had no real choice in the matter!!

    In addition to my handmade, mulberry paper flowers, there is some vintage lace (no brand, got it off eBay a few months ago), some random twine, and some unbranded stamen. Plus, the beautiful butterfly is from ReneaBouquets! It came on the business card in one of my orders, and it worked perfectly for this card!! (Thank you, Renea!)

    The card stock, patterned paper, and embossed paper are all from the Simon Says Stamp November Card Kit, and the sentiment is from the Simon Says Stamp “Floral Bliss” stamp set (links at the bottom in the “Product List” area).

    The inside says:
    “May you forever find joy in each others eyes,
    warmth in each others arms,
    love in each others heart.”

    I just printed it out on some “linen” printer paper and used my ATG to stick it down! (Oh, I found the quote on Pinterest, I’m not that poetic!)
    I will be entering this little project into the Simon Says Stamp Wednesday “Anything Goes” Challenge!
    Product List:
    • ReneaBouquets Butterfly 
    • Mulberry paper (I made all the flowers) 
    • Simon Says Stamp: 
  • Elmer’s – Craft Bond – Glue Spots – Thin Medium
  • Prima – Finnabair – Art Basics – 3D Gloss Gel – 8 Ounces
  • Tim Holtz 
    • Distress Oxides Ink Pads – Frayed Burlap
    • Distress Ink Pads – Embossing Ink Clear
    • Paper Distresser
  • Wendy Vecchi 
    • Embossing Powder – Watering Can
  • Sizzix 
    • Big Shot Plus Machine – White and Gray
  • Spellbinders 
    • Shapeabilities Collection – D-Lites Die – Create A Rose
  • Unknown/unbranded twine 
    • stamen 
    • 5 petal flower dies 
    • vintage laces

    Mermaid Tag

    Steampunk Mermaid Tag

    I came across the June Challenge over at Creative Embellishments and decided I would play along! Of course I came across it the afternoon of the 28th, giving me about 2 1/2 days to think up a project and complete it! I made it, with about 50 minutes left! Edit: Although the challenge said it closed at 11:55pm EST, when I tried to add my link, it was already closed, at only 11:16pm EST. I wish I had some of Creative Embellishments products to add to my tag, thankfully it wasn’t a requirement! I do now have another place to go shopping, I’m sure the hubs will love that! LOL

    Background ready for color!

    I started out with a #12 tag that I made using some think chipboard and an industrial paper trimmer! (The hubs used to use it to cut aluminum for seamless eaves-troughs AKA: the gutters on your roof!) I glued down some tissue paper, my “sheet-metal,” a bit of paper, and some of my seaweed. I added my texture paste clock, then gave it all a good coat of white gesso.

    Amazing Casting Resin + Tim Holtz’s Riveted Metal Embossing Folder

    As a side note about how that riveted metal was made, go watch Mixed Media ATCs with Opal Magic Wax by Keren Tamir!

    Background misted and spritzed!

    After the gesso had dried on the background I used Distress Spray Stains: Cracked Pistachio and Mermaid Lagoon; Heidi Swapp Color Shine: Sweet Mint; Shimmerz Coloringz: Well Blue Me Down and Oh Say Can U Sea; and Shimmerz Vibez: Jeni B Bleu. I just sprayed rather randomly, drying between layers of colors, until I got what I wanted.

    My glue of choice this whole project, Tim Holtz Distress Collage Medium: Matte

    For my mermaid’s tail I used 140# watercolor paper, ran it through my Sizzix Big Shot using Tim Holtz’s Riveted Metal Embossing Folder, then used a glue stick to randomly give adhesion points for the Foil Transfer Sheets by Ranger (Vintage pack).

    Adding Prima Finnabair Art Alchemy Metallic and Opal Magic waxes to my mermaid!

    I didn’t have any real plan going in on where I was going to add which color of wax where, and I don’t think it makes a big difference! Rarely do my crafts have an all out plan!

    The Mermaid, Hat, and Seaweed all came from cut files found on the Silhouette Store!
    The fish were fussy cut from a paper in Graphic 45’s “Steampunk Debutante” Deluxe Collector’s Edition, the seahorses and sand dollar are a Spellbinders Die D-Lites set, some of the gears are from Bead Landing, and some have no (known) brand.

    The seaweed was cut from a sheet of American Crafts White Vellum, and sprayed with Heidi Swapp’s Color Shine: Tinsel or a combination of Heidi Swapp Color Shine: Sweet Mint and Shimmerz Coloringz: Oh Say Can U Sea.