Tres Jolie Kit Club-Tags-August 2021 Cards, Tags, & More Kit (+a few staple products!)

Hey, all! Welcome back to my corner! I hope your August is starting out well and you’ve had some craft-tastic time’s so far!

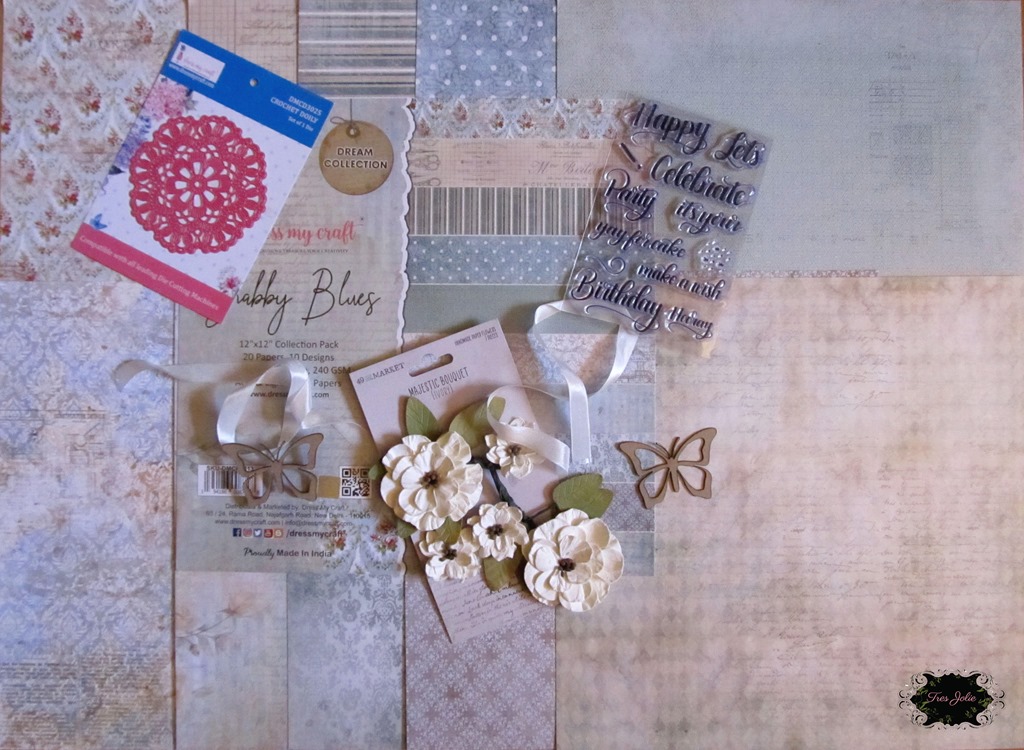
I like to make my first project of the month a “kit only” project as much as possible, and this one is no different! I created these tags using a couple of basic (staple) items from my stash and the rest is all from the August Cards, Tags, & More Kit from Tres Jolie Kit Club!

FRAMED-20210717_181424

I used some corrugated cardboard for one of my tags, and some chipboard for the other. You can use a variety of items from the home to make your tag bases, such as cereal boxes and Styrofoam trays. (Just remember, Styrofoam isn’t going to be able to handle heat!) Check out my video to see how I put these tags together!


Video:


Now for a few close-ups:

FRAMED-20210717_181531

FRAMED-20210717_181606

Here you can see those beautiful pieces of Tres Jolie Chipboard that came in the kit this month! I just grabbed up my Ranger Gold Embossing Powder and Simon Says Stamp Embossing Ink to give them a little shine! I think a nice gold embossing powder is a good staple item to have in your stash, metallics go with all colors and styles and are great at adding a little extra “pop”! You can also see my white gesso splatters sprinkled about, adding a bit more of that shabby feel to these tags.

FRAMED-20210717_181450

FRAMED-20210717_181519

FRAMED-20210717_181554

In the photos above you can see some more details. I used quite a few of my fussy cut pieces to create my clusters, and even cut apart one of the Prima stems to add some extra texture to my tags. It took me a long time to be able to cut apart pre-packaged embellishments, but now that I have become more comfortable with it, I have found it has led to more creativity because I look at items with a “how can I use this” mentality instead of a “how is this supposed to be used” one!

I have a $5 glue gun that has been working well for me for years now. I like to use a low-heat gun most of the time because it allows me to touch the items I’m working with (almost always paper!) and shape it! And that’s what I did for my butterflies and flowers—I shaped them around globs of hot glue!

FRAMED-20210717_181508

FRAMED-20210717_181545

Thank you for joining us here at Tres Jolie, I hope these tags inspired you and gave you some ideas of what you can do with the items found in this month’s Cards, Tags, & More Kit! I’ll see you again next Thursday!

Stay Crafty, Friends!


Did you get a kit? Share what you made in our Facebook Group!

Thank you for joining us here at Tres Jolie Kits!


Tres Jolie can be found at the following places:

Tres Jolie Facebook

Tres Jolie Instagram

Tres Jolie Website

Tres Jolie Subscriptions

Tres Jolie Blog

Tres Jolie YouTube

Tres Jolie Pinterest


My “staple” items: Prima/Finnabair Heavy White Gesso; Ranger “Gold” Embossing Powder; Simon Says Stamp Clear Embossing Ink; hot glue gun; Art Glitter Glue; chipboard; cardboard

Tres Jolie Kit Club-Cards, Cards, Cards!-July 2021 Cards, Tags, & More Kit

Hey, all! I hope you had a craft-astic July and we were able to inspire you to go out and create!
For my third Cards, Tags, & More Kit project, I have a few cards, a few different ways!

FRAMED-20210619_095329

Check out my video to see my thoughts and process for all these cards!


Video:


Now for the close-ups and a few details for each card!

FRAMED-20210619_095551

FRAMED-20210619_095609

These two cards are some basic, “flat” cards. The “Happy Birthday” card is a 4-3/4”x4-3/4” square with just a piece of the striped cardstock, a doily die cut, and a piece of vellum with the greeting embossed. The “Let’s Celebrate!” is just stamped straight on the cardstock. I used a die from my stash with the Sizzix Emboss & Transfer set to add a little dimension to those birds being “pushed through” the gold cardstock.

FRAMED-20210619_095448

FRAMED-20210619_095730

The flowers from the kit get featured with these two cards! The “Hooray” cards is a little more fun with the flourish coming out from under the flower! The vertical card is more elegant, with some bits of lace dangling with the leaves.

FRAMED-20210619_095628

FRAMED-20210619_095650

Both of these cards of pieced together background, using strips of cardstock I had leftover from my previous projects! I cut some rosettes for the slimline card—giving it the “Party” feeling. The “imagine” card is another “flat” card, but those stars are just perfect to “make a wish” on.

FRAMED-20210619_095423

FRAMED-20210619_095528

These two cards sum up my feelings about cake! Lucky and Yay!! For the card on the left I used the negative cuts from the sheet of cardstock from my first project and added in some doliy cuts to create the background. I used my hexagon punches and any bit of “scrap” cardstock I could find to create the background for the card on the right. To cards with the same greetings, but totally different looks!

FRAMED-20210619_095817

I hope you enjoyed this project, and all of the projects this month, and they gave you some ideas of what you can do with the July Kits from Tres Jolie!

Stay Crafty, Friends


Did you get a kit? Share what you made in our Facebook Group!

Thank you for joining us here at Tres Jolie Kits!


Tres Jolie can be found at the following places:

Tres Jolie Facebook

Tres Jolie Instagram

Tres Jolie Website

Tres Jolie Subscriptions

Tres Jolie Blog

Tres Jolie YouTube

Tres Jolie Pinterest


In addition to items from this month’s Cards, Tags, & More Kit (*from previous Tres Jolie Kits), I used:

*Prima Rub-On Foils, *lace trim, Spellbinders “Flower Garden” Die, Heidi Swapp “Imagine” Die, Concord & 9th “Lucky” Dies, Sizzix/Tim Holtz “Rosettes” & “Skeleton Leaves,” Fiskars Hexagon Punches 1” & 1-1/2”, Martha Stewart “Carnelian” Glitter, Sizzix Big Shot Plus, Sizzix Emboss & Transfer Set, Ranger Embossing Powders “White” & “Gold,” *Gary M. Burlin Co. “Patina Bronzed Copper” Embossing Powder, Simon Says Stamp Clear Embossing Ink, StazOn “Timber Brown,” Scotch ATG, hot glue gun, double-sided sticky foam squares, Tim Holtz Stamp Platform, Art Glitter Glue, FabriTac, Scrapbook Adhesives 12×12 Adhesive Sheets, Ranger Brayer, Spellbinders Tool ‘n One, EK Tools Scoreboard, various cardstock for card bases, orange sequins, Lawn Fawn Stamp Shammy, scrap vellum (some of it Bazzill), adhesive foam sheet

Art Journal-Hero & Paint-June MTW Challenge

Hey, all! Welcome back to my corner!

Today I have an Art Journal spread I created for the June More Than Words Challenge “Hero & Paint.”

WM-20210622_201758

I wasn’t sure if I’d come up with something this month for the MTW Challenge, I wasn’t feeling very layout-ish, and I wasn’t able to really narrow down a personal hero. One day I just pulled out my DWM Journal and grabbed a few brighter paints. Then I sat there staring! I think things finally came together when I got a “picture” in my mind of some stenciling. I didn’t have anything like what I was picturing, so I cut one out of some heavy cardstock.


Video:


June 2021 Main


I suppose, if you wanted to really get down to the nitty-gritty, I think I had problems thinking of a hero because I tend to lean to a “I’ll do it myself” attitude. I’m not saying I won’t let people do things for me, I just find doing it myself faster! LOL!


Some close-ups of the spread:

WM-20210622_201853

The silver on the background is from sheets of Prima Run-On Foils. I used my homemade stencil with some Finnabair “Gold Dust” Jewel Effect Paste, and then freehanded some paint highlights!

WM-20210622_201840 WM-20210622_201903 WM-20210622_201944

I used some DWM “Eggplant” & “Lemon” that I had from the October 2020 Tres Jolie Kit Club Mixed Media Kit, and some Vicki Boutin “Juicy Pear.”

WM-20210622_201949

All of the papers have been in my “scraps” pile for ages, and none of them had the border with the manufacturer on them anymore, so I couldn’t even begin to guess where they came from now!

WM-20210622_201910 WM-20210622_201935

I just tore a bit of corrugated cardboard from a box, coated it in some DWM Gesso I’ve had since the April 2019 Tres Jolie Mixed Media Kit (I had an open container way back then already, and with black gesso, I’ve learned a little bit goes a long way!); I then layered my stamped papers, punched circles, and label on top of the cardboard.

WM-20210622_202023

I hope you enjoyed this project. I love getting my Art Journal out because I gives me a chance to do a project without always having to plan ahead or prepare too much! With just a little guideline, “Hero & Paint” I was able to do a project and relax!

Stay Crafty, Friends

Red heart C.J.


Products:

Dina Wakley Media: Journal, Black Gesso, “Eggplant” & “Lemon” Acrylic Paint, “Essential Silhouettes” Stamp + Stencil Set; Prima Rub-On Foils; Finnabair Jewel Effect Paste “Golden Dust;” Vicki Boutin: “Juicy Pear” Paint & “All The Good Things” Watercolor Stickers; Recollections 2.5” Circle Punch; Fiskars 1.5” & 1” Circle Punches; Ranger Heat-It Tool; Staedtler Black Permanent Super Fine Tip; ArtPen: black glitter pen; Sakura: GellyRoll Moonlight 10 (dark pink), Soufflé XPGB# 920 (light pink); KaiserCraft Glitter Gel Pen (pink glitter); Tim Holtz Tiny Attacher; StazOn “Jet Black;” Liquitex Gloss Gel; Various paper scraps; homemade stencil

Tres Jolie Kit Club-June 2021 Cards, Tags, & More Kit-Art Journal

Hey, all! Welcome back to my little corner!

This week I’m bringing you an art journal I created for the Tres Jolie Kit Club using some of the papers and chipboard gears from this month’s Cards, Tags, & More Kit along with papers, some embellishments, and mediums from my stash.

20210504_100134-FRAMED

I absolutely loved the Sir Vagabond line from Stamperia, and I knew I’d have to make Sir Vagabond himself part of a cover as soon as I saw the paper pack! Check out my video to see how I put this art journal together.


Video:


20210504_100222-FRAMED 20210504_100254-FRAMED

For my pages I used some homemade tea dyed papers and some printed papers I’ve had for who knows how long! I also splattered the pages with some “Salvaged Patina” & “Aged Mahogany” Distress Oxide Sprays.

20210504_100242-FRAMED 20210504_100312-FRAMED

My art journal isn’t very think, so I only have two signatures in it. However, each signature has one sheet of the Stamperia paper included! The outer sheet for the first signature, and the center for the second signature.

20210504_100358-FRAMED

20210504_100345-FRAMED

20210504_100333-FRAMED

On the front and back covers I used some heavy gel with two stencils for texture, added my Tres Jolie chipboard gears that I painted with “Steampunk Copper” Prima paint, and some roman numeral before adding the “Salvaged Patina” Distress Paint & some splatters. I backed Sir Vagabond with some chipboard and gave him a “new” moustache before adding him to the cover.

20210504_100201-FRAMED

I hope you enjoyed this project and it gave you some ideas of what you can do with items found in this month’s Cards, Tags, and More Kit!

Stay Crafty, Friends!


Did you get a kit? Share what you made in our Facebook Group!

Thank you for joining us here at Tres Jolie Kits!


Tres Jolie can be found at the following places:

Tres Jolie Facebook

Tres Jolie Instagram

Tres Jolie Website

Tres Jolie Subscriptions

Tres Jolie Blog

Tres Jolie YouTube

Tres Jolie Pinterest


June 2021 Cards, Tags, & More Kit:

In addition to items found it this months Cards, Tags, & More Kit (*from previous Tres Jolie Kits), I used:

Creative Embellishments: “Rivet” Stencil & “Clock” Stencil; Prima: Wire Thread “Cyan,” & *“Vintage Trinkets;” Prima/Finnabair: *Clear Gesso, *Metallique Paint “Steampunk Copper,” *Mechanicals “Roman Numerals,” & *Mechanicals “Winged;” Ranger/Tim Holtz: Distress Oxide Sprays “Salvaged Patina” & “Aged Mahogany,” Distress Paint “Salvaged Patina,” & Distress Oxide Inks “Salvaged Patina” & “Aged Mahogany;” DCWV: “The Fun In The Sun Summer Stack;” Krylon Workable Fixatif, LineCo PVA Glue, Liquitex Matte Super Heavy Gel, Ranger Heat-It Craft Tool, Ranger Brayer, We R Memory Keepers Crop-A-Dile, Crop-A-Dile II, & Craft Knife, idea-ology/Tim Holtz Sanding Block & paper, Recollection Value Pack Cards & Envelopes “Kraft,” an old book cover, Unknown/Unbranded Eyelets (3/16”), Beige Herringbone (1/2”), 2” Book Binding/Repair Tape, chipboard, tea dyed papers, printed scrapbooking paper, awl, brad

Faces of You-May 2021 More Than Words Challenge

Hey, all! Welcome back to my little corner!

Today I am bringing you a (redone) layout. I originally did “Faces of You” 10+ years ago, and of all the layouts I’ve done, this is one I remembered! (Seriously, when looking for the layout I came across too many layouts I have no recollection of!) Anyhow, when I saw that this month’s More Than Words Challenge was “Faces & Kraft,” I knew I’d (finally) redo “Faces of You.” (I have grand plans to redo most of my layouts from when I first started scrapbooking.)

20210523_111810-wm


Process video:


May2021MTWMain


Here is my original layout. I thought I was really getting fancy by adding stitching & ribbon! And, my goodness, there is almost some pattern going on with the light paper and the circles on that ribbon; I even overlapped the photos some! I remember when I started I was, more or less, afraid of colors and patterns! It was all too new. I didn’t add mediums; I didn’t even own mediums beyond a few to Tim Holtz’s Distress Ink pads, in varying shades of brown! A lot has changed since my early days.

20210516_131835-wm


And now, I have layers, embellishments of all kinds, mediums, and colors galore! Instead of being “afraid” of using “too much” I try to use as much as I can so I can work through my stash!

20210523_135201-wm


20210523_111821-wm

So many layers! I have my photos on foam, and the torn papers lifted with foam so the frame wouldn’t leave a weird lump.

20210523_111855-wm

I discovered long ago that I really LOVE cutting frames apart and having them look bigger than they actually are. It turns out, scissors are my friend, and I don’t have to be nervous about altering items!

20210523_111951-wm

I just used some white texture paste with my Fabrika Decoru stencil and used some Distress Oxide sprays as my paint!

20210523_111909-wm

I went through my stash, pulled out a lot of different choices, and eventually worked out what I wanted to add to this layout!

Thank you for joining me here, I hope you enjoyed this remake of one of my original layouts and it inspires you to be more daring with colors and mediums or to redo something!

Stay Crafty, Friends

Red heart C.J.


Products:

Project Life “Kraft Edition,” The Paper Studio “Everyday Kraft,” Ranger-Tim Holtz Distress Oxide Sprays “Evergreen Bough,” “Pine Needles,” “Candied Apple,” & “Wild Honey,” Fabrika Decoru “Leaves” Stencil (FDTR 162), Maggie Holmes “Chasing Dreams” Ephemera, Maggie Holmes “Willow Lane” Frame, Pretty Little Studio “Sunny Memories” Fresh Phrases, Echo Park “The Story of Fall” Enamel Dots, AC Shimelle “Box of Crayons” Stickers/Folder, Teresa Collins “Summer Stories” Die Cut Borders, Pink Fresh Studio “Life Noted” Puffy Alpha Stickers, Pink Fresh Studio “Escape the Ordinary” Chipboard Stickers, Fancy Pants Designs “Off to School” Sticker Sheet, Queen & Co Alphabits “Orange,” Hip Kit Club Stickers, Prima-Finnabair Clear Gesso, TCW Light & Fluffy Modeling Paste, Fabri-Tac, Art Glitter Glue, Variegated Thread, Unknown Red “XOXO” Frame

Fairy House-MMP April Challenge

Hey, all! Welcome back to my little corner!

I am bringing you a little project I put together, inspired by the Mixed Media Place’s April Challenge. I don’t often work with pinks, but I really loved the mood board this month, and decided it was a good time to pull out my pink paints!

20210519_120715-WM 20210519_120431-WM

Video:


moodboard-mmp-4-2021

Aren’t the colors for the April Challenge absolutely wonderful? I couldn’t help but want to make something pink!


Now, how about a few close-ups?

20210519_120450-WM 20210519_120611-WM

The fairy’s house is actually a repurposed bed riser! My youngest moved from his dorm to an apartment and didn’t need them anymore, so he gave them to me! My family has learned I will take anything and repurpose it into a craft project!

20210519_120504-WM 20210519_120519-WM

My little door is from Creative Embellishments, coated in Vintage Gold wax with some ReneaBouquet’s glitter glass as the window. I used a variety of random pieces for my foliage: Christmas berries and leaves from JoAnn’s that I’ve had a couple of years, and some Styrofoam “shapers” with some wire that I thought would look interesting!

20210519_120528-WM 20210519_120554-WM 20210519_120540-WM

The figurines I found a couple of years ago at Dollar Tree and picked them up to have when the right project presented itself!

I hope you enjoyed this project! I had fun putting it all together, even if I did make a massive mess!


Products:

Creative Embellishments Fairy Door Set 2, ReneaBouquets Chunky Glitter Glass “Diamond,” 13@rts “Old Gold” XS Microspheres, Shimmerz Paints AcriTonez “Pinkadelic,” AC-Vicki Boutin “Sugared Strawberry” & “Coral Macaroon” Paints, idea-ology-Tim Holtz Sanding Block, Ranger-Tim Holtz “Kitch Flamingo” Distress Paint & Spray Stain, Prima-Finnabair “Paper” Texture Paste, Heavy White Gesso, “Burnt Sienna” Liquid Acrylic, “Green-Gold,” “Aqua-Rose,” & “Rose-Gold” Opal Magic, “Enchanted” Sparks, Waxes: “Vintage Gold,” “Mint Sparkle,” “Turquoise Satin,” “Royal Robes,” “Green Brocade,” “French Lavender,” “Sage Leaves,” & “Shabby Pink,” Liquitex Matte Super Heavy Gel, Mod Podge Stiffy, Unknown “Spider Web” Material, Creative Paper Clay, Unbranded Styrofoam Flower Shaper/Center, Floral Wire, Plastic Leaves, Berries, Teal Sisal, Pink/Bronze Beads, Fairy Garden Figurines, JudiKins Diamond Glaze

Best Bed Ever!

Hey, all! Welcome back to my corner!

For my final project for the month of April, I have a layout that will (most likely) be getting mounted in a shadow box. I couldn’t resist turning this photo of my husband & our granddaughter into a star filled project! This project is full of dreamy blues for the Creative Embellishments April 2021 Challenge – Monochrome & Washi (I have Tim Holtz Tissue Tape along the edges!).

20210427_075117-EDIT-WM

Check out my video to see how this came together!

Video:

monthly_challenge
AP-CHAL-224x300

20210427_075227-EDIT-WM

I used a sheet of Fabrika Decoru Golden Mini Drops Mysterious Garden Sky 12×12 paper as my base for my starry sky. Then added some stenciled stars and some “Unicorn’s Hair” Sparks splatters for even more of a dreamy, starry sky.

20210427_075150-EDIT-WM 20210427_075247-EDIT-WM
20210427_075127-EDIT-WM 20210427_075221-EDIT-WM

Under and around the photo I have resin pieces from the Finnabair Stars & Moons Mould, chipboard and flair/buttons from Creative Embellishments, white gardenias from ASC Supplies, dusty blue and white roses from ReneaBouquets, and some glass glitter from Darice. All working with a variety of paints from Finnabair, some Old White Matte Wax, and Nuvo gold gilding flakes.

20210427_075140-EDIT-WM

Thank you for joining me here in my corner! I hope you enjoyed this project and it inspired you to go get your craft on!

Red heart C.J.


Products:

Creative Embellishments Music Note Borders & Music Bar Flair; ReneaBouquets Mini Dusty Blue & Ivory Roses; Hip Kit Club Stars Stencil; ASC Supplies White Gardenia’s; Prima-Finnabair Stars & Moons Mould, Clear Gesso, Matte Wax “Old White,” Metallique Paint “Royal Blue,” Opal Magic Paint “Yellow-Blue,” Sparks Paint “Unicorn’s Hair,” Fabrika Decoru Golden Mini Drops Mysterious Garden Sky (UAH 18); Ranger-Tim Holtz Distress Oxide “Weathered Wood;” Ranger Dina Wakley Media Black Gesso; Ranger Blending Tool; Ranger Sticky Embossing Powder; Nuvo “Radiant Gold” Gilding Flakes; idea-ology – Tim Holtz Tissue Tape “Symphony;” Darice Glass Glitter “Vintage Gold;” LineCo PVA Glue, JudiKins Diamond Glaze, Liquitex Matte Super Heavy Gel, Amazing Cast Resin (White); Pro Marine Supply Epoxy (Clear)

Spring Butterfly Canvas-March 2021 MMP Mood Board Challenge

Hey, all! Look at me, I’m back! After having to take a little bit of a hiatus, I have managed to put a project together! It felt good to get paint stuck to me again. And, if we’re being honest, I really missed the smell of my Finnabair waxes!

For my first project to bring me back into the fray, I have a Spring Butterfly Canvas for the March 2021 Mixed Media Place Challenge. The canvas and doily are from a couple of years ago that was originally supposed to be something Christmas-y, but it failed. After the failure, I decided to coat the whole thing in Kilz spray primer and set the canvas aside until inspiration struck. That inspiration finally struck, over two years later! LOL!


photostudio_1617569837320-WM


I was worried I would have somehow forgotten everything I’ve learned over the years during my hiatus, but I’m happy to report I was able to access the creative storage in my brain and get this put together. Check out my process in the video below:


Video:


Check out this beautiful mood board for the challenge! It really got me in the mood for spring!

moodboard-mmp-3-2021


Now, how about some close-ups!

photostudio_1617569948905-WM

Here you can see I added some shine to the green lily using some of my Unicorn’s Hair Sparks paint. I didn’t add the Sparks to all of the flowers, I kept it to the green, white, & off-white flowers.

photostudio_1617569992720-WM

Here you can see how those gold microbeads really set off the wing! I love how my butterfly came out! So many layers of paint and wax! I was worried I wasn’t going to get it “just right,” until I came across my beads!

photostudio_1617570045670-WM

Here is the whole butterfly! You can see how the color changes depending on the light. Even though this photo was taken straight on, with the light coming from the right, the left wing shows up as more purple, and the shine really stands out!

photostudio_1617569902387-WM

Look at those beautiful glass beads! I didn’t need a lot and I love how they give an almost magical look to the piece!

photostudio_1617570103937-WM

Thank you for joining me here in my little corner! Hopefully, it won’t be too long before I have another project up for you!

Red heart C.J.


Products:

ASC Supplies: White & Green Lily’s, Unknown: Flowers (off-white) from a swap, Unbranded Yellow Roses Large & Small, Darice: Yellow Roses, Prima: “Life Time Collection” Flowers (purple), Resin Frame “Montchamp Imperial, Prima-Finnabair: Clear Gesso, Heavy White Gesso, Metallique Paint “Ancient Coin,” Opal Magic Paint “Green-Gold,” Sparks Paint “Unicorn’s Hair,” Opal Magic Waxes “Royal Robes” & “Green Brocade,” Metallique Waxes “Heather Hills” & “Vintage Gold,” “Spark” Stencil (on the original attempt, but it still shows so I’m listing it!), Ranger-Tim Holtz: Distress Paint “Rustic Wilderness,” ReneaBouquets: Glass Beautiful Beads “Dark Purple,” JudiKins Diamond Glaze, Liquitex Gloss Gel & Super Heavy Matte Gel, Tim Holtz Distress Splatter Brush, Ranger Heat-It Craft Tool, Unknown Gold Microbeads, Upcycled Butterfly & doily, Unknown canvas, texture paste & crackle paste on the original attempt, Kilz Original Spray Primer

Fairy Moonlight – July 2020 Mixed Media Place Challenge

Hey, all! Welcome back to my little corner!

Today I’m bringing you a little piece I did for the July 2020 Challenge over at the Mixed Media Place blog.

DSC_0013-wm-resized

Looking at the moodboard for this month I was immediately drawn to the mushrooms. I absolutely adore mushrooms in art. In food, I can tolerate them (except those white “button” mushrooms, Ewww), but in art I absolutely love them! In addition to the mushrooms, all the colors kept making me think of sunsets and the dusk of early evening. Check out my process video, which can be found under the Mixed Media Place Moodboard!


moodboard-mmp-7-2020

Mixed Media Place Moodboard


Process Video:


DSC_0016-em-resized

I have quite a few mediums making up my background; a couple of Jacquard Paints topped with three different Distress Oxide Sprays. For my moon and stars, I used two Prima/Finnabair paints, one of which is “Unicorn’s Hair,” which was also used for my splatter!

DSC_0019-wm-resized

I really loved the idea of just having a fairy silhouette looking at the night sky, so I grabbed up my Creative Embellishments chipboard, added some black gesso, but by the end, I decided to add a coat of “Charcoal Black” Matte Wax.

DSC_0017-wm-resized

I used “Burnt Sienna” Liquid Acrylic Paint to give some shadowy depth behind the mushrooms.

DSC_0012-wm-resized

To add a little extra to the moon and stars I lightly brushed on some “White Gold” Metallique Wax, and to give a little extra shine to the mushroom caps I added some “Heather Hills” wax on the front curves (if that makes sense!)

DSC_0011-wm-resized

Thank you for joining me here at my little corner! I hope you enjoyed this project and I hope you’ll visit me again soon!

Stay Crafty,
C.J.


Products:

Creative Embellishments “Mega Fairy Chipboard Pack In Black,” Prima/Finnabair Sparks “Unicorn’s Hair,” Opal Magic “Yellow-Blue,” Liquid Acrylic “Burnt Sienna,” “Stars & Moons” Mould, Matte Wax “Charcoal Black,” Metallique Wax Cire Cera “White Gold” & “Heather Hills,” Lindy’s Gang Moon Shadow Mist “Gossamer Gold” & Starburst Squirts “Polite People Purple,” Ranger/Tim Holtz Distress Paint “Antique Linen,” “Ground Espresso” & “Wilted Violet,” Distress Oxide Spray “Fossilized Amber,” “Worn Lipstick” & “Wilted Violet,” Jacquard Lumiere “Halo Pink Gold” & “Halo Violet Gold,” Floral Garden “Floral Moss,” Decorative Pebbles & Sand, Little Birdie Black Gesso, Creative Paperclay, Amazing Cast Resin, Liquitex Super Heavy Gel, TCW Gloss Gel Medium, Krylon Workable Fixatif, scrap piece of MDF (it was used as protection/packing material for something else I ordered)