Below the Lindy’s Gang Color Challenge Image, you’ll find a quick process video!
Here’s a quick (7 minutes) video of what I did:
Now for a few close-ups:
For the background I used a circle punch on the paper ribbon and added a stamped image that I embossed with some Lindy’s Gang “Silver Moon Mistletoe” Embossing Powder (Discontinued?). For the stars I mixed a little of the “Plumeria Pink” Flat Magical with some water and brushed it on, and for the wings I mixed the same “Plumeria Pink” Flat Magical with some white gesso to lighten it up. I dyed the cheesecloth with the “Aloha Avocado” Flat Magical powder, and after everything was dry I just started layering, adding some sisal, twine, and “Small Talk” phrases!
Once I figured out where I was going with this project, it went along rather quickly! Sometimes the idea is harder than the execution!
Products:
Lindy’s Gang – “Plumeria Pink” Flat Magical, “Aloha Avocado” Flat Magical (Both from the Hawaiian Island Flat Magical Set), and “Silver Moon Mistletoe” Embossing Powder (Discontinued? Seasonal? I couldn’t find it on the site), ReneaBouquets Beautiful Board-Beautiful Bits “Star,” The Paperie Shoppe “Uncharted” Paper Ribbon, Creative Embellishments ATC Coin Blanks, Recollections 2.5” Circle Punch, Finnabair Mechanicals “Winged,” Prima Quick Dry Fluid Chalk Ink “Tin Can,” Hobby Lobby July 4th Carded Twine, Stamperia Cosmos Stamps (WTKCCR05), Tim Holtz idea-ology “Small Talk,” Finnabair Heavy Gesso, Sisal, Cheesecloth, Liquitex Clear Gesso, FabriTac, Art Glitter Glue, E6000
Hey, all! Welcome back to my blog! Today I’m bringing you a quick little layout I created for this month’s sketch challenge for the Tres Jolie Kit Club!
I had a very craft-filled May, and by the time I got to this project I had one whole sheet of the beautiful Craft o’Clock paper left! There was a time when the thought of using such a “busy” pattern as a background would have terrified me, but I have learned sometimes less is more, so I kept everything else simple! (Sketch below the video)
Check out my video for the process!
May 2020 Sketch
Behind the smaller cluster in the upper-left corner and behind the photo layers I added a touch of stenciling using the “Golden Glaze” paint (mixed with some 13@rts MAGIC! Powder) and a homemade texture paste that contains some of the “Caribbean Teal” paint, both [paints] from this month’s mixed media kit. Also, as I’m sure you’ve noticed, the teal flowers on this layout were from the Prima “vine” that came in the kit! Don’t be afraid to cut things apart if needed to make them work better for your purpose!
I didn’t want to just plant the photo directly on the background, so I used some torn pieces of papers from the kit, some tissue paper, and the square, white frame from the chipboard (cut apart!) behind the photo! Then I added one of the chipboard tabs!
The beautiful black and gold butterflies were the final touch needed for this layout! They provide just the right amount of accent!
May 2020 Scrapbooking Kit
May 2020 Mixed Media Kit
In addition to items from the scrapbooking kit & mediums from the mixed media kit (*from previous Tres Jolie Kits), I used:
*Prima Stencil Item# 564278, *13@rts MAGIC! Powder, tissue paper, Tim Holtz Tiny Attacher, FabriTac, Liquitex Clear Gesso, and in my homemade teal texture paste: *13@rts Acrylic Modeling Paste, Little Birdie Caribbean Teal Metallic Paint (May 2020 Mixed Media Kit), Lindy’s Gang Magical Shakers *Bratwurst Brown & *Glittering Gold, *13@rts MAGIC!Powder, Art Philosophy Concentrated Watercolor *Onyx & *Bora Bora, Vicki Boutin Watermelon Blast Paint
Did you get a kit? Share what you made in our Facebook Group!
Hey, all! Welcome back to my blog! Today I have an Art Journal spread I created based on this month’s mood board challenge for the Tres Jolie Kit Club!
**Note: The photos are pinker than in real life, the video shows the colors much better. What I’ve learned is to be more awake when editing…
I have a little something from every May kit on this 2-page spread! Mediums from the Mixed Media kit, the clock & papers from the Scrapbooking kit, and papers from the Cards, Tags, & More kit!
Here is the mood board, and below it, you will find a video!
Check out my video to see how I did this spread & to get a better representation of the colors!
Here is a close-up of the left page. Some of the papers were torn, some were cut with a circle die, and I fussy cut the phrase!
Here is the right page. The chipboard clock came from the May 2020 Scrapbooking kit and I painted it with the “Caribbean Teal” paint from the May 2020 Mixed Media kit! The gold stenciling is the “Golden Glaze” paint, also from the May 2020 Mixed Media kit, mixed with some 13@rts MAGIC! Powder.
The more teal colored papers came from the scrapbooking kit, while the soft rose-colored papers are from the Cards, Tags, and More kit! (Below are photos of all three kits!)
*13@rts MAGIC! Powder, Spellbinders Nestabilities Standard Circle, Fabrika Decoru FDTR 006, Prima “Spark” Stencil (Item# 980399), Lindy’s Gang *Moon Shadow Mist “Buccaneer Bay Blue,” *Starburst Squirts “Hockey Puck Black,” & *Magical Shakers “Alpine Ice Rose,” Dina Wakley Large Art Journal, FabriTac, Prima White Heavy Gesso
In my (teal-ish) custom texture paste, I used:
13@rts *Acrylic Modeling Paste & *Magic! Powder, Little Birdie “Caribbean Teal” Metallic Paint (from this month’s mixed media kit), Lindy’s Gang Magical Shakers *“Bratwurst Brown,” & *“Glittering Gold,” Art Philosophy Concentrated Water Colors *“Bora Bora,” and *“Onyx,” and Vicki Boutin “Watermelon Blast” Paint
Did you get a kit? Share what you made in our Facebook Group!
Hey, all! Welcome back to my blog! Today I am bringing you my “Butterfly Reels” project where I used three of the VHS reels, the mediums, and the package of Prima Mechanicals, along with items from my stash, to build this steampunk piece!
I am very happy with how this piece came out! I love mixing the patina and rust effect with the non-aged look of the reels and flowers! Check out the video to see the whole process!
Video:
In the above photo you can see the ripples created by the paint pour!
I love Prima’s Rust Effect Paste, and I’m glad I had some on-hand to use with the Mechanicals from this month’s kit! Plus, those butterflies were what I had left from the March Mixed Media Kit!
I knew parts of my chipboard would overhang, so to give it some extra stability I used “Prima Sculpture Medium” before adding the Rust Effect Paste!
The longest parts of this project were all the drying times, so I would just set it aside while the glues and mediums dried so I could work on other projects! My final touch was adding some Teal Glass Beads from ReneaBouquets on top of each stack of Mechanicals!
Prima Rust Effect Paste Set (Brown, Gold, and Red Rust), All chipboard received from a swap with Toni, *Prima Finnabair Mechanicals “Scrapyard Butterflies,” ReneaBouquets Glass Beautiful Beads “Teal”,” Liquitex Pouring Medium, Dina Wakley Cell Creator, Prima Sculpture Medium, Liquitex Matte Super Heavy Gel, JudiKins Diamond Glaze, E6000
Did you get a kit? Share what you made in our Facebook Group!
Hey, all! Welcome back to my blog! Here are some more photos and a video of the project I did for Rae’s “Masculine Layout” challenge, sponsored by the Tres Jolie Kit Club, for International Scrapbooking Day (iNSD)!
To recap, the challenge was to create a masculine layout that included stenciling and chipboard, plus a bonus for using flowers! I used four stencils, I have a piece of chipboard from the May scrapbooking kit and some Grungeboard from my stash, and I got the flowers on…something that isn’t always easy with a “masculine” layout! Plus, and I like to think my subconscious was helping me out here, my layout fits this months sketch challenge (with the sketch rotated 180°, shown below).
Original Sketch
Rotated Sketch
Check out my video to see what I did!
I layered my stenciling on top of each other before topping with my Grungeboard chevrons!
With all the stenciling, there was already so much going on that I opted to keep it relatively simple around the photo.
I created the colors I wanted for both of the texture pastes using the paints from the Mixed Media kit & items from my stash (see video for full details!)
The chevrons were painted with just simple black gesso (from the Mixed Media kit! to keep them nice and matte!
Getting flowers on a masculine layout isn’t always easy, but I dug into my stash and pulled out pack of neutral flowers.
I don’t know how long I’ve owned those Tim Holtz Framed Words, but I found a place for “Adventure” with this layout!
I hope that you were able to join us over at Tres Jolie for the iNSD challenges! I also hope that this layout gave you an idea of what can be done with items from the kits this month, and with the sketch!
May 2020 Scrapbooking Kit
May 2020 Mixed Media Kit
In addition to items from this month’s scrapbooking and mixed media kits (*from previous Tres Jolie Kits), I used:
KaiserCraft 12×12 Stencil – “Textures,” Fabrika Decoru Stencils – FDTR 37, FDTR 132, & FDTR 36, Tim Holtz Film Strip Ribbon, Tim Holtz “Nostalgic” Tissue Tape, Tim Holtz Alpha Parts “Framed,” Tim Holtz Grungeboard, StazOn – “Jet Black,” Distress Oxide – “Ground Espresso,” 13@rts – *Acrylic Texture Paste & *Magic! Powder, Art Philosophy Concentrated Watercolor – *“Onyx” & *“Bora Bora,” Lindy’s Gang Magical Shakers *“Glittering Gold” & *“Bratwurst Brown,” Vicki Boutin Acrylic Paint – “Watermelon Burst,” Ranger Mini Blending Tool, Prima 2” Silicone Brush, Ranger Brayer, Liquitex Clear Gesso, LineCo PVA Glue, Art Glitter Glue, Krylon Workable Fixatif
Did you get a kit? Share what you made in our Facebook Group!
Hi, all! Welcome back to my blog! I hope you were able to join us over at the Tres Jolie Kit Club Café and enjoyed the challenges offered!
I created a BINGO challenge, and am now sharing the details of that challenge here on my personal blog! (I didn’t want to cause “entry” confusion during the challenge!)
BINGO! Challenge Guidelines & my examples:
Now, to the requirement! It’s rather simple, all you need to do is have all five (5) elements of the one (1) row OR one (1) column OR one (1) diagonal that you choose included on your project!
You are not limited to only those five (5) elements, but all five (5) must be included!
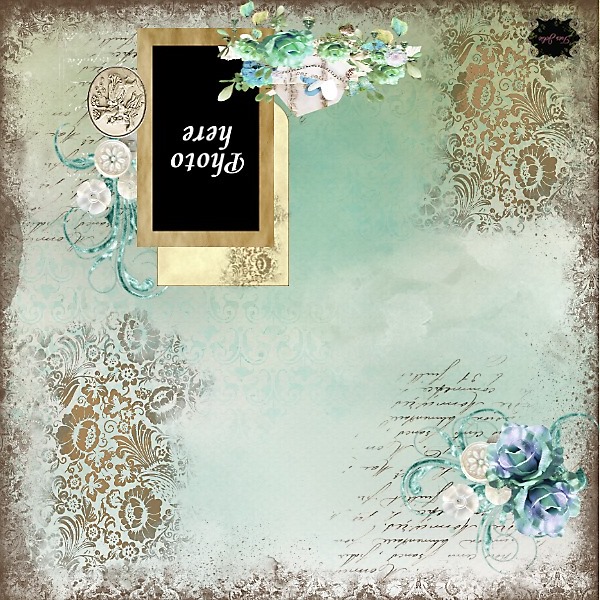
I have put together a couple of examples for you to view; a layout, a mini-journal/notebook, and a mixed media canvas. You do not have to create any specific project type! These are just some examples of what can be done!
First, the layout:
Sample layout (featuring my youngest!)
The column I picked for my layout!
I created a process video to accompany the photos for an overview of my creative process!
You can see some of the chipboard pieces!
I used embossing powder on the star frame!
My torn paper!
Some more chipboard!
The upper left corner with the stamping!
A close up of the stenciling!
I hope this project gave you some ideas! Now on to the next example, a Mini-Journal/Notebook!
My mini-journal/notebook!
The row I picked for the mini-journal/notebook!
The process video for the mini-journal/notebook!
There are flowers on the cover and on the patterned papers, the staples and eyelet are metal, there are three half-back beads on the cover, as well as a chipboard frame around “Notes,” and the mini-paper clips are wooden!
My third example is a mixed media project featuring a photo of my son’s friend! (With her permission, of course!)
My mixed media canvas!
The diagonal I used on the canvas!
The process video for my mixed media project:
Layers don’t only have to be paper! Here I have the rice paper, chipboard, and flowers!
The flowers on the background are the rice paper from this month’s Cards, Tags, and More Kit!
The fine black text is from the stamp that came in the May Cards, Tags, and More Kit!
I added some glass beads randomly along the chipboard pieces as a final touch!
Products for the example layout:
May 2020 Scrapbooking Kit
May 2020 Mixed Media Kit
In addition to items from the May 2020 Scrapbooking & Mixed Media Kits (*from previous Tres Jolie Kits), I used:
StazOn “Timber Brown,” Studio 490 – Wendy Vecchi “Rectangle Collage” Stamp, Tim Holtz Mini Snips, Liquitex Clear Gesso, ReneaBouquets Beautiful Board – Beautiful Bits “Star,” We R Memory Keepers Craft Knife, Brown Thread, Emerald Creek “Rocky Road” Baked Texture, Creative Embellishments “Star In My Universe Frame” and *“Crackled Brick Stencil,” Lindy’s Gang Magical Shaker *“Bratwurst Brown” and *“Grab A Guy Gold,” Ranger Big Emboss It, Liquitex Matte Super Heavy Gel, Twine, FabriTac, JudiKins Diamond Glaze, Silly Winks Sticky Back Sheets
Products for the example mini-journal/notebook:
May 2020 Cards, Tags, & More Kit
In addition to items from this months Cards, Tags, & More Kit (*From previous Tres Jolie Kits), I used:
Brown Twine, Brown Thread, EK Tools Score Board, We R Memory Keepers Crop A Dile, Recollections 2 1/2” (6.35cm) Circle Punch, Ranger Big Emboss It, We R Memory Keepers 3 Way Corner Punch, Mini Clothes Pins, *Lindy’s Gang “Oakleaf Olive” Embossing Powder, ReneaBouquets Candy “Toffee,” Tim Holtz Tiny Attacher, FabriTac, JudiKins Diamond Glaze, Brown Eyelet, Art Glitter Glue, 2” Book Binding Tape, Lineco 1.25” Linen Hinging Tape, Lineco PVA Glue, Scotch ATG
StazOn “Jet Black,” Mod Podge Paper Matte, Krylon Workable Fixatif, Tim Holtz Splatter Brush, Prima 2” Silicon Brush, Prima Waterbrushs, Tim Holtz Flat Waterbrush, Liquitex Matte Super Heavy Gel, *Prima Watercolors Tiki, Palms, & Coconut, *Lindy’s Gang Embossing Powder “Bougainvillea Red Teal,” Ranger Big Emboss It, ReneaBouquets Glass Beautiful Beads “Cranberry,” Prima Bloom Stencil “Spark,” Silly-winks Sticky Back Sheets, FabriTac, JudiKins Diamond Glaze
Hey, all! Today I am bringing you the project I made for this month’s sketch challenge for the Tres Jolie Kit Club, using the April scrapbooking kit!
As you can see I didn’t make a layout! I was totally obsessed with the clock face and flowers of the sketch, and I really wanted to create something 3D from those elements.
Here is the sketch, and under that, you will find the tutorial video!
Video:
I used some Prima Texture Fantasy Paste on my chipboard gears, and the embossing powder from the kit on my clock face, which I also back with some of the patterned paper from the kit.
On the flowers of the chipboard roses from the kit I used a combination of two embossing powders from my stash, and again used the embossing powder from the kit on the stems and leaves.
I also tucked in a few of the die cuts from the pack that came in the kit.
Inspiration can come from anywhere and can take you anywhere! For me I couldn’t quit focusing on the section around the photo on the sketch, and I let it take me down a non-layout road!
April 2020 Scrapbooking Kit:
In addition to items from the kit (*From previous Tres Jolie kits; **From the April 2020 Mixed Media Kit), I used:
Prima Texture Fantasy Paste (Taupe Rose, Fire Orange, Blue Green), *Prima Metallique Paint “Ancient Coin,” **13@rts White Gesso, Ranger Embossing Powder “Orange Blossom,” Lindy’s Gang Embossing Powder “Cosmic Pink Blue,” Ranger Emboss It Pen, Creative Embellishments “Large Gear Frames” (x2) and “Steampunk Clock Face 5”, Simon Says Stamp Clear Embossing Ink, Liquitex Matte Super Heavy Gel, JudiKins Diamond Glaze, E6000, Thread Locker Blue 242, Bulldog Hardware: Machine Screw Value Kit (MA-519), Fender Washers WA-567 & WA-569
Did you get a kit? Share what you made in our Facebook Group!
Hey, all! Welcome back to my blog! Today I’ll be sharing a Spring Birdhouse I created for the Tres Jolie Kit Club using items from this month’s mixed media kit along with items from my stash!
I created the birdhouse with various brown and tan cardstock sheets and some patterned papers from Friends and Craft O’Clock using Silhouette Store ID# 271046 – “Birdhouse 3D Gable Box” by Snapdragon Snippets (Snapdragon Snippets Assembly Instructions)
Video:
I used the larger circle from this month’s kit on the “entrance” of the birdhouse, then used the last of the transparency and flowers from my stash to fill it in! The stick is one from my yard, the brick chipboard is from the kit, and painted with a single layer of the Cafe Au Lait paint. I added some of the metal butterflies to finish things off!
This photo of the roof shows the watered-down paints that I used to add some extra color to the birdhouse!
Here at the back of the birdhouse, I arranged some of the chipboard to cover the rear hole from the stick!
More bricks and butterflies on the front!
I painted the back of the transparency pieces with the Olive Green paint before using gel medium to hold it in place!
March Mixed Media Kit
In addition to items from the kit (*From previous Tres Jolie kits), I also used:
Scotch Advanced Tape Glider; BEST Double-Sided Tape 1/4” & 1/8”; Art Glitter Glue; FabriTac; Spellbinder Tool n One; Silhouette Store ID# 271046 – “Birdhouse 3D Gable Box” by Snapdragon Snippets (Snapdragon Snippets Assembly Instructions); *Friends & Craft O’Clock “Vintage Bison”; *Bazzill “Dark Kraft” Cardstock (x4); Silhouette Cameo 3; Niacapa Cutting Mat; Silhouette Premium Blade; Stick from outside; Krylon Workable Fixatif; Tim Holtz Tiny Attacher.
Note: All other cardstock was unmarked & I’ve had it so long I can no longer recall manufacturer or how I acquired it! I used 2 sheets of the dark brown and 2 sheets of the light tan. (At least I’m fairly certain, it may have been 3 sheets of the dark brown.)
Did you get a kit? Share what you made in our Facebook Group!
Today I have an example project, a junk journal, for this months moodboard challenge for the Tres Jolie Kit Club!
I was in love with the “Emerald Queen” line by AB Studio that came in this months scrapbooking kit as soon as I saw the photos! And when I saw the books on the moodboard, I knew I’d be making a junk journal! And it was serendipitous that the green fabric image (above the clocks) fit with some sari silk I had already prepared for use! Below the moodboard image I have two video links, one is a flip-through of the completed journal and the other is a process video.
March 2020 Moodboard
“Emerald Queen” Junk Journal Flip-through
“Emerald Queen” Junk Journal Process
On the spine I let some of the fibers from The Paper Studio peek through the zipper, then added a Prima Vintage Trinket! I added some “Sage” Embossing Powder by Ranger to the chipboard from the kit and added it to the layers on my cover.
Here you can see the many various laces I used along the edges of the pages!
I layered some scraps of fabric, lace, and a zipper from an old jacket with items from this months kit on the cover, “holding” them in place with clips from my stash!
The band I used to hold the junk journal closed is a headband! I found packages of them on clearance one time and it suddenly dawned on me that they would be great for junk journals!
March 2020 Scrapbooking Kit
In addition to items from the kit (*From previous Tres Jolie Kits), I also used:
Heat n Bond Lite Iron-On Adhesive; Pellon 70 Peltex (Midweight – Heavyweight Fabric Stabilizer); Sari Silk; Scrap fabrics; Various Scrap Laces (*Some from previous Tres Jolie Kits); The Paper Studio Ivory Crochet Lace; 2” Book Binding Tape; 1” BEST Double Sided Tape; We R Memory Keepers 3 Way Corner Punch; LineCo PVA; FabriTac; Spellbinders Tool n One; LineCo Linen Hinging Tape 1.25”; Ranger “Sage” Embossing Powder; Simon Says Stamp Clear Embossing Ink; *Small Doilies; Tim Holtz Index Clips; Binder Clip; We R Memory Keepers Crop A Dile Corner Chomper; E6000; The Paper Studio Fibers; *Prima Vintage Trinkets
Did you get a kit? Share what you made in our Facebook Group!


