Tres Jolie Kit Club–September 2021 Moodboard-Half Circle Journal

Hey, all! Welcome back to my corner!

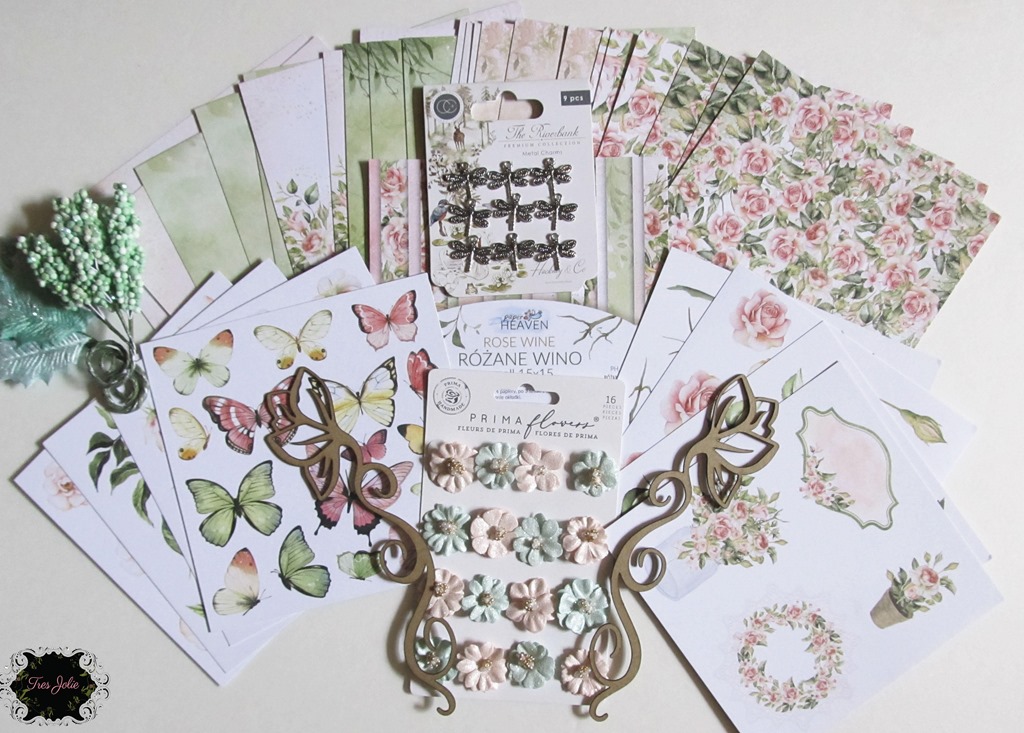
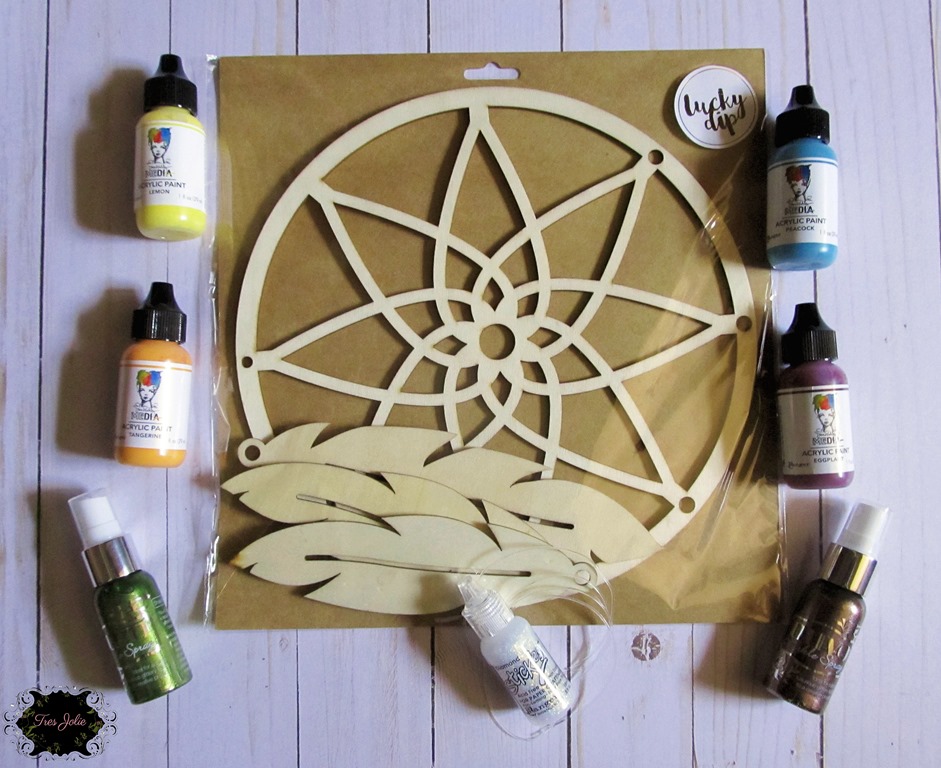
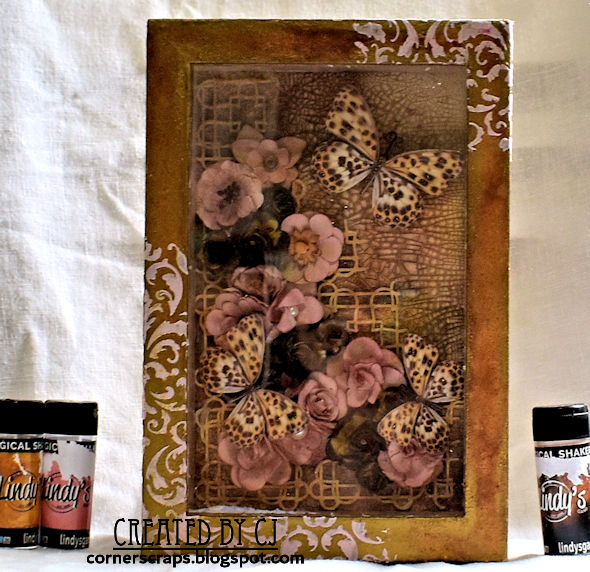
This week I’m bringing you a half-circle journal I created using items from both the September Mixed Media Kit and Cards, Tags, & More Kit from Tres Jolie Kit Club –plus items from my stash. Below you will find some photos, this month’s moodboard, and two videos for this project (Part 1 is preparing and the cover work; Part 2 is assembly and finalizing!)

FRAMED-20210907_112918

I hadn’t originally even thought of doing a journal when I pulled out my circle canvas, but as I sat there staring at the canvas and the new “Circle Swirl” chipboard from Tres Jolie an idea began to take shape! Check out my videos to see how everything came together.


Part 1:

Part 2:


Look at these beautiful colors on the September Moodboard! (Twist: Vintage)

moodboard-sept2021


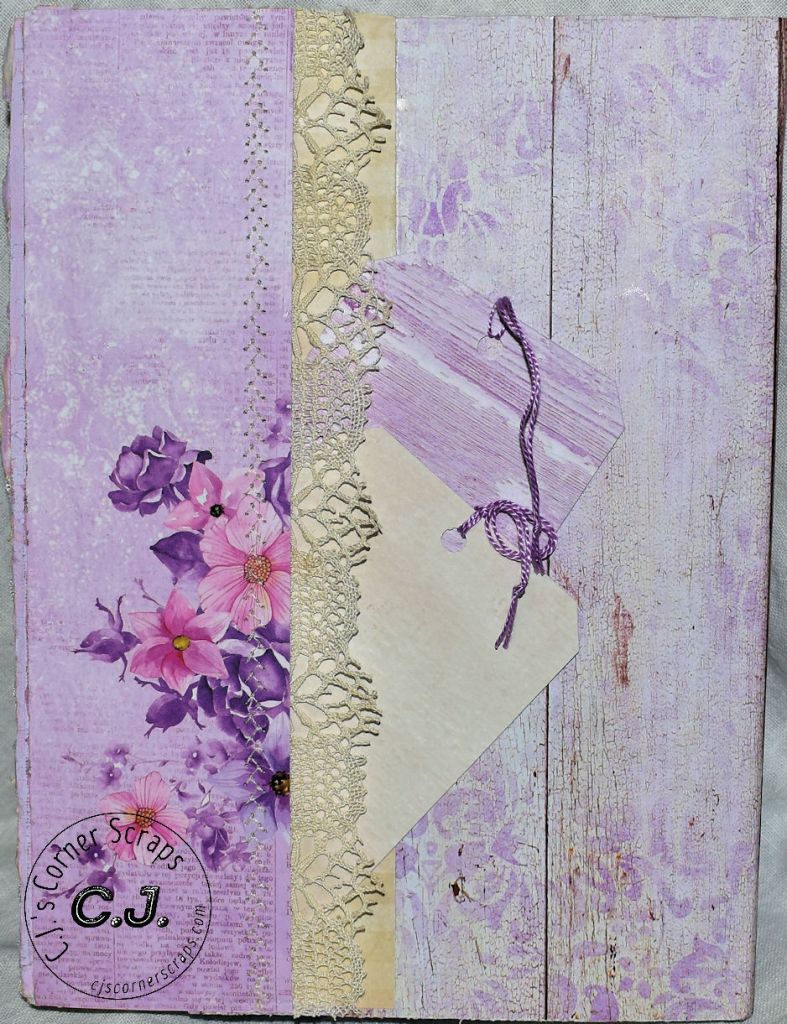
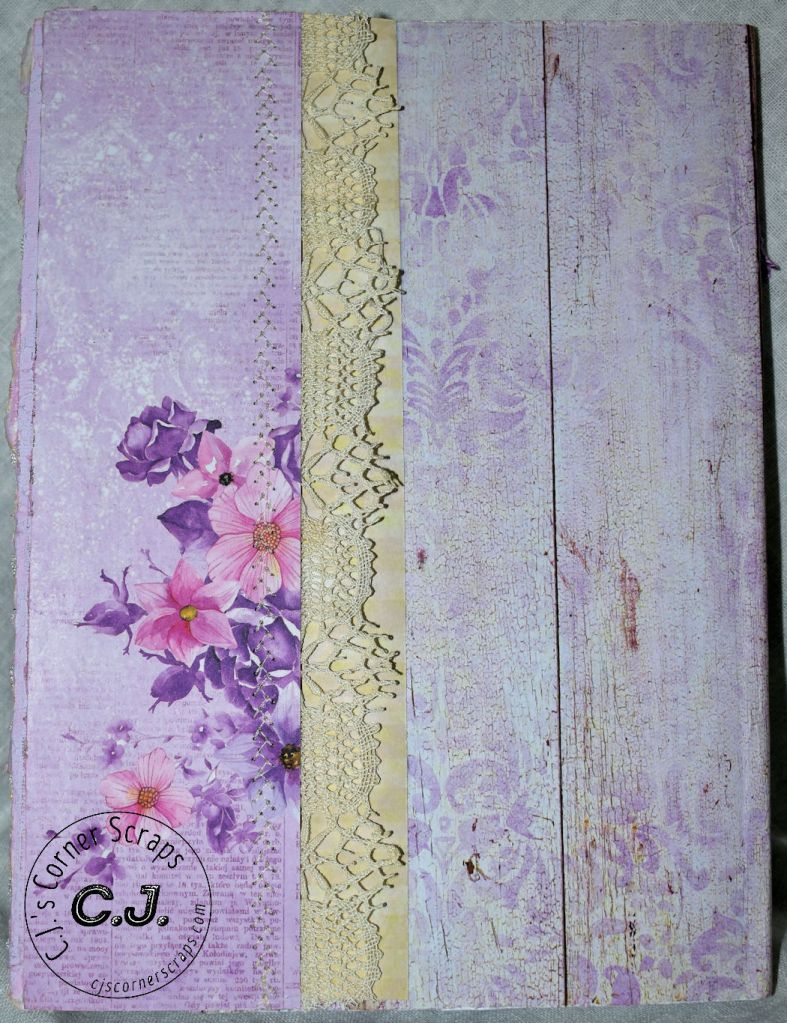
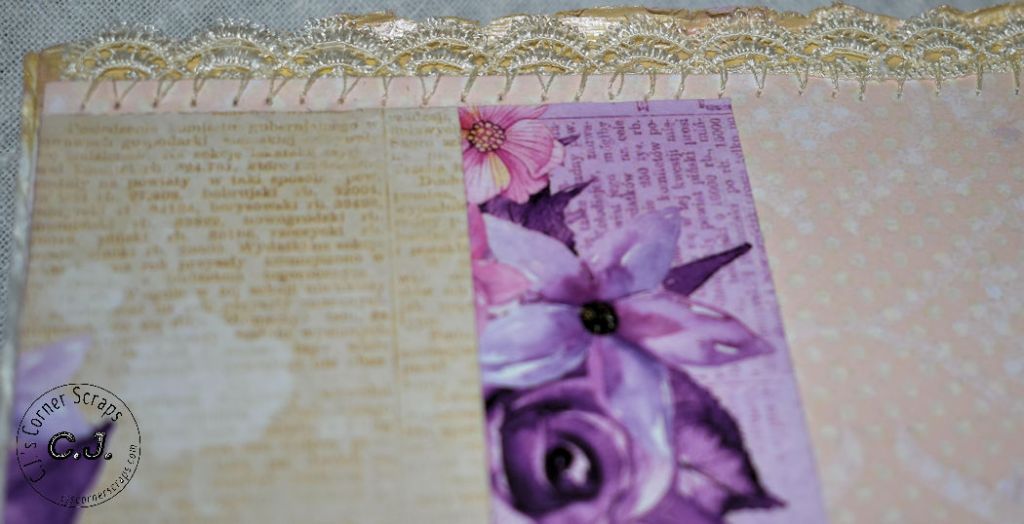
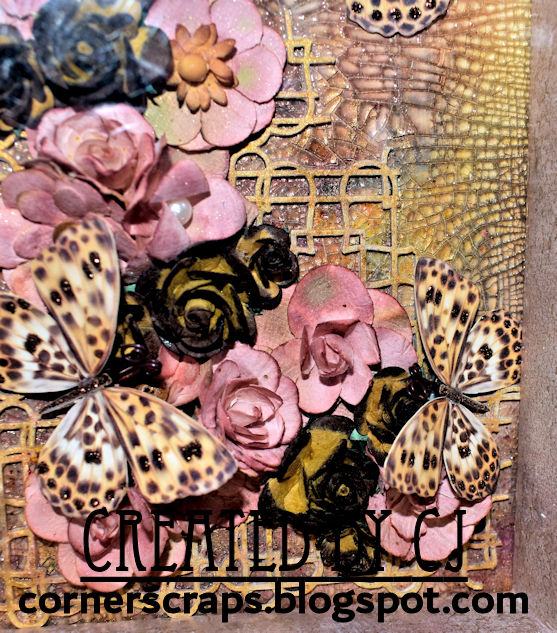
Now for a few close-ups:

FRAMED-20210907_113151

FRAMED-20210907_113207

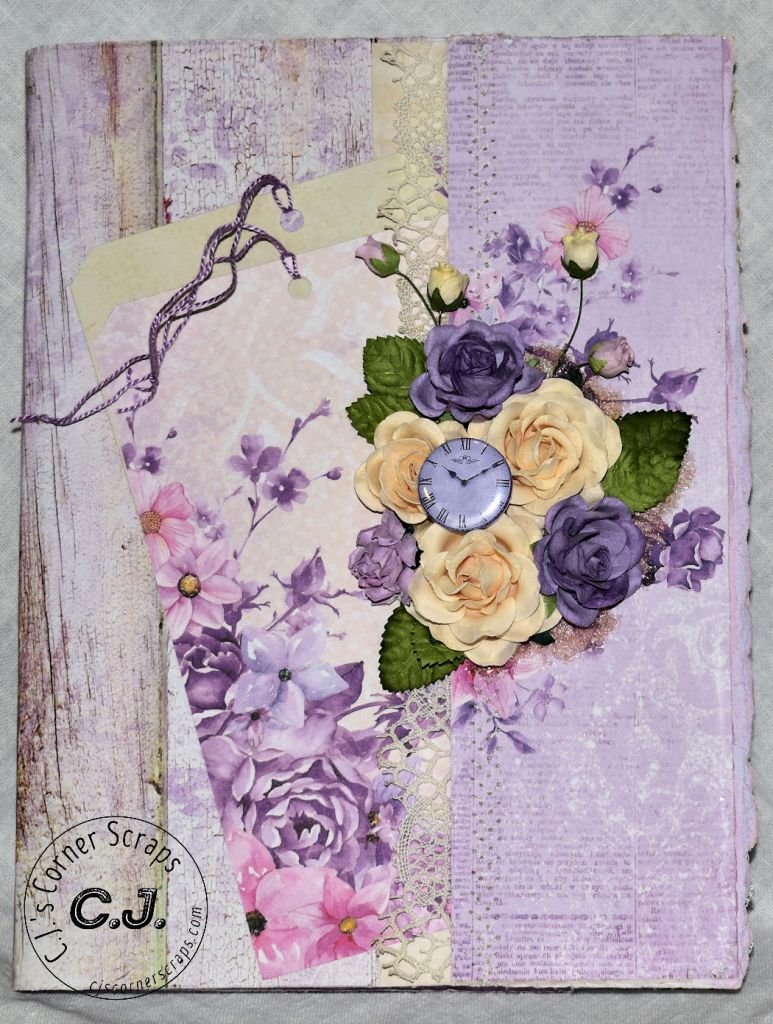
I used my Tim Holtz Distress Crayons with a Heidi Swapp stencil. Sometimes adding the Crayon first and lifting through the stencil with a baby wipe; sometimes adding the Crayon through the stencil. I was able to layer my Crayon using some Krylon Workable Fixatif in-between.

FRAMED-20210907_113119

FRAMED-20210907_113248

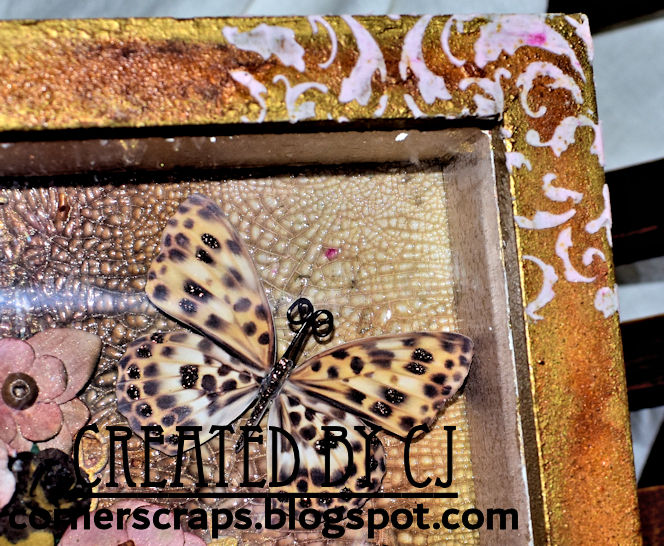
I used the “Burnished Bronze” Nuvo Embellishment Mousse from the September Mixed Media Kit to add some shine to my spine and the “Circle Swirl” Tres Jolie Chipboard.

FRAMED-20210907_113402

I’ve been hoarding this lace for about three years, and I was finally able to bring myself to using it! I grabbed up my Linen Hinging Tape and just added it in a couple of places—almost like a page made of lace!

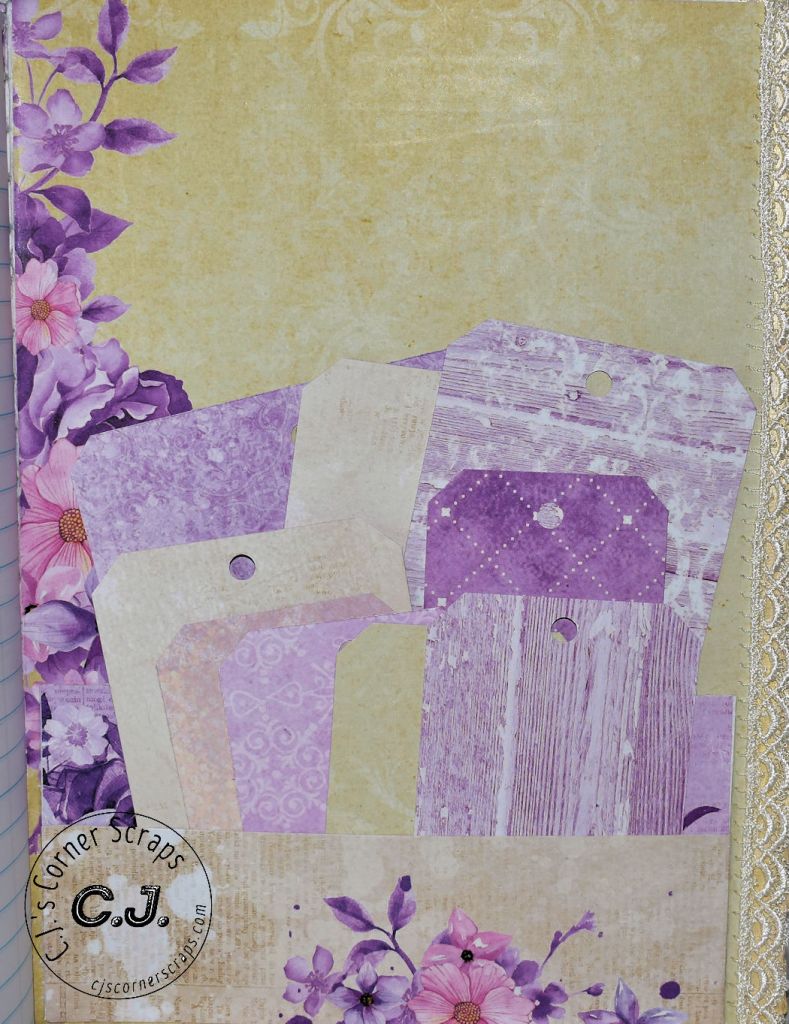
Here are a few photos of the inside:

FRAMED-20210907_113314

FRAMED-20210907_113548

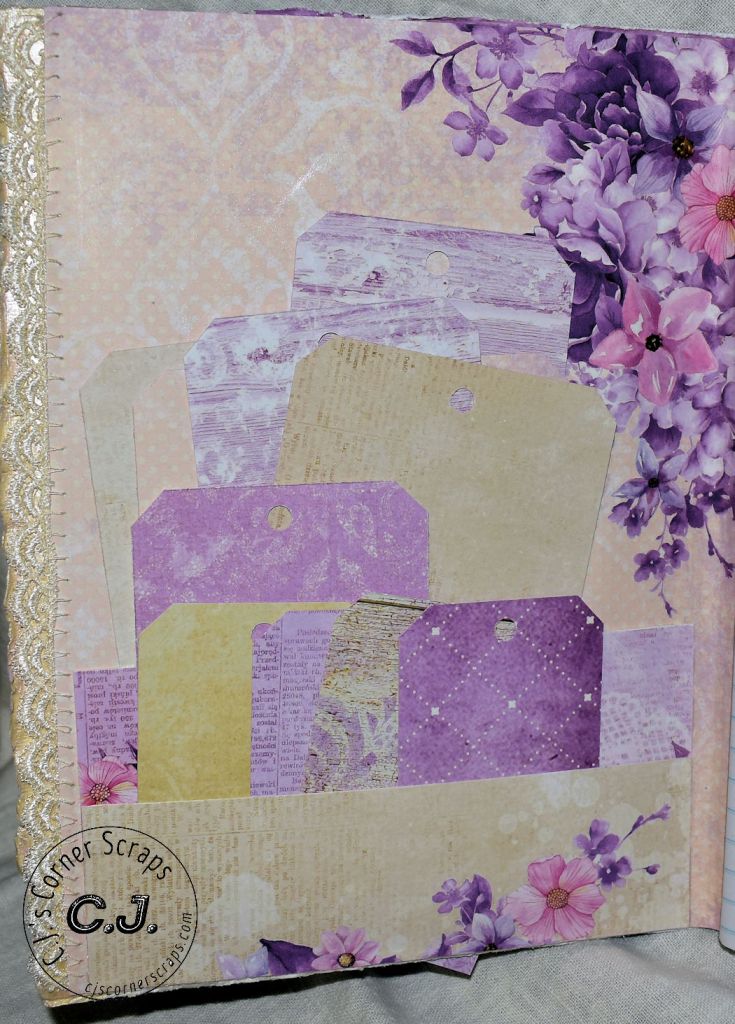
I used some green masking paper to line the inside of the cover, and added some subtle Distress Crayon + Lattice Stenciling as well, using the same process as I did on the outside. The pink papers are from the Cards, Tags, & More Kit, I used some Kraft-stock from my stash for the pages and to back the pieces of ephemera.

FRAMED-20210907_113452

FRAMED-20210907_113520

I created a few mini-envelopes to add to my pages, leaving one side unattached so create a little pocket for some notecards I made using the same Kraft-stock as the pages, topped with the swirls from the “Circle Swirl” chipboard.

FRAMED-20210907_113052

Thank-you for joining me here in my corner! I hope you enjoyed this Half-Circle Journal and it gave you some inspiration and ideas of what you can create using items from this month’s Mixed Media and Cards, Tags, & More Kits.

Stay Crafty, Friends


Did you get a kit? Share what you made in our Facebook Group!

Thank you for joining us here at Tres Jolie Kits!


Tres Jolie can be found at the following places:

Tres Jolie Facebook

Tres Jolie Instagram

Tres Jolie Website

Tres Jolie Subscriptions

Tres Jolie Blog

Tres Jolie YouTube

Tres Jolie Pinterest


Card kit sept 2021

MM kit sept 2021

In addition to items found in the September Cards, Tags, & More Kit and Mixed Media Kit (*from previous Tres Jolie Kits), I used:

Tres Jolie Kit Club Chipboard: “Circle Swirl;” *All Laces; *8” Circle Canvas Board; Ranger/Tim Holtz Distress Crayons: “Frayed Burlap,” Victorian Velvet,” “Bundled Sage,” & “Milled Lavender;” Heidi Swapp 6×6 “Lattice” Stencil; idea-ology/Tim Holtz: Tiny Attacher; We R Memory Keepers: Crop-A-Dile II, Tab Punch, & Envelope Punch Board; Ranger: Blending Tool, Heat-It Tool, & 3.5” Brayer; Krylon Workable Fixatif; Mod Podge Matte Clear Acrylic Sealer; Liquitex: Clear Gesso & Matte Super Heavy Gel; LineCo: PVA Glue & 1.25” Linen Hinging Tape; 2” Bookbinding Tape; 1/4” & 1/8” double sided tape; awl; bookbinding thread & needle; green masking paper; Kraft-stock; Art Glitter Glue; pink thread; Scotch Advanced Tape Glider; pink zipper

Tres Jolie Kit Club-Magnets-August 2021 Cards, Tags, & More Kit

Hey, all! Welcome back to my corner!

This week I’m bringing you some ideas for magnets using pieces of this month’s Cards, Tags, & More Kit from the Tres Jolie Kit Club, along with items from my stash.

FRAMED-20210717_181045

A couple of the magnets I made using the Finnabair “Elisian Clockworks” Mould, and the rest were made from some unfinished wood drawer/door knobs. Check out my video to see how I created my magnet set!


Video:


Now for some individual photos:

FRAMED-20210717_181105

FRAMED-20210717_181230

These two magnets were created using the Elisian Clocks mould and some Amazing Cast Resin. I filled the mould about half way and after that half hardened, I added my magnets and finished filling the mould with more resin.

After coating my pieces with gesso, paint, and paste, I added my embellishment clusters, then a bit of gold wax for some accent.

FRAMED-20210717_181116

FRAMED-20210717_181149

FRAMED-20210717_181222

FRAMED-20210717_181139

FRAMED-20210717_181159

On my drawer/door knobs I added some smaller mould pieces using paper clay, followed the same painting, embellishment, wax process as the resin magnets, but then also added some Nuvo Crystal Drops for a bit more texture on the “plain” edges.

FRAMED-20210717_181256

Thank you for joining us here at Tres Jolie! I hope you enjoyed these magnets and they gave you some ideas of what can be done with items from this month’s Cards, Tags, & More Kit.

Stay Crafty, Friends!


Did you get a kit? Share what you made in our Facebook Group!

Thank you for joining us here at Tres Jolie Kits!


Tres Jolie can be found at the following places:

Tres Jolie Facebook

Tres Jolie Instagram

Tres Jolie Website

Tres Jolie Subscriptions

Tres Jolie Blog

Tres Jolie YouTube

Tres Jolie Pinterest


August 2021 Cards, Tags, & More Kit:

In addition to items from this month’s Cards, Tags, & More Kit (*from previous Tres Jolie Kits), I used: Creative Paperclay; Amazing Cast Resin; Prima Moulds: “Seashore Treasure,” “Curio Trinkets,” & “Elisian Clockworks;” Prima/Finnabair: Heavy White Gesso, *Metallique Wax “Vintage Gold,” *Rust Effect Paste “Cool Grey;” Ranger/Tim Holtz Distress Paint “Speckled Egg;” *Nuvo Crystal Drops “Wedgewood Blue;” Unfinished Wooden Drawer/Door Knobs; magnets; Liquitex Matte Super Heavy Gel; Baby Powder

Tres Jolie Kit Club-October 2020 Mixed Media Kit-Autumn Centerpiece

Hey, all! Welcome back to my corner!

October is almost over, and here in the United States the leaves are in various stages of turning as we are head into our “holiday season.” For my final October project I decided to create a custom autumn center piece using those beautiful Dina Wakley paints and the Nuvo spray found in the Tres Jolie Kit Club October Mixed Media Kit.

DSC_0004-FRAMED

With a few inexpensive, store-bought gourds, pumpkins, and pinecones I was able to add a bit of paint and create a custom décor piece. Check out my video to see how it all came about!


Video:


On each gourd and pumpkin I blended two of the Dina Wakley paints; Eggplant with Tangerine, and Peacock with Lemon, except the smallest pumpkin, which is Peacock with Tangerine.

DSC_0008-FRAMED DSC_0005-FRAMED
DSC_0013-FRAMED DSC_0012-FRAMED

All-in-all this was a rather easy and straight-forward project. The paints are so easy to work with and blend together beautifully! Plus, there is not “right” or “wrong,” you just add the paint, layering and blending, until you are happy with the results.

DSC_0011-FRAMED

After my Dina Wakley paints dried, I coated all of the stems in some “Vintage Gold” Metallique Wax, then coated all of my gourds and pumpkins in some “Clear Rock Candy” Distress Crackle paint. I really love the frosted look it lends to the pieces.

DSC_0006-FRAMED

I wanted to do “something” with  those little pinecones of mine, and I decided to give them a nice coating of the Nuvo “Cocoa Powder” Sparkle Spray from the kit. It darkened them up and gave them some shine! As a final touch, to set that Sparkle Spray, I coated the pinecones in a layer of Mod Podge Clear Acrylic Gloss Sealer.

To create my finished cluster I used a super heavy gel to hold everything together.

DSC_0007-FRAMED

I hope you enjoyed this project and it gave you some ideas of what you can do with the mediums found in this month’s Mixed Media kit!

Stay Crafty, Friends


Did you get a kit? Share what you made in our Facebook Group!

Thank you for joining us here at Tres Jolie Kits!


Tres Jolie can be found at the following places:

Tres Jolie Facebook

Tres Jolie Instagram

Tres Jolie Website

Tres Jolie Subscriptions

Tres Jolie Blog

Tres Jolie YouTube


October 2020 Mixed Media Kit:

In addition to items from this month’s kit (*from previous Tres Jolie Kits), I used:

Prima/Finnabair Heavy White Gesso & *Metallique Wax “Vintage Gold,” Ranger/Tim Holtz Distress Crackle Paint “Clear Rock Candy,” & Distress Brush, Liquitex Matte Super Heavy Gel, Mod Podge Gloss Clear Acrylic Sealer, Foam Pumpkins & Gourds, small pinecones

Tres Jolie Kit Club-October Mixed Media Kit-Art Journaling

Hey, all! Welcome back to my corner!

Today I am bringing you an Art Journal spread I created using the mediums found in this month’s Mixed Media Kit from the Tres Jolie Kit Club.

I find Art Journaling can be freeing and relaxing. There isn’t a need to have a plan going in, I think it’s impossible to “make a mistake,” and you can practice with your mediums!

DSC_0011-FRAMED

In the video I go over the different items (also listed at the end of this post) I used to make this spread and I show the process involved.


Video:


DSC_0012-FRAMED DSC_0013-FRAMED

I first coated the pages in my art journal with some clear gesso, then started layering my stencils for the background – drying in between each layer. After my background was finished I just started drawing! The paints are no longer water reactive once they are dry, so I only worried about using my Workable Fixatif when I wanted my Stabilo pencils to stay put!

DSC_0021-FRAMED DSC_0015-FRAMED

I didn’t worry about trying to make everything “perfect,” I just went along adding color and designs as I felt the “need” for them. After the background stenciling I added my leafy vines, mushrooms, and leaf. I mixed some of the Nuvo Sparkle Spray with some clear gesso to make it more of a paint and (tried) using it to create some shadow effects and to color my leaf some. After I had it painted on I watered the remaining mixture down some and splattered it across the pages. The final step to the spread was to draw on the border around the pages.

DSC_0017-FRAMED

Thank you for joining us here at Tres Jolie, I hope this project gave you some ideas of what you can do with the mediums found in this month’s Mixed Media Kit!

Stay Crafty, Friends!


Did you get a kit? Share what you made in our Facebook Group!

Thank you for joining us here at Tres Jolie Kits!


Tres Jolie can be found at the following places:

Tres Jolie Facebook

Tres Jolie Instagram

Tres Jolie Website

Tres Jolie Subscriptions

Tres Jolie Blog

Tres Jolie YouTube


October 2020 Mixed Media Kit (Note: the green spray is NOT included with the kit):

In addition to items from this month’s Mixed Media Kit (*from previous Tres Jolie kits), I used:

Fabrika Decoru Stencil FDTR 162, *A.B. Studio Stencil, *TCW “Mini Art Deco Leaves” Stencil, Echo Park “Mini Leaves” Stencil, *Prima Waterbrush, Stabilo Black & White, Sharpie Pen – Black, Prima/Finnabair Heavy White Gesso, Liquitex Clear Gesso, Ranger Heat-It Craft Tool, Ranger Blending Tool, Krylon Workable Fixatif, Dina Wakley Media Journal 8” x 10”

Tres Jolie Kit Club-October Mixed Media Kit-Follow Along With Us

Hey, all! Welcome back to my Corner!

For my first project this month I am bringing you my Dreamcatcher for the Tres Jolie Kit Club! For this project I only used some white gesso from my stash in addition to the items found in this month’s Mixed Media Kit, and I hope I have made the video in a way that you will be able to follow along with! I rarely know what direction a project is going when I start it, but I try to edit the video in a way that allows you to see the steps I took!

DSC_0004-FRAMED

Check out the video for my process of how I went about adding the color to my Dreamcatcher, and follow along if you’d like!


Video:


Pretty simple, right? But the results are just fabulous! And, as you’ll see as you use your Dina Wakley paints, a little bit goes a long way!

DSC_0017-FRAMED DSC_0012-FRAMED

Here on the main piece of the Dreamcatcher you can see how I created a rainbow effect using all four paints from the kit and blending where two colors met. After my paint was dry I used the Stickles from the kit to outline all of the edges.

DSC_0018-FRAMED DSC_0007-FRAMED

For the feathers I mixed some white gesso with the Nuvo spray from the kit and brushed it on. After that was dry I added my Dina Wakley paints, again blending where the colors met. For the final touch I brushed on a light coating of the stickles to give some sparkle all over the feather.

DSC_0020-FRAMED

I hope you enjoyed this quick & easy project using this month’s Mixed Media kit and I hope it gave you some ideas of what can be done with the mediums found in this month’s kit!

Thank-you!


Did you get a kit? Share what you made in our Facebook Group!

Thank you for joining us here at Tres Jolie Kits!


Tres Jolie can be found at the following places:

Tres Jolie Facebook

Tres Jolie Instagram

Tres Jolie Website

Tres Jolie Subscriptions

Tres Jolie Blog

Tres Jolie YouTube


October 2020 Mixed Media Kit:

Under the Sea-ATCoins-Creative Embellishments August 2020 Challenge

Hey, all! Welcome back to my corner!

Today I’m bringing you an ATC Coin set I created for the August 2020 Creative Embellishments Challenge.

DSC_0022-wm

I have a quick process video to go along with this project, if you’d like to see how I put these together.


Process Video (potentially still uploading):


Here is the inspiration graphic from Creative Embellishments. I saw the challenge on the first of the month, and I just remembered “Mermaids” until I was finally able to get a project together! I love all things fantasy, so I knew I had to participate this month!

aug-chal


All-in-all I had about two hours of “work” put into the making of these (not including any air dry time), and I am very happy with how they came out!

I layered some gilding flakes on top of some homemade texture paste using Ranger’s Sticky Embossing Powder, added the “Mermaid Artist Trading Coins” to the base, glued down some shells, used some of Finnabair’s wonderful waxes, and added some 13 @rts microspheres as a finishing touch.

DSC_0023-wm DSC_0024-wm
DSC_0025-wm DSC_0026-wm

To me my Artist Trading Coins looked like they very well could have been coins sitting on the ocean floor!

Thank you for joining me in my little corner for this rather quick project! I hope you enjoyed it and I’ll see you again soon!

Stay Crafty!


Products:

Creative Embellishments Artist Trading Coins, Mermaid Artist Trading Coins, & Seaweed Stencil, 13 @rts “Old Gold” XS Microspheres, Prima/Finnabair Heavy White Gesso, “Burnt Sienna” Liquid Acrylic Paint, “Ancient Coin” Metallique Paint, “Yellow-Blue” Opal Magic Paint, “Bronze Age” Metallique Wax, and “Patina Blue” & “Patina Green” Matte Wax, Ranger Sticky Embossing Powder, Tonic-Nuvo Gilding Flakes “Radient Gold,” “Silved Bullion,” and “Sunkissed Copper,” Simon Says Stamp Clear Embossing Ink, Liquitex Gloss Gel & Gloss Super Heavy Gel, Ranger Heat It Craft Tool, Decor Sand & Shells,

*The texture paste I used was made quite a few months ago and has a lot of different products in it.

Sunset Dolphin-Lindy’s Gang June 2020 Challenge

Hey, all! Welcome back to my little corner of the Internet!

Today I’m bringing you an altered mirror from Dollar Tree for the Lindy’s Gang June 2020 Color Challenge!

DSC_0043-wm

I used a lot of Lindy’s Gang products just to make the three colors for the challenge! I know I only two are required, but I like trying to get everything in! The “Guten Tag Teal” Embossing Powder is the only Lindy’s product I own that was a match all on its own, I had to create the bright green and orange-ish coral, which I show in the video (below the Lindy’s Challenge board), plus I’ll add the details to the other photos on this post.


challenge-

The Lindy’s Gang Challenge Color Board.


DSC_0031-wm DSC_0033-wm
For the coral flowers, I mixed “Alpine Ice Rose” Magical Shaker, “Magical Mai Tai” Flat Magical, and “Plumeria Pink” Flat Magical powders. While the flowers were still wet, I sprinkled on “Alpine Ice Rose” Magical Shaker in the center. For the bright green flowers, I made a spray of the “Aloha Avacado” Flat Magical, but I didn’t think it was quite bright enough, so I also sprayed the flowers with “Pineapple Paradise” Flat Fabio Sprays.
DSC_0030-wm DSC_0035-wm
Fortunately, I had a few teal flowers that matched the “Guten Tag Teal” Embossing Powder I used on the ReneaBouquets Beautiful Board and in the center of the green flowers. For the frame around the mirror, I mixed the same colors I used on the coral flowers into some Liquitex Gel Medium and brushed it on. Then I spritzed it with water and sprinkled on more of the “Alpine Ice Rose” Magical Shaker.
DSC_0032-wm DSC_0036-wm
I wasn’t entirely sure what I wanted to do with the mirror, but I didn’t want to leave it as it was, then in finally dawned on me to use my alcohol inks! For the sunset sky, which needed to match the coral, I used “Sunset Orange” and “Flamingo.” For the water, which needed to match the teal, I used “Patina,” and to make my wave caps I used the “Pearl” mixative. I made a stencil from some scrap cardstock and a cut file from the Silhouette Store (ID# 297497) and used Nuvo Embellishment Mousse “Black Ash” to create the dolphin.

DSC_0024-wm

And there you have it. I used a simple mirror from Dollar Tree and spruced it up using a lot of Lindy’s Gang products!

Thank you for joining me here in my corner!!


Products Used:

Lindy’s Gang: “Alpine Ice Rose” Magical Shaker, “Magical Mai Tai” Flat Magical, “Plumeria Pink” Flat Magical, “Pineapple Paradise” Flat Fabio Sprays, “Aloha Avacado” Flat Magical, “Guten Tag Teal” Embossing Powder, ReneaBouquets “Small Twisted Chain Frame Set,” Silhouette Design Store “Tropical Leaves” ID# 293541 & “Tropical Dolphin Sunset” ID# 297497, Prima Flowers (I don’t know which ones, I’ve had them for years!), Prima Melange Art Pebbles “Sugar,” Prima Flowers Item# 640040, Bazzill “Limeade,” Unbranded Gold Microbeads, Unbranded Stamen, Ranger Emboss-It Ink Refill, Fabri-Tac, E6000, Simon Says Stamp Clear Embossing Ink, Liquitex Gloss Gel, Liquitex Matte Super Heavy Gel, Tonic Nuvo Embellishment Mousse “Black Ash,” Ranger-Tim Holtz Alcohol Blending Solution, “Sunset Orange,” “Flamingo,” & “Patina” Alcohol Inks and “Pearl” Mixative, “Krylon Triple-Thick Crystal Clear Glaze, Nicapa Cutting Mat, Silhouette Cameo 3, Mirror from Dollar Tree

Altered Composition Book – ReneaBouquets Swap on scrapbook.com

The front cover using the beautiful Mulberry paper flowers from ReneaBouquets!
The back cover.
The back cover without tags.

Supplies:

Below are the products I used with Affiliate Links, at no extra cost to you! Thank you for your support!

Below are the remaining products I used.

  • ReneaBouquets
    • Mulberry Paper Flowers – Pale Apricot Roses and Leaves, Lavender Roses and Leaves, & Purple Spring Mix
    • Chunky Glitter Glass – Sand (Recieved from Monica in the Sept. Swap!! Thank you, Monica!)
  • LemonCraft – Violet Silence
    • 12×12 Collection Kit
    • Buttons/Badges
  • The Paper Studio
    • Plain Handmade, White
  • Making Memories Bone Folder
  • Unknown/Unbranded
    • Laces
    • Hole Punch

Shadowbox

Note: Taking photos of reflective surfaces is one of my least favorite things to do!

I created this shadowbox for the July 2019 Lindy’s Gang Color Challenge (Info can be found on the Lindy’s Blog and Facebook Page). It’s my first time doing a Lindy’s Challenge, mostly because I need more Lindy’s supplies. It’s not a lack of wanting to go on a Lindy’s shopping spree, it’s an “I don’t know where it would go” thing. I need to use up some of the items I already own so I’ll have spots for new stuff! (However, if I’m lucky enough to win, then the hubs can’t question why I bought new items when I am clearly at capacity! “It’s not my fault,” I’ll say, “I was trying to use what I own and this just happened!”)

Anyhow, I did happen to have some Lindy’s Magical Shakers in Bratwurst BrownGrab A Guy Gold, and Alpine Ice Rose that I thought would work for this challenge. I “diluted” the Alpine Ice Rose in some white texture paste for the Pale Rose in the color challenge (1st color on the photo below) and used my “new” texture paste for the stenciling on the outside of the shadowbox. I also created the Red Brown (2nd color on the photo below) for the color challenge in a homemade spray by mixing Alpine Ice Rose and Bratwurst Brown, which I sprayed on the (white) Darice flowers.
I used a lot of Bratwurst Brown and Grab A Guy Gold on the outside of the shadowbox, as well as on the background inside the shadowbox. On the lattice, after I gave it a coat of white gesso, I used clear embossing ink on the surface and brushed on more Grab A Guy Gold. (There will be a process video link further down this post which will hopefully explain things a lot better than I can with words!)
My process video: It will go here after editing & uploading. Also, uploads can take a while for me because I have satellite Internet…and to top it off, today is a rainy/overcast day.

However, I do have a few close-ups for you to look at!


Products:

  • [From the] July 2019 Tres Jolie Mixed Media Kit
    • Darice
    • Floral Embellishments
    • Shadow Box
  • Creative Embellishments
    • Love Knot Panel
  • ReneaBouquets
    • Mini Chocolate Covered Caramel Roses
    • Leopard Premium Paper Butterflies
  • KaiserCraft
    • Wildflower Collection
    • Succulents
  • Tonic
    • Nuvo Mica Mist
    • Antique Gold
  • Ranger
    • Tim Holtz
    • Distress Crackle Paint
    • Clear Rock Candy
  • Mini Blending Tool
  • idea-ology
    • Tim Holtz
    • Sanding Block
  • Prima
    • Stencil (Item #564278
    • Finnabair
    • Opal Magic Acrylic Paint
    • Rose Gold
  • Metallique Wax
    • Vintage Gold
  • TCW
    • Light & Fluffy Modeling Paste
  • Simon Says Stamp
    • Embossing & Watermark Ink
    • Clear
  • Liquitex
    • Matte Super Heavy Gel
  • Kilz
    • Original Primer
  • Mod Podge
    • Matte Acrylic Sealer
  • Daler Rowney
    • White Gesso