Tres Jolie Kit Club – Décor “Vintage” Spools -March 2022 Cards, Tags, & More Kit

Hey, y’all! Welcome back to the Corner Scraps blog!

This week I have some décor spools I made to go with this month’s “Threads” Stamperia papers and ephemera in the Cards, Tags, & More Kit from Tres Jolie Kit Club. I loved this month’s kit, and couldn’t help turn it into some décor pieces this week (and next week too!) along with the needlebook I made for my first project this month! I definitely focused on the “and More” part of the kit for March!

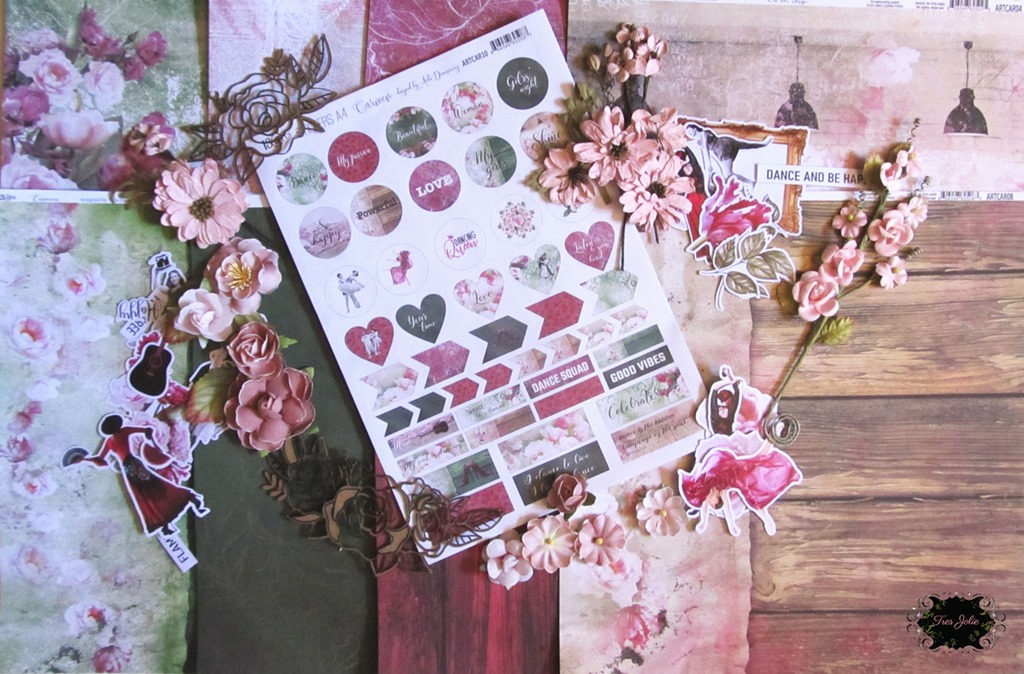
Check out the video to get some ideas and inspiration for what you can do with the items in this months kit!

Mar22-CTM-Spools-02


Video:


I can honestly say that if everything was insta-dry this project would not have taken very long! I spent a lot of time waiting for my 3D Gel or the paint, mica, and water soaked flowers to dry since I didn’t want to use my heat gun too much – some things just work best air dried, like the rust effect powder.

Mar22-CTM-Spools-03 Mar22-CTM-Spools-05

Here is are a couple of close ups of the shortest spool – the one with the Tres Jolie Chipboard Tailor’s Dummy (Mannequin) on top. As you can see, I added tons of mediums to the spools before I considered them finished, but I didn’t actually use that much! I used the lightest and darkest [rose] mica powers and the Liquid Color Fluid Medium from the March Mixed Media Kit, some Burnt Sienna Liquid Acrylic paint from the February Mixed Media Kit, and some rust effect powder from the September 2019 Mixed Media Kit. Mixing the darkest mica with the Burnt Sienna paint also gave me some rust color! All of the waxes I used were also from previous Tres Jolie Kits! (Tres Jolie Kits are great for building up a stash!)

Mar22-CTM-Spools-06 Mar22-CTM-Spools-07

Here is the base of the shortest spool. I just wrapped my “measuring tape” around the bottom, built up a hill of gel, and after it dried I added some rust effect powder and paint to make it look like it had been sitting around for ages! Letting my rust and paint air dry also allowed for some color to soak into the papers—adding more the the aged look I was going for.

Mar22-CTM-Spools-10 Mar22-CTM-Spools-11

I think the top of the middle sized spool was the quickest to go together – minus the dry time for the 3D gel to dry that is holding the chipboard up—because it is mostly flowers! You can see along the edges of the chipboard some of the dark rose mica that I painted on in some of the areas.

Mar22-CTM-Spools-08 Mar22-CTM-Spools-09 Mar22-CTM-Spools-12
Mar22-CTM-Spools-13 Mar22-CTM-Spools-15 Mar22-CTM-Spools-14

There are a lot of layers wrapped around this base! I have chipboard thread spools, scissors, and advertisements. This is the spool I used [reversed] Scotch tape on to hold the chipboard pieces in a curved shape while I waited for the 3D gel to dry. Then I came in with my flowers, followed by my mediums, and started layering on some color and rust.

Mar22-CTM-Spools-16 Mar22-CTM-Spools-18

Last, but not least, the tallest spool top! This one might be my favorite because it was large enough to really let the “rust” show up!! I also really love how the Burnt Sienna mixed with the dark rose mica gave a rust-ish color to the top edge of the sewing machine—it shows up especially well on the backside where the measuring tape paper is.

Mar22-CTM-Spools-17

Here is a good close up of how some paint and rust really added a distressed, vintage feel to those flowers. Once it’s in place, and if you don’t touch it too much while wet, paper is an amazing substrate to work with! It may be delicate when wet, but it makes up for it in absorbability and malleability.

Mar22-CTM-Spools-20 Mar22-CTM-Spools-21 Mar22-CTM-Spools-22

Here is the base of my third and largest spool. I added my rust, paint, and mica to all of my exposed edges, and really added some rust to the top of my chipboard bobbin. As soon as I’m sure all of the glues and chipboard is bone dry, I will be giving these spools a protective coating of some matte sealer and be posting them up in my Etsy shop.

Mar22-CTM-Spools-23

I even added some of the rust effect powder to the undersides of the tops! I carefully supported my spools between a few bottles and let them sit upside down until the rust effect powder and vinegar had dried.

Thank you for joining me here in my corner, I hope you enjoyed this project and it gave you some ideas of what you can do using the papers and embellishments found in this month’s Cards, Tags, & More Kit!

Stay Crafty, Friends


Did you get a kit? Share what you made in our Facebook Group!

Thank you for joining us here at Tres Jolie Kits!


Corner Scraps can be found in the following places:

Corner Scraps Studio Etsy

Corner Scraps Instagram

Corner Scraps Facebook

Corner Scraps YouTube

Corner Scraps Pinterest


Tres Jolie can be found at the following places:

Tres Jolie Facebook

Tres Jolie Instagram

Tres Jolie Website

Tres Jolie Subscriptions

Tres Jolie Blog

Tres Jolie YouTube

Tres Jolie Pinterest


mar22ctm

In addition to this month’s Cards, Tags, & More Kit (*from previous Tres Jolie Kits), I used:

*DecoArt Black Gesso; Finnabair: *Matte Wax: “Old White” & “Charcoal Black,” 3D Matte Gel, Clear Gesso, “Large Gears” & “Machine Parts” Moulds; *13@rts “Rusty Bronze” Ayeeda Powder; Tim Holtz: Sanding Block, Opaque Matte Texture Paste, Alcohol Ink: “Caramel” & “Latte,” *Stamperia “Metallic Black” Wax; Fiskars 1” Circle Punch; *49 & Market Flowers, Prima Marketing Flowers, Art Glitter Glue; Mod Podge (Vintage); Liquitex Matte Gel; Fabri-Tac, spools made by me

Tres Jolie Kit Club–“Carmen” Junk Journal–February 2022 Mood board

Hey, all! Welcome back to the Corner Scraps Blog!

This week I have my Tres Jolie Kit Club mood board inspired project for you – a junk journal using this month’s Scrapbooking Kit! I had an old book cover that I had altered a while ago, just waiting for the right papers to come along to make a junk journal, and the “Carmen” line from 13@rts (13 Arts) was the perfect fit! I really love the combination of the dark pink with the deep green that is in these papers.

Feb2022-Mdbrd-CarmenJJ-15

I didn’t make a “How to make a Junk Journal” video for this project—there are tons of how-to videos to be found on YouTube already—I just go over what I’m doing to help give you some ideas of how this month’s kit can be used. Check out my video to see my thought process!


Video (full):

Video (starts at flipthrough):


February 2022 Tres Jolie Kit Club Mood Board:

4-moodboard

Check out this month’s Mood Board! Isn’t it fabulous? The twist this month is “Cabaret Life” – grab up your papers and glues and join in! Place your entries in the February 2022 challenge folder on Tres Jolie Kit Club Café Facebook page. This challenge ends February 28, 2022 at 11:59 pm CST. All entries must be in this folder to be eligible for the prize (to have everyone eligible to win, we are limited the same winner to once every 3 months).

Challenge Rules:

  • You can create any type of project for the challenge.
  • You MUST say what you were inspired by.
  • You MUST include the twist in your design.
  • We would love to see you USE AT LEAST 1 of Tres Jolie’s products on your projects but it isn’t required to play along.
  • It MUST be a new project.

Feb2022-Mdbrd-CarmenJJ-01

Feb2022-Mdbrd-CarmenJJ-11

I mixed up four different embossing powders (check the product list at the end of the post!) and added that mixture to the Tres Jolie Chipboard from the kit. I then added it as little tuck spots on the back cover and front page of the journal.

Feb2022-Mdbrd-CarmenJJ-12

Feb2022-Mdbrd-CarmenJJ-13

The spine of this cover was in pretty sad shape when I originally decided to do the alterations. I had to layer up some linen hinging tape and book binding tape to hold everything together again, and the outer layer still wanted to peel off – by the fabric and canvas layers I added to my junk journal gave this cover new life.

Feb2022-Mdbrd-CarmenJJ-10

In addition to the “Carmen” papers, I have some printables I created and some tea dyed papers I made in here. That music fabric in the above photo has one of the printables printed on it!

Feb2022-Mdbrd-CarmenJJ-02

Feb2022-Mdbrd-CarmenJJ-03

Feb2022-Mdbrd-CarmenJJ-08

Some of the pages in my journal are dyed with various pink inks/sprays. I have stitching throughout, along with little tuck spots made from corners or layers of paper and fabric/lace. If I wasn’t using bits of the ephemera pack in stitched clusters, I layered them up on a page to add some interest and detail.

Feb2022-Mdbrd-CarmenJJ-04

Feb2022-Mdbrd-CarmenJJ-09

In addition to the ephemera pack for bits of detail, I used the cut apart page from the “Carmen” paper pad. After I cut out the piece I used, I distressed the edges with scissors and added some “Frayed Burlap” Distress Ink. I think one of my favorite things about junk journals is the freedom they give to the creative process. A lot of the time I would just grab up some of the bits and pieces and just start layering them up – without trying to think if it looked “right.” More often than not, NOT overthinking created easy and wonderful results!

Feb2022-Mdbrd-CarmenJJ-05

Feb2022-Mdbrd-CarmenJJ-06

Feb2022-Mdbrd-CarmenJJ-07

Although I love the creative process of creating junk journals, they are journals! So I also make sure to leave lots of room for journaling – blank pages, tags, and lots of tucks and folds to hold loose bits.


Feb2022-Mdbrd-CarmenJJ-14

Thank you for joining me here in my corner, I hope you enjoyed this project and it gave you some ideas of what you can make using this month’s Scrapbooking Kit!

Stay Crafty, Friends!


Corner Scraps can also be found at:

Corner Scraps Studio Etsy

Corner Scraps Instagram

Corner Scraps Facebook

Corner Scraps YouTube

Corner Scraps Pinterest


In addition to this month’s Scrapbooking Kit (*from previous Tres Jolie Kits), I used:

*StudioLight Rice Paper (RICEJMA22); *Lindy’s Gang: “Terra Cotta Rust” & *“Bougainvillea Red Teal” Embossing Powders; *Prima “Blossom Bud” Fluid Chalk Ink; Ranger Antiquities “Frosted Crystal” Embossing Powder; Finnabair: *Elementals Resist Canvas (Prima Item# 960698), “Manuscript” & “Ornate Lace” Stencils, “Rusty Red” Matte Wax, & “Red Wine” Metallique Paint; *P13 “The Four Seasons: Spring” Stamp Set (this month’s Cards, Tags, & More Kit; in video, not actually used in journal); StazOn “Jet Black” (in video, not actually used in journal), Shimmerz: “Ruby” Spritz & “Pink Stilettos” Coloringz; Plain Jane Simply Sheer “Taupe;” Dylusions “Funky Fuchsia” Ink Spray; Tim Holtz “Tea Dye” Distress Oxide Spray, “Kitsch Flamingo” Distress Embossing Glaze, “Frayed Burlap” Distress Ink, Jute Sting, & “Symphony” Tissue Tape; Scotch: Expressions “Pink” Tape & ATG; Fabri-Tac; Art Glitter Glue; Simon Says Stamp Clear Embossing Ink; *DecoArt “Black” Gesso; We R Memory Keepers: Corner Chomper, Crop-A-Dile, & Crop-A-Dile II; book binding cloth; book binding tape, double-sided tape; Linen Hinging Tape; old book cover; Liquitex Matte Super Heavy Gel; tea dyed papers; printables created by me; piano roll paper; old news paper; old book pages; Recollections Blank Cards & Envelopes; various fabrics and trims from my plethora of fabrics and trims!; pink sewing thread; white book binding thread; large needle; awl; We R Memory Keepers Foam Mat (or something to use as a “cushion” for your awl—stack of paper, phone book, folded towel, etc.); chain; *Charm (this month’s Cards, Tags, & More Kit); pink threads; black thread

Best Bed Ever!

Hey, all! Welcome back to my corner!

For my final project for the month of April, I have a layout that will (most likely) be getting mounted in a shadow box. I couldn’t resist turning this photo of my husband & our granddaughter into a star filled project! This project is full of dreamy blues for the Creative Embellishments April 2021 Challenge – Monochrome & Washi (I have Tim Holtz Tissue Tape along the edges!).

20210427_075117-EDIT-WM

Check out my video to see how this came together!

Video:

monthly_challenge
AP-CHAL-224x300

20210427_075227-EDIT-WM

I used a sheet of Fabrika Decoru Golden Mini Drops Mysterious Garden Sky 12×12 paper as my base for my starry sky. Then added some stenciled stars and some “Unicorn’s Hair” Sparks splatters for even more of a dreamy, starry sky.

20210427_075150-EDIT-WM 20210427_075247-EDIT-WM
20210427_075127-EDIT-WM 20210427_075221-EDIT-WM

Under and around the photo I have resin pieces from the Finnabair Stars & Moons Mould, chipboard and flair/buttons from Creative Embellishments, white gardenias from ASC Supplies, dusty blue and white roses from ReneaBouquets, and some glass glitter from Darice. All working with a variety of paints from Finnabair, some Old White Matte Wax, and Nuvo gold gilding flakes.

20210427_075140-EDIT-WM

Thank you for joining me here in my corner! I hope you enjoyed this project and it inspired you to go get your craft on!

Red heart C.J.


Products:

Creative Embellishments Music Note Borders & Music Bar Flair; ReneaBouquets Mini Dusty Blue & Ivory Roses; Hip Kit Club Stars Stencil; ASC Supplies White Gardenia’s; Prima-Finnabair Stars & Moons Mould, Clear Gesso, Matte Wax “Old White,” Metallique Paint “Royal Blue,” Opal Magic Paint “Yellow-Blue,” Sparks Paint “Unicorn’s Hair,” Fabrika Decoru Golden Mini Drops Mysterious Garden Sky (UAH 18); Ranger-Tim Holtz Distress Oxide “Weathered Wood;” Ranger Dina Wakley Media Black Gesso; Ranger Blending Tool; Ranger Sticky Embossing Powder; Nuvo “Radiant Gold” Gilding Flakes; idea-ology – Tim Holtz Tissue Tape “Symphony;” Darice Glass Glitter “Vintage Gold;” LineCo PVA Glue, JudiKins Diamond Glaze, Liquitex Matte Super Heavy Gel, Amazing Cast Resin (White); Pro Marine Supply Epoxy (Clear)

Tres Jolie Kit Club-November 2020 Mixed Media Kit-Altered Embroidery Hoop

Hey, all! Welcome back to my corner!

For my final November project, I’m bringing you an altered hoop using items from my stash with items found in this month’s Mixed Media Kit from Tres Jolie Kit Club.

DSC_0034-FRAMED

I used an old embroidery hoop from my stash and upcycled some aluminum screen for this Autumn Butterfly piece! Check out the video below to see how I did it! (My husbands hands even make their Internet debut!)


Video:


Now, how about a few close-ups?

DSC_0043-FRAMED DSC_0036-FRAMED

I wasn’t overly worried about “clogging” some of the holes in the screen with the gesso, I think it adds a little something to the piece and makes it seem more connected to the hoop. You don’t have to coat your screen with gesso and wax, I like it better this way though because it cut out the shine from the aluminum. You can also see that I added some “Vintage Gold” wax to the hoop to add just a little shine to offset the matte.

DSC_0035-FRAMED DSC_0038-FRAMED

I finished off two partial packs of flowers on this project and added some die cut leaves coated in “Vintage Gold” wax and sprinkled with some glass glitter for my cluster on the bottom of the hoop, bringing the gold of the butterflies to the outside as well.

DSC_0049_FRAMED DSC_0053_FRAMED

Isn’t it beautiful with the light coming from behind? It makes me think of the setting sun at the end of an autumn day.

DSC_0040-FRAMED

Thank you for joining us here at Tres Jolie! I hope you enjoyed this project and it gave you some ideas of what can be done with items found in this month’s Mixed Media Kit! I’ll see you again in December!

Stay Crafty, Friends!


Did you get a kit? Share what you made in our Facebook Group!

Thank you for joining us here at Tres Jolie Kits!


Tres Jolie can be found at the following places:

Tres Jolie Facebook

Tres Jolie Instagram

Tres Jolie Website

Tres Jolie Subscriptions

Tres Jolie Blog

Tres Jolie YouTube

Tres Jolie Pinterest


MM kit

In addition to items from this month’s Mixed Media Kit (from previous Tres Jolie Kits), I used:

*49 & Market Country Blooms “Ginger,” *Tres Jolie White Flowers, *Lindy’s Gang “Gossamer Gold” Moon Shadow Mist, *Little Birdie Black Gesso, *Darice “Vintage Gold” Glass Glitter, *Prima/Finnabair “Vintage Gold” Metallique Wax, Sizzix/Tim Holtz “Skeleton Leaves” Thinlits, ReneaBouquets “Elegant Gold Glitter Glass Wing Double Layer Premium Paper Butterflies,” smooth white cardstock, Grafix ® Computer Grafix Printable Transparent Plastic Sheets, Liquitex Clear Matte, Gloss, and Super Heavy Gloss Gel, E6000

Tres Jolie Kit Club-November Mixed Media Kit-Butterfly Panel

Hey, all! Welcome back to my corner!

This week I’m bringing you a grungy “Butterfly Panel” using the items from this month’s mixed media kit from Tres Jolie Kit Club!

DSC_0042-FRAMED

All of those Mould pieces, butterflies, and beads came from my stash, as well as the MDF I used as the base, but I used the Decorative Paper, stencil, and Distress Paints from the kit to give the base some texture and to give it all some color. Check out the video to see how it all came together.


Video:


Pretty straightforward, right? A lot of layers, a lot of different textures, and just working with the colors found in this month’s kit! Here are some close-up images for you to take a look at!

DSC_0046-FRAMED DSC_0057-FRAMED

I’d been hanging on to these butterflies for a couple of years just waiting for the right project and inspiration to come along, and this month it came to me! The MDF I used as my base is nice and sturdy, so it was able to take all the weight from all those Mould pieces and those two butterflies. (That large butterfly is really pretty hefty!)

DSC_0043-FRAMED

Here you can see how I have those pieces all layers working together. Make sure you have some heavy-duty adhesive to take all the moisture while you are working and the weight while you are done! I love using my super-heavy gel for projects like this, it is super-versatile. I can use it with stencils, I can mix paint into it, and I can use it as an adhesive.

DSC_0054-FRAMED DSC_0055-FRAMED

In the photo on the left, you can see a close up of some of the Mould pieces topped with those texture pebbles and the finishing touch, those iridescent beads to offset the matte finish of the paints and wax. The photo on the right shows more of all those textures and layers, but also give a good view of the background. You can see the decorative paper gave some wrinkles, and the stenciling gave some lines!

DSC_0047-FRAMED

This photo gives a good look at how “thick” this project is! Make sure you have someplace sturdy to display your masterpiece when you are done!

As always, thank you for joining us here at Tres Jolie. I hope you enjoyed this project and it gave you some ideas of what you can do with items found in this month’s mixed media kit!

Stay Crafty, Friends


Did you get a kit? Share what you made in our Facebook Group!

Thank you for joining us here at Tres Jolie Kits!


Tres Jolie can be found at the following places:

Tres Jolie Facebook

Tres Jolie Instagram

Tres Jolie Website

Tres Jolie Subscriptions

Tres Jolie Blog

Tres Jolie YouTube

Tres Jolie Pinterest


MM kit

In addition to items from this month’s Mixed Media Kit, I used (*from previous Tres Jolie kits):

ReneaBouquets “Midnight Magic” Iridescent Beautiful Beads, Prima/Finnabair “Mechanica” & “Stars & Moons” Moulds, Prima/Finnabair Heavy White Gesso & *Clear Gesso, Prima/Finnabair Mega Art Stones, Art Stones, & Mini Art Stones, *Prima “Papillon” Matte Resin Craft Blanks (942366), Liquitex Clear Gesso, Matte Gel, Gloss Gel, & Super Heavy Matte Gel, JudiKins Diamond Glaze, Ranger Heat-It Tool, Unbranded Black Microbeads

Under the Sea-ATCoins-Creative Embellishments August 2020 Challenge

Hey, all! Welcome back to my corner!

Today I’m bringing you an ATC Coin set I created for the August 2020 Creative Embellishments Challenge.

DSC_0022-wm

I have a quick process video to go along with this project, if you’d like to see how I put these together.


Process Video (potentially still uploading):


Here is the inspiration graphic from Creative Embellishments. I saw the challenge on the first of the month, and I just remembered “Mermaids” until I was finally able to get a project together! I love all things fantasy, so I knew I had to participate this month!

aug-chal


All-in-all I had about two hours of “work” put into the making of these (not including any air dry time), and I am very happy with how they came out!

I layered some gilding flakes on top of some homemade texture paste using Ranger’s Sticky Embossing Powder, added the “Mermaid Artist Trading Coins” to the base, glued down some shells, used some of Finnabair’s wonderful waxes, and added some 13 @rts microspheres as a finishing touch.

DSC_0023-wm DSC_0024-wm
DSC_0025-wm DSC_0026-wm

To me my Artist Trading Coins looked like they very well could have been coins sitting on the ocean floor!

Thank you for joining me in my little corner for this rather quick project! I hope you enjoyed it and I’ll see you again soon!

Stay Crafty!


Products:

Creative Embellishments Artist Trading Coins, Mermaid Artist Trading Coins, & Seaweed Stencil, 13 @rts “Old Gold” XS Microspheres, Prima/Finnabair Heavy White Gesso, “Burnt Sienna” Liquid Acrylic Paint, “Ancient Coin” Metallique Paint, “Yellow-Blue” Opal Magic Paint, “Bronze Age” Metallique Wax, and “Patina Blue” & “Patina Green” Matte Wax, Ranger Sticky Embossing Powder, Tonic-Nuvo Gilding Flakes “Radient Gold,” “Silved Bullion,” and “Sunkissed Copper,” Simon Says Stamp Clear Embossing Ink, Liquitex Gloss Gel & Gloss Super Heavy Gel, Ranger Heat It Craft Tool, Decor Sand & Shells,

*The texture paste I used was made quite a few months ago and has a lot of different products in it.

Fairy Moonlight – July 2020 Mixed Media Place Challenge

Hey, all! Welcome back to my little corner!

Today I’m bringing you a little piece I did for the July 2020 Challenge over at the Mixed Media Place blog.

DSC_0013-wm-resized

Looking at the moodboard for this month I was immediately drawn to the mushrooms. I absolutely adore mushrooms in art. In food, I can tolerate them (except those white “button” mushrooms, Ewww), but in art I absolutely love them! In addition to the mushrooms, all the colors kept making me think of sunsets and the dusk of early evening. Check out my process video, which can be found under the Mixed Media Place Moodboard!


moodboard-mmp-7-2020

Mixed Media Place Moodboard


Process Video:


DSC_0016-em-resized

I have quite a few mediums making up my background; a couple of Jacquard Paints topped with three different Distress Oxide Sprays. For my moon and stars, I used two Prima/Finnabair paints, one of which is “Unicorn’s Hair,” which was also used for my splatter!

DSC_0019-wm-resized

I really loved the idea of just having a fairy silhouette looking at the night sky, so I grabbed up my Creative Embellishments chipboard, added some black gesso, but by the end, I decided to add a coat of “Charcoal Black” Matte Wax.

DSC_0017-wm-resized

I used “Burnt Sienna” Liquid Acrylic Paint to give some shadowy depth behind the mushrooms.

DSC_0012-wm-resized

To add a little extra to the moon and stars I lightly brushed on some “White Gold” Metallique Wax, and to give a little extra shine to the mushroom caps I added some “Heather Hills” wax on the front curves (if that makes sense!)

DSC_0011-wm-resized

Thank you for joining me here at my little corner! I hope you enjoyed this project and I hope you’ll visit me again soon!

Stay Crafty,
C.J.


Products:

Creative Embellishments “Mega Fairy Chipboard Pack In Black,” Prima/Finnabair Sparks “Unicorn’s Hair,” Opal Magic “Yellow-Blue,” Liquid Acrylic “Burnt Sienna,” “Stars & Moons” Mould, Matte Wax “Charcoal Black,” Metallique Wax Cire Cera “White Gold” & “Heather Hills,” Lindy’s Gang Moon Shadow Mist “Gossamer Gold” & Starburst Squirts “Polite People Purple,” Ranger/Tim Holtz Distress Paint “Antique Linen,” “Ground Espresso” & “Wilted Violet,” Distress Oxide Spray “Fossilized Amber,” “Worn Lipstick” & “Wilted Violet,” Jacquard Lumiere “Halo Pink Gold” & “Halo Violet Gold,” Floral Garden “Floral Moss,” Decorative Pebbles & Sand, Little Birdie Black Gesso, Creative Paperclay, Amazing Cast Resin, Liquitex Super Heavy Gel, TCW Gloss Gel Medium, Krylon Workable Fixatif, scrap piece of MDF (it was used as protection/packing material for something else I ordered)