Tres Jolie Kit Club–Advent Calendar-Moodboard Inspired Project

Hey, all! Welcome back to my corner!

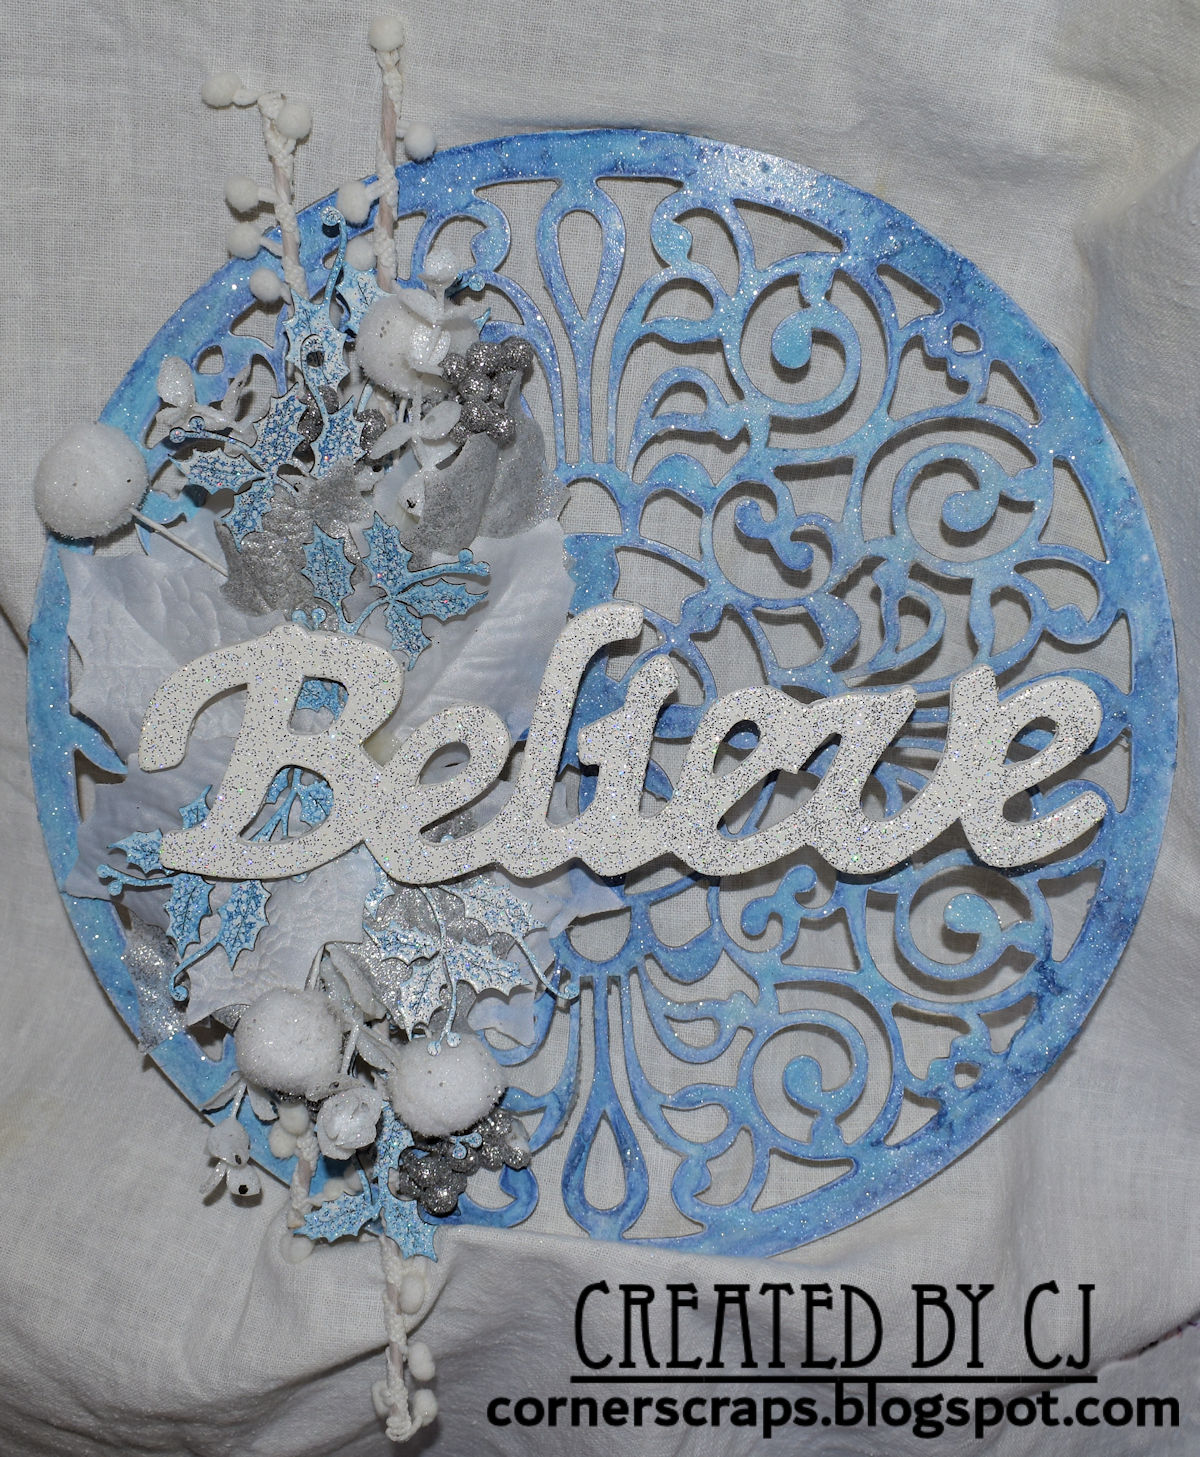
I have, for my moodboard inspired project, an Advent Calendar using the Tres Jolie Kit Club’s Limited Edition Advent Calendar Kit, the December Scrapbooking Kit, and even some of the paint and glitter from the December Mixed Media Kit!

AdventCollage

Now, this project was a rather “hefty” project, and there was more than once I thought about stopping! LOL! But, I recorded my process, so I hope you find it helpful and enjoyable! It did turn into two, longer than I expected, videos though – one for the base, and one for the roof! Check them out!


Part 1 – the base:

Part 2 – the roof:


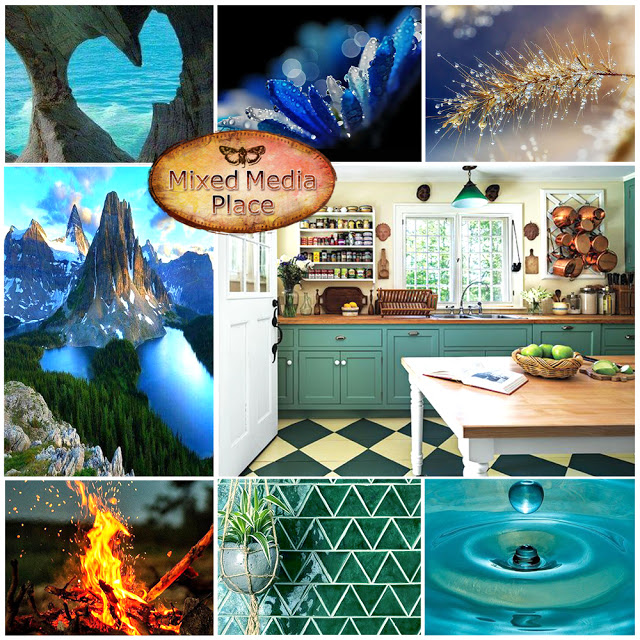
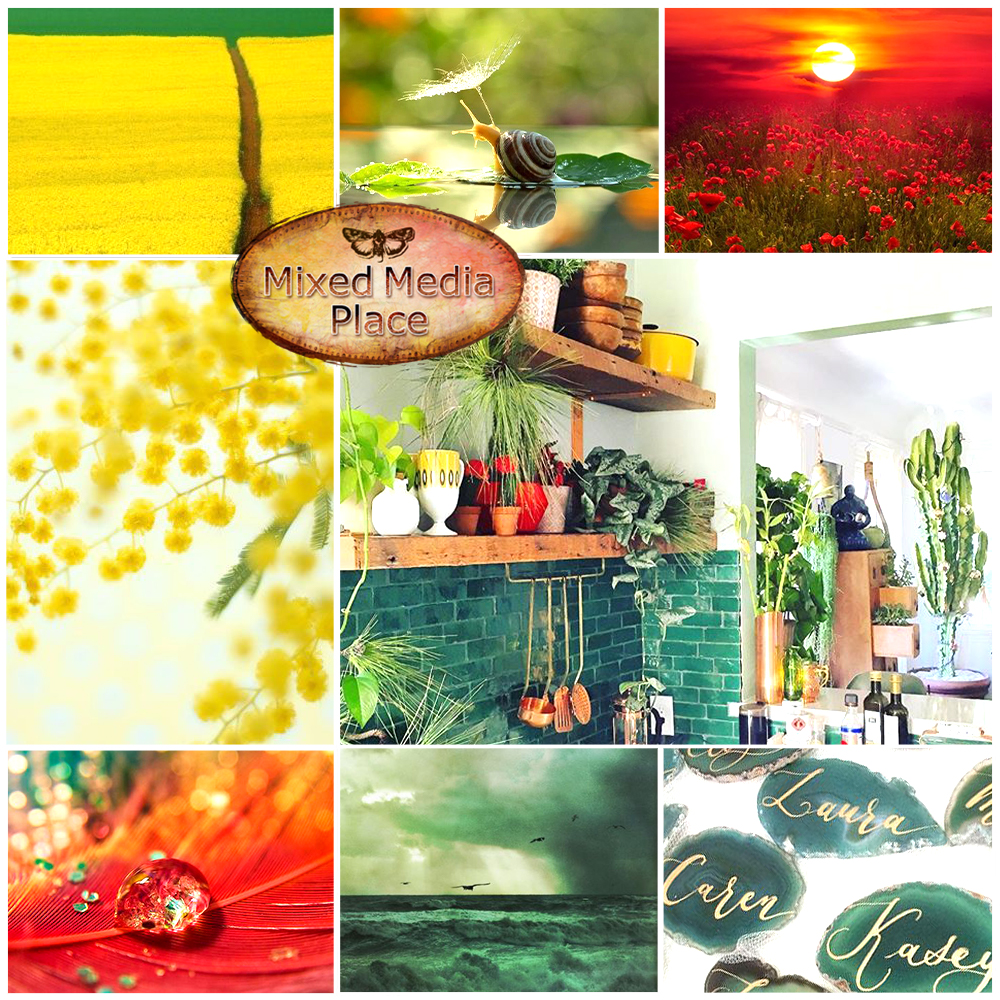
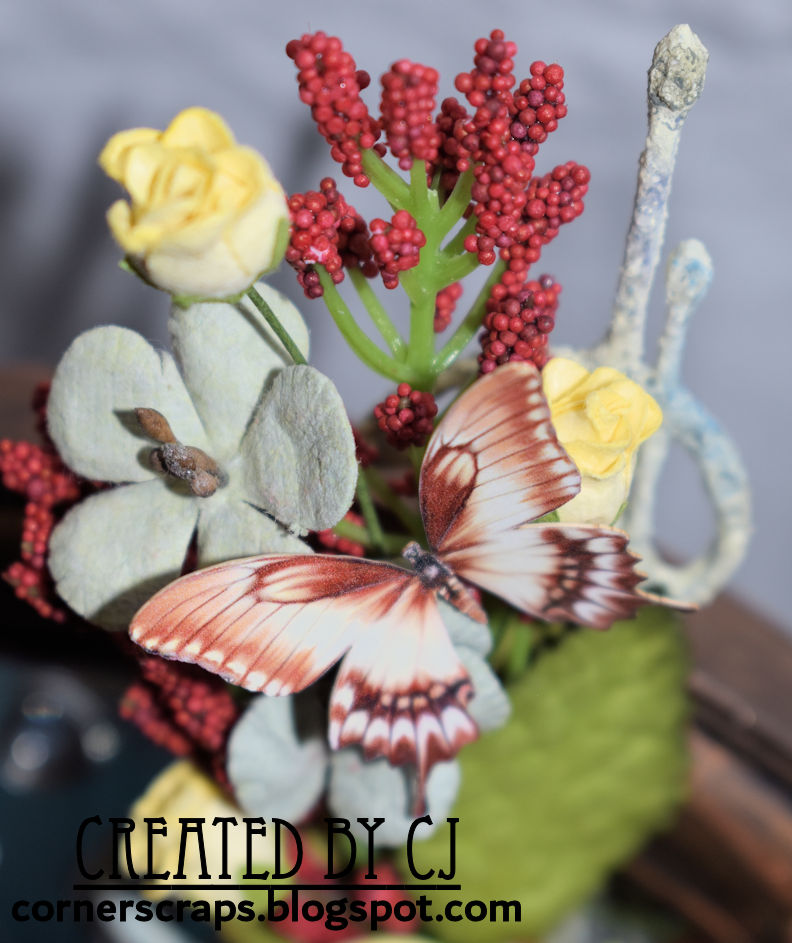
December 2021 Moodboard:

moodboard


For my base I created my own “stain” using the silver paint from the mixed media kit, the Distress Oxide from the Advent kit, and some clear gesso. I had to cover (practically) every surface of the calendar with it! I just couldn’t leave anything unfinished! Do you have to? No! The only surfaces I didn’t stain were the drawer fronts and the inside of the back panel of the roof – because they would be getting covered with gel medium and paper! (The measurements for my “stain” are approximately 1/3 cup clear gesso, between 1/4-1/3 of the bottle of silver paint, and 60 full squirts of the Distress Oxide Spray – and yes, I rubbed it in, I didn’t brush it on!)

FRAMED-20211202_222711

My drawer fronts are covered in paper from 49 & Market found in this month’s Scrapbooking Kit. I used two sheets of paper, and probably close to 2/3rds of the package of rub-on’s! (To make sure your paper(s) are centered, work from the center out!) At the bottom edge of the bottom row of drawers and the top edge of the top row, I added some of the Snow Glitter to “fill-in” the small gaps since the drawer fronts, when all together, are slightly larger than 12 inches. After the rub-on’s, and before the snow, I sprayed four layers of Krylon Matte Finish for some extra protection.

FRAMED-20211202_222602 FRAMED-20211202_222628

After the gel medium I used to attach the papers dried fully, I just started layering the rub-on’s (before the snow glitter). In the center of the Advent I added the large die cut wreath and roses from the paper pack and then came in with a few of the rub-on poinsettias. My “knobs” are Tim Holtz Hitch Fasteners (I pre-drilled my holes!) and, using jump rings, I hung the Tim Holtz Number Tokens that can be found in the Advent Kit.


Once I saw the watercolor tree paper I knew it belonged in the roof! It really shaped how the rest of my Advent Calendar came about. If you look closely at the trees, you can see where the pattern starts it’s repeat, I made that specific tree the center of my background. With careful cutting and placement, the seam is practically invisible – especially with the “distraction” of all the other trees in the top!

FRAMED-20211202_222701

I used a variety of Distress Crayons to add color to my trees and deer, I didn’t want to paint them, and I didn’t want to stain them – watery liquids will follow your wood grain and I wanted more control without having to seal the wood first and I still wanted the wood grain to show. The Distress Crayons gave me that control! I could control where my colors went and rub them in to still show the grain! (My deer and trees were also coated with the matte spray so the “snow” wouldn’t activate the water-reactive Crayons)

FRAMED-20211202_222937

FRAMED-20211202_222825

FRAMED-20211202_222949

If you watch the video, you will see that I “dye” my deer and trees before I ever add the crayons. I did this for a couple of reasons – 1) The color of the wood can effect the colors placed on top – like the difference of what happens when you use white or black gesso and 2) I rarely know exactly what I am going to be doing so I like to “be prepared”!

In addition to the Glitter Snow in the kit, I made my own snow paste! I just had to have snow everywhere!! I didn’t even mind the snow on the legs of the deer! Why? Have you ever walked through snow? That stuff will stick to you and I think it helps add to the illusion of movement – like the deer were really walking through.

FRAMED-20211202_222801 FRAMED-20211202_222804

I also added some white bottle brush trees from my stash and a small string of lights inside the roof. On the front panel, I had to add more snow! I finished drawing the snow mounds across, laid down a layer of white gesso, then added my snow pastes!

FRAMED-20211202_222637 FRAMED-20211202_222645

For my roof I wanted snow, but I also wanted the shingles to show – so I compromised using a stencil! After I stained my roof I added a few coats of sealer in hopes the pastes wouldn’t break through and absorb the stain. It worked – mostly! I added my stenciling to the roof, then the roof peak so I could blend it into the stenciling and while the paste was still wet, I added glitter.

FRAMED-20211202_222526 FRAMED-20211202_222751

Thank-you for joining me here in my corner! I hope you enjoyed this project and it gave you some ideas of what you can do using the Advent Calendar Kit and the Scrapbooking Kit!

Stay Crafty, Friends!


Did you get a kit? Share what you made in our Facebook Group!

Thank you for joining us here at Tres Jolie Kits!


Tres Jolie can be found at the following places:

Tres Jolie Facebook

Tres Jolie Instagram

Tres Jolie Website

Tres Jolie Subscriptions

Tres Jolie Blog

Tres Jolie YouTube

Tres Jolie Pinterest


ADVENT-CALENDAR-KIT unnamed mmkit

In addition to the Advent Calendar Kit and the December Scrapbooking & Mixed Media Kits (*from previous Tres Jolie Kits), I used:

*Lindy’s Gang “Sidewalk Chalk” Flat Fabio Spray; *Cosmic Shimmer Crackle Paste “Frosted Aqua;” *Tres Jolie Crackle Medium; TCW Light & Fluffy Modeling Paste; Ranger/Tim Holtz “Speckled Egg” Distress Paint, Distress Crayons: “Tree Lot,” “Iced Spruce,” “Snow Flurries,” “Empty Tomb,” “Crooked Broomstick,” “Old Paper,” “Wild Honey,” “Scattered Straw,” “Tea Dye,” “Black Soot,” “Speckled Egg,” “Frosted Juniper,” & “Weathered Wood;” Ranger Brayer; idea-ology/Tim Holtz Hitch Fastners; Prima/Finnabair Heavy White Gesso, “Bindweed Wallpaper” Stencil; Liquitex: Clear Gesso, Matte Gel, Gloss Super Heavy Gel, and Acrylic Inks: “Titanium White,” “Naphthol Crimson,” “Yellow Medium Azo,” & “Phthalocyanine Blue;” Krylon Workable Fixatif & Matte Finish; Daler Rowney White Gesso; 4mm & 8mm jump rings; foam snow; JoAnn’s Makers Holiday Littles White Bottle Brush Trees; Gorilla Wood Glue, double sided tape; Scotch Tape; E6000; Starry Lights: Warm White

Tres Jolie Kit Club-iNSD 2020 Challenge-Masculine Layout

Hey, all! Welcome back to my blog! Here are some more photos and a video of the project I did for Rae’s “Masculine Layout” challenge, sponsored by the Tres Jolie Kit Club, for International Scrapbooking Day (iNSD)!

To recap, the challenge was to create a masculine layout that included stenciling and chipboard, plus a bonus for using flowers! I used four stencils, I have a piece of chipboard from the May scrapbooking kit and some Grungeboard from my stash, and I got the flowers on…something that isn’t always easy with a “masculine” layout! Plus, and I like to think my subconscious was helping me out here, my layout fits this months sketch challenge (with the sketch rotated 180°, shown below).

DrakeAdventure-RaesNSDchallenge-FRAMED

Original Sketch

Rotated Sketch

sketch sketch

Check out my video to see what I did!


DSC_0009-FRAMED DSC_0011-FRAMED
I layered my stenciling on top of each other before topping with my Grungeboard chevrons! With all the stenciling, there was already so much going on that I opted to keep it relatively simple around the photo.
DSC_0010-FRAMED DSC_0014-FRAMED
I created the colors I wanted for both of the texture pastes using the paints from the Mixed Media kit & items from my stash (see video for full details!) The chevrons were painted with just simple black gesso (from the Mixed Media kit! to keep them nice and matte!
DSC_0008-FRAMED DSC_0013-FRAMED
Getting flowers on a masculine layout isn’t always easy, but I dug into my stash and pulled out pack of neutral flowers. I don’t know how long I’ve owned those Tim Holtz Framed Words, but I found a place for “Adventure” with this layout!

I hope that you were able to join us over at Tres Jolie for the iNSD challenges! I also hope that this layout gave you an idea of what can be done with items from the kits this month, and with the sketch!


May 2020 Scrapbooking Kit

May 2020 Mixed Media Kit

Scrapbook kit Mixed Media Kit

In addition to items from this month’s scrapbooking and mixed media kits (*from previous Tres Jolie Kits), I used:

KaiserCraft 12×12 Stencil – “Textures,” Fabrika Decoru Stencils – FDTR 37, FDTR 132, & FDTR 36, Tim Holtz Film Strip Ribbon, Tim Holtz “Nostalgic” Tissue Tape, Tim Holtz Alpha Parts “Framed,” Tim Holtz Grungeboard, StazOn – “Jet Black,” Distress Oxide – “Ground Espresso,” 13@rts  – *Acrylic Texture Paste & *Magic! Powder, Art Philosophy Concentrated Watercolor – *“Onyx” & *“Bora Bora,” Lindy’s Gang Magical Shakers *“Glittering Gold” & *“Bratwurst Brown,” Vicki Boutin Acrylic Paint – “Watermelon Burst,” Ranger Mini Blending Tool, Prima 2” Silicone Brush, Ranger Brayer, Liquitex Clear Gesso, LineCo PVA Glue, Art Glitter Glue, Krylon Workable Fixatif


Did you get a kit? Share what you made in our Facebook Group!

Thank you for joining us here at Tres Jolie Kits!


Tres Jolie can be found at the following places:

Facebook: https://www.facebook.com/groups/121919621993809/

Instagram: https://www.instagram.com/tresjoliekits/

Tres Jolie website: https://tresjoliekits.com/

Tres Jolie subscriptions: https://tresjoliekits.com/services/

Tres Jolie blog: https://tresjoliekits.com/blog/

Tres Jolie YouTube: https://www.youtube.com/channel/UCVBFOOKxZzsXs2tl4MMqSKg?view_as=subscriber

Believe (Mixed Media Project)

My project “Believe” created for the August Challenge over at the Mixed Media Place blog.

Maybe it’s the fact that I feel like summer is never going to end where I live, but the second and third photo on the top row of the Mixed Media Place mood board, at first glance, looked like ice on the foliage. I’m not exactly a person who likes being cold, and I live in a southern state, but I’ve had it with summer this year! It’s the middle of September and we are still hitting the mid-90s! Which, according to the weather last night, is a full ten degrees above average! Too, too much I tell ya!

Beside the thought of ice, I really loved the colors in general on the mood board! It’s filled with most of my favorites! But once I had blue + white + ICE!! on my mind, I had to go with it! Below the mood board you will find a process video, some more photos, and a full product list.

Process Video:

Close-up Photos:

Products

  • AB Studio
  • Chipboard Background 30×30 (centimeters) ID-4
  • Creative Embellishments
    • Holly and Berry Flourish
  • Shimmerz
    • Vibez
    • Frost Bite
    • Snow Way Man
  • DecoArt
    • Weathered Wood
    • Crackle Medium
  • Ranger
    • Tim Holtz
    • Distress Crackle Paint
    • Clear Rock Candy
  • Distress Glitter
    • Clear Rock Candy
  • Embossing Powder
    • Blue
    • Snowflake Tinsel
  • Simon Says Stamp
    • Embossing and Watermark Ink
    • Clear
  • Krylon
    • Workable Fixatif
  • Liquitex
    • Gloss Gel
  • Unknown
    • All the artificial foliage. I bought it at JoAnn’s … last year.

    Letters for Linny! (ReneaBouquets "Initial" Swap)

    Linny’s Initials – for the ReneaBouquets Initial Swap hosted by Donna (bonprof) over at scrapbook.com!

    At the start of the swap, when we exchanged addresses, Linny told me her craft room was mauve, burgundy, pink, green, and cream, so I tried to make it so her letters would match her already established decor! (She told me they would go well in her craft room, so mission accomplished!)

    Below you’ll find the process video, some close up photos, and the full product list!
    Process Video:
    Close-ups


    Products:

    • [From the] Tres Jolie Cards, Tags, & More Sept. 2019 Kit
    • Dress My Craft
    • Vintage Saga
    • 6×6 Collection Pack
  • Lindy’s
    • Embossing Powder
    • Oakleaf Olive
        • ReneaBouquets
          • Shard Glitter Glass
          • Pearl
        • Beautiful Beads
          • Glass
          • Cranberry (Gifted to me by Terry in the Nov. 2018 RB Swap! Thank-you, Terry!!)
        • Mulberry Paper Roses
          • Green (Don’t know the “proper” name.)
          • Pink Spring Mix
          • Mini Mermaid Tails (the ivory ones)
          • The ‘other’ pink ones (I don’t know which set they came from)
        • Ranger
          • Perfect Pearls
          • Blush
        • Prima
          • Finnabair
          • Metallique Acrylic Paint
          • Red Wine
        • Texture Paste
          • White Crackle
          • Paper
        • Wax Cire Cera
          • Sweet Rose
        • Art Anthology
          • 6×9 Stencil
          • Lattice
        • Simon Says Stamp
          • Embossing and Watermark Ink
          • Clear
        • Liquitex
          • Matte Super Heavy Gel
          • Matte Gel
        • JudiKins
          • Diamond Glaze
        • Jacquard
          • Gum Arabic
        • Unbranded
          • L & J Wood Block Alpha (Sold by Fantwa, according to my Order History, on Amazon)

          Origin (Canvas) – MTW Sept. 2019

          Over on the More Than Words Challenge blog this month we were tasked with finding inspiration from the word “Origins” and using the colors of our country. I love genealogy, so for me “Origins” is “where did I come from?” I love seeing faces of people I never knew and finding some resemblance!

          For this project I used a photo from Ancestry.com of my great-great grandparents and eight of their ten children and maybe a grandchild (the youngest being held). Based on records on Ancestry.com, this photo is over 104 years old. (The youngest girl passed away in 1905 at only 12 years old.)
          I chose this photo for this project for a couple of reasons. First, it is representative of the Cherokee I have in my family history. Besides the red, white, and blue of the United States, I (tried to) incorporate the colors of the flag of the Cherokee Nation, orange, yellow, green, and black. The following is from Cherokee.org’s FAQ page regarding the flag and seal:

          The seal of the Cherokee Nation was created by an executive Act under Chief Lewis Downing in 1869. The Act calls for the seal to contain a seven-pointed star inside of a wreath of oak leaves, symbolizing the eternal flame of the Cherokee people. The star is not designated to point a specific direction, but in the original version from 1869, it rests on a single downward point. The points of the star represent the seven traditional Cherokee clans. Within the rings of the seal, the words Cherokee Nation, September 6, 1839, are included, recognizing the date of the signing of the first Cherokee Nation Constitution after relocation to Indian Territory, as well as the date of the Act of Union, uniting the Old Settlers and Eastern Immigrant Cherokees into a single Cherokee Nation government once again.

          The Cherokee Flag contains the Cherokee Nation seal (see the question above for the full symbolism of the seal) in the middle with seven stars in the outer field along with a single, black star. The seven stars in the outer field represent the seven clans, and the one additional star, which is black, is to remember those who died as a result of the Trail of Tears.

          In addition to the Cherokee in my history, the “white” part of this particular branch of my family has been in the United States since before it was the United States! So, there you have it! The colors of my country and what “Origins” means to me!

          Process Video:


          Close-ups:


          Products:

          • [From the] Tres Jolie Sept. 2019 Mixed Media Kit
          • 9×12 Canvas
          • 13@rts
          • Mixed Media Stencil
          • His & Hers Remastered
          • Mechanical
        • Ayeeda Paint
          • Red Bronze
          • Snow Cap
        • Ayeeda Powder
          • Rusty Bronze
        • Rust Reagent
        • Ayeeda Powder 3D
          • Old Gold XS Microspheres
        • Lindy’s
          • Starburst Squirts
          • Beaver Tail Brown
          • Hockey Puck Black
        • 13 @rts
          • Ayeeda Mist
          • Patina Bronze
        • Prima
          • Prima Flowers
          • Item #637682
          • Item #632014
        • Resin Icons
          • Item #573355 (Feathers)
        • Finnabair
          • Metallique Paint
          • Royal Blue
        • Ranger
          • Tim Holtz
          • Mini Blending Tool
          • Splatter Brush
          • Distress Paint
          • Lucky Clover
          • Candied Apple
        • Dylusions Paint
          • Tangerine Dream
        • Glossy Accents
        • 49 & Market
          • Vintage Shades Flowers
          • Yellow Cluster
        • Graphic 45
          • Rose Bouquet Collection
          • Triumphant Red
        • Folk Art
          • Enamels
          • Yellow Light
        • Liquitex
          • Matte Gel
          • Matte Super Heavy Gel
        • Unknown/Unbranded
          • Texture Pebbles

          Mermaids Welcome (Shadow Box)

          “Mermaids Welcome” Shadowbox! Created for the “Paradise In August” Collaboration between ReneaBoquets & Crafty City!

          Process Video:


          Close-ups:


          Products

          • ReneaBouquets
          • [From] Treasure Box #1
          • Chunky Glitter Glass
          • Diamond
        • Beautiful Beads
          • Unicorn Candy
        • Printed Beautiful Board Laser Cut Chipboard
          • Small Ocean Orchid Mermaid
          • Tiny Sunkissed Mermaid
        • Beautiful Board Laser Cut Chipboard
          • Small Mermaids Welcome Sign
          • Small Seashell Frame
        • Beautiful Board (From Stash)
          • Small Nautical Anchor
        • craftycity
          • Mintay
          • Paradise
        • Fabrika Decoru
          • Shadow Box
        • idea-ology
          • Tim Holtz
          • Vignette Hardware
          • Corked Domes
        • Ranger
          • Emboss It Pen
          • Tim Holtz
          • Distress Oxide
          • Cracked Pistachio
        • Emerald Creek
          • Seth Apter
          • Baked Texture
          • Dirty Sand
          • Chunky Rust
        • Prima
          • Finnabair
          • Metallique Wax
          • Rose Gold
        • Texture Paste
          • Anemone & Coral Set
          • Blue Green
          • Fire Orange
          • Taupe Rose
        • US Shell Inc.
          • Hobby Shells
          • Cholla Pieces
        • Jacquard
          • Gum Arabic
        • Liquitex
          • Matte Super Heavy Gel
        • JudiKins
          • Diamond Glaze
        • E6000
        • Beacon
          • FabriTac
        • Unknown/Unbranded
          • Sand
          • Pebbles
          • Texture Pebbles
          • Seashells
          • Sand Dollars
          • Starfish
          • Glass Decor Pebbles
          • Gold-ish Beads (I received them from Brandy M. in a swap!)
          • Clear & White Pearls/Beads
          • Clear Microbeads
          • Chain
          • Spoon
          • Burlap Ribbon
          • Glass Micro Beads (they are intended for fingernail art, so they are super micro!)
          • Sand
          • Gold
        • Glass Vials
        • Sea Soul

          My altered frame for the August Lindy’s Gang Color Challenge!

          This month for the Lindy’s Gang Color Challenge I put together this picture frame specifically to hold a picture of my mom when she was around two years old, standing waist deep in the ocean! (But I blurred her out because her swimsuit didn’t fit quite “perfect,” and in today’s time…*shrug*)

          The following Lindy’s products can be found on this project (full product list after photos):

          “Hawaiian Islands” Flat Magicals
          *I used “Plumeria Pink” & “South Shore Sand” on my project*

          “Time Travel Teal” Magical Shaker

          The Lindy’s Gang Color Challenge!

          Process Video:

          Close Ups:

          Products:

          • Lindy’s Gang
        • ReneaBouquets
          • Light Pink Mulberry Paper Roses (these specific ones aren’t currently listed, so she may be out, or I may have bought “Special Edition” ones. I also don’t know the “official” name!)
          • Chunky Glitter Glass
          • Diamond (It is mixed in the sand, so it doesn’t really show up unless the light hits it just right)
        • Fabrika Decoru
          • Chipboard
          • FDCH 320
          • FDCH 321
          • FDCH 322
        • Ranger
          • Embossing Powder
          • Aqua Tinsel
        • Prima
          • Finnabair
          • Texture Paste
          • White Crackle
        • Simon Says Stamp
          • Clear Embossing Ink
        • Jacquard
          • Gum Arabic
        • Liquitex
          • Matte Super Heavy Gel
        • JudiKins
          • Diamond Glaze
        • Unknown/Unbranded
          • Sand
          • Gold Microbeads
          • Texture Pebbles

          Beach Wall Plaque

          ReneaBouquets and Crafty City are having a collaboration this month (Aug. 2019) called Paradise In August! ReneaBouquets has two “Treasure Boxes” to choose from (Treasure Box #1, Treasure Box #2) that work wonderfully with the Mintay “Paradise” Collection available at Crafty City!

          For this project I used items from Treasure Box #1, and I have more than enough to do, at least, two more projects. (For the ideas I have swimming about anyhow!)

          After the following photos is the process video, some close-up photos, and a product list.

          ReneaBouquets Treasure Box #1
          12×12 Paper Collection
          6×6 Paper Collection

          Process Video:

          Some close ups:


          Products

          • ReneaBouquets
          • Chunky Glitter Glass
          • Diamond
        • Beautiful Beads Candy – Flat-back Pearls
          • Cotton Candy
        • Beautiful Board
          • Starfish with Accents Set
        • Beautiful Board
          • Starfish (2 from stash)
          • April in Paris 
          • Small Adornment Pattern
        • [From] Crafty City [for the collaboration with ReneaBouquets]
          • Mintay
          • Paradise Paper Collection
          • 12×12 Paper Pad
          • 6×6 Paper Pad
        • Lindy’s
          • Magical Shakers
          • Grab A Guy Gold
          • Alpine Ice Rose
          • Bratwurst Brown
        • Art Anthology
          • 6×9 Stencil
          • Lattice
        • Prima
          • Art Philosophy
          • Concentrated Watercolor
          • Bora Bora
        • Finnabair
          • 3D Gloss Gel
        • Ranger
          • Perfect Pearls
          • Blush
          • Perfect Pearl
        • Tonic
          • Tim Holtz
          • Paper Distresser
        • We R Memory Keepers
          • 3 Way Corner Punch
          • Jacquard
            • PearlEx
            • Flamingo Pink
          • Mod Podge
            • Gloss Acrylic Sealer
          • Krylon 
            • Workable Fixatif
          • Darice
            • Wood Plaque
          • JudiKins
            • Diamond Glaze
          • Daler Rowney
            • White Gesso
          • Liquitex
            • Matte Super Heavy Gel

            Fairy Mirror

            A little decorative mirror I put together for the July 2019 Mixed Media Place Challenge.

            For this project I was inspired by the colors found on the July, Mixed Media Place, mood board, most specifically the yellows, reds, and seafoam green. Especially since the green on the ReneaBouquets Fairy “Belle” was a fantastic match!

            Below the mood board you’ll find a process video, some close up photos, and a product list.

            Process Video:

            Close-ups:

            And, because she happened to come along, Lucy (Great Dane) is helping to demonstrate how well the mirror works!

            Products:

            • ReneaBouquets
            • Beautiful Board
            • Fairy Belle (Small)
          • Mulberry Paper Roses
            • Yellow & White Curly Roses
          • Double Sided Print, Premium Paper Butterflies
            • Salted Caramel
          • Dusty Attic
            • Chipboard Flourish (I don’t know which one)
          • 49 & Market
            • Blossom Blends
            • Aloe
          • Prima
            • Finnabair
            • Wax Cire Cera
            • Firebird
          • Rust Effect Paste
            • Cream
            • Moss
            • Cool Grey
          • Flowers
            • A Victorian Christmas
            • Item #583507
          • Ranger
            • Tim Holtz
            • Distress Paint
            • Ground Espresso
            • Black Soot
          • Liquitex
            • Matte Super Heavy Gel
          • Daler Rowney
            • White Gesso
          • JudiKins
            • Diamond Glaze
          • Unknown/Unbranded
            • Mirror (I bought it at Dollar Tree)
            • Cabochons