Tres Jolie Kit Club–Memory Dex Cards!–June 2022 Cards, Tags, & More Kit

Hey, y’all!

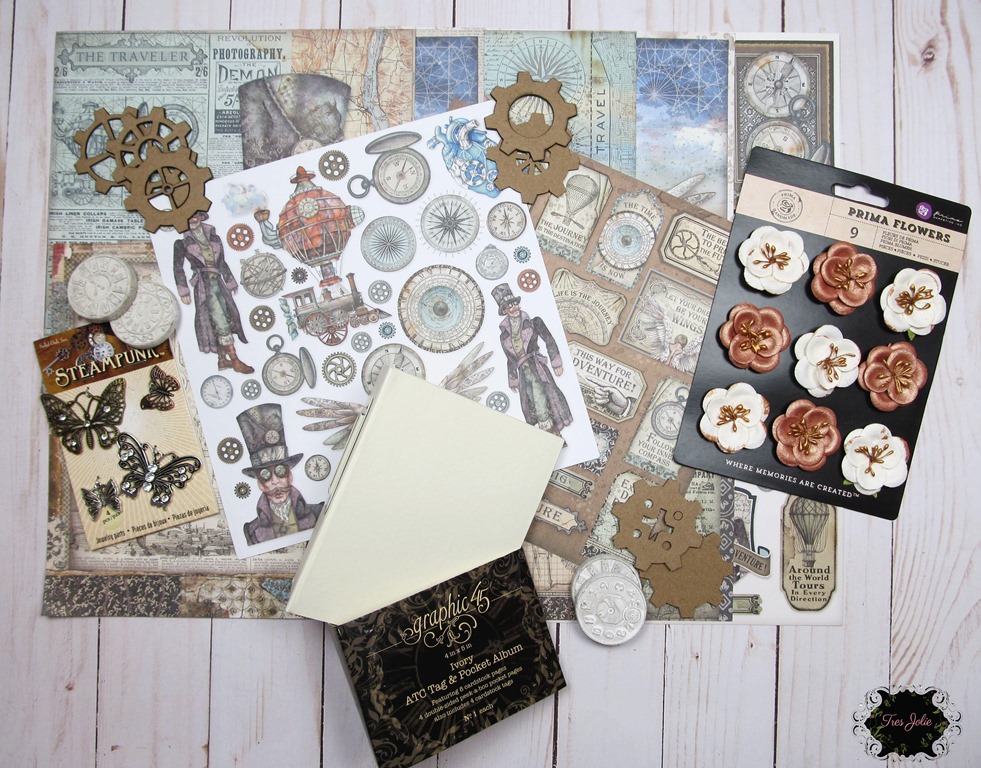
We’re halfway through June, and this week I have some Memory Dex cards for you that I created using items from this month’s Cards, Tags, & More Kit from Tres Jolie Kit Club and items from my stash – quite a few from previous Tres Jolie Kits! Check out my video to see what I did for each of the cards I made – then grab up your supplies and create your own Memory Dex card(s).

memoryDex-jun22ctm-04

I had bought the Heidi Swapp Memory Dex Spinner quite some time ago, and had originally thought of grabbing up some spray paint and changing the color – I might still do that – but I grabbed it up for this project so I’d have someplace to put my cards when they were done, and to make sure I didn’t make them too tall to clear the bottom! Depending on what kind of “–dex” system you have – be it a spinner, a box, something vintage, or something custom made – you can get very creative on how your Memory Dex cards are made! If, for example, you have the Memory Dex Box, you don’t have to worry about height, only width! (After this project was completed I happened to find a vintage Rolodex® system that would allow cards to fit in without any height or width restrictions!! *happy dance*)


Video:


A closer look at the cards I made:

memoryDex-jun22ctm-06 memoryDex-jun22ctm-09

My Concord & 9th “Lucky” Die cuts the three layers – thick line and outline from one die, thin line from another – so I made two lucky cards. The thick line and outline were cut from a half sheet of the white cardstock that I hand-inked up using a variety of Distress Oxides from my stash. The white pieces were from another partial sheet of the KaiserCraft cardstock, and on some of those, like the butterfly, I added some Distress Oxide to give a pop of color. I didn’t have any particular plans when I set out to make my cards, I just cut a lot of pieces and started layering; generally ending with a few of the Eyelet Outlet jewels and/or some of the small Prima butterflies.

memoryDex-jun22ctm-07

I made my “Imagine” card a shaker card by cutting a circle out of the pink striped paper from this month’s kit, adding a sheet of craft foam with a circle cut out as a spacer, and filling it with some of the beads and sequins from the Buttons Galore cube from Septembers (2021) Cards Kit. I just used some plastic from an old package of die cuts – I often save the harder/stiffer plastic packaging for just this reason! – and stitched it in place with some metallic silver thread. My “Imagine” as a layer of the “Gamboge” Stencil Butter on it from the Mixed Media Kit and, while it was still wet, I sprinkled some Lindy’s Magical Powder on and spritzed it with a little water.

memoryDex-jun22ctm-05 memoryDex-jun22ctm-12

These two cards were really a couple of “let’s see how these parts work together” cards! The “grateful” card has a slot cut from the top (the label die from Tim Holtz’s “Stitched Slots”) that I just tucked a couple of large die cuts into after giving them a little color. The flower is just inked with some Distress Oxide, and the leaves have some Lindy’s Magical’s sprinkled on them. I cut the card from my inked KaiserCraft sheet, backed it with some of my leftover handmade paper, and added some stamping, jewels, & butterflies. The “grateful” had originally been stamped, but it didn’t show up very well, so I traced over it with a gel pen.

I wasn’t sure when I cut it if I would use the Bird Branch die, but I added some Magical’s, let it dry, and thought about what I’d do with it while working on other cards. Eventually, it came time to play with it, and I found that I liked how it looked with the oval frame, but the frame needed some color too! So on went some Magical and PearlEx powders. The card is another cut from my inked sheet and has some of the “Grecian Gold” Modeling paste (from the Mixed Media Kit this month!) dabbed on with my finger for a little shine. Then, to add a bit from this month’s Card’s Kit, I popped on a tab punched from one of the papers, added some orange jewels, and a Tim Holtz “Small Talk” sticker from my stash.

memoryDex-jun22ctm-11 memoryDex-jun22ctm-15

These two Memory Dex cards were made from a piece of scrap cardstock that I practiced a couple of mixed media ideas on. I have some texture paste, mica powder, and Magical powder on the base tag/Memory Dex, then I stamped the butterfly from the stamp in this month’s kit, I cut a tag-shaped frame out from my inked paper, layered a couple of more tags vertically, popped in a flower, added my jewels and phrase.

While I was doing all of my cutting, I decided to make a round Memory Dex card, so I used one of my circle dies to cut out the inked stenciling I had done (stencil from this month’s Mixed Media kit!). I stamped on the butterfly and phrase, attached a rectangle bottom, and ran it through my sewing machine a few times. The final touches were some Distress Oxide around the edges and the jewels.

memoryDex-jun22ctm-10

When I first started this card I had thought of just attaching the pocket to another card, but as I was putting it together, I decided that I much preferred the pocket as the card! The top slot is backed by some pink cardstock from my stash, and the rest of the slots are back with white cardstock – what had been the original Memory Dex shaped card. The Tim Holtz “Stitched Slots” die is the perfect size for the spinner, I just punched the slots at the bottom and popped it right on. I used some of the smaller tags, cut with the tag dies from this month’s kit and cut from this month’s papers, to stick on some “Small Talk” phrases and slipped them into the slots. They don’t weigh a lot, so the friction between the papers is enough to hold them in place when they are upside down on the spinner. I then just added some of my die-cut hearts, outlined them with a yellow gel pen, added the label, and another “Small Talk” sticker.

memoryDex-jun22ctm-13 memoryDex-jun22ctm-14

The card with the bicycle stamped on it was probably the fastest to put together because all I did is layer up the different circles I had already cut out! I used the pink striped circle to fill the circle in the card base, then put the layers through my Sizzix using the dot embossing folder that had come with the machine, added that half-circle with some Lindy’s Magical’s stenciled on, and then all of the other plain circles. To add some contrast to all those circles, I popped on one of the smallest tags, then stamped on the bicycle and added the butterfly and phrase.

My “Spring” card was my first of the batch! I trimmed an inch off the width of a 3”x5” index card so it would fit on the spinner, used the stamp from this month to just get the flowers to peek out from behind the tag, and splattered it with some “Lemon” Glossy Spray. The tag is from some pink cardstock I had that was already adhered to an adhesive sheet. I used the thin scraps from my Folio at the beginning of the month, and just randomly layered them on the adhesive. I then cut the tag using the next to largest die in the set, peeled the protective paper the rest of the way off, and brushed on some Finnabair Mica Powder. Then I just finished up the details with some flowers, jewels, a butterfly, and the small tag.

memoryDex-jun22ctm-08

Lastly, my “document” card. The die-cut word was too long to fit on the Memory Dex Spinner, so I cut it where it could be hyphenated, clipped off an end of the cross-mark on the “t” to use as the hyphen, and layered up a couple tags and a tab on the base card. I used some of the “Grecian Gold” Modeling paste on “document,” the stars and diamonds are from my Concord & 9th Lucky Die Set, there’s a little stamping, and a few jewels, and this card was done!

memoryDex-jun22ctm-01 memoryDex-jun22ctm-02 memoryDex-jun22ctm-03

Thank you for joining me here in my corner! I hope you enjoyed seeing these cards and they inspired you to make your own Memory Dex card or two!

Stay Crafty, Friends


Corner Scraps can also be found at:

Corner Scraps Studio Etsy

Corner Scraps Instagram

Corner Scraps Facebook

Corner Scraps YouTube

Corner Scraps Pinterest

Tres Jolie can also be found at:

Tres Jolie Facebook

Tres Jolie Instagram

Tres Jolie Website

Tres Jolie Subscriptions

Tres Jolie Blog

Tres Jolie YouTube

Tres Jolie Pinterest


Tres Jolie Insta Square Frame

In addition to this month’s Cards, Tags, & More Kit (*from previous Tres Jolie Kits), I used:

Some items (non-Tres Jolie) contain an affiliate link where I earn a commission at no extra cost to you!

Lindy’s Gang: Magical Shaker: *Guten Tag Teal, *Oktoberfest Orange, & Yodeling Yellow, & *Magical “Bougainvillea Fuchsia;” *Jacquard PearlEx “Misty Lavender;” Ranger/Dina Wakley: *Glossy Spray “Lemon;” Prima/Finnabair: *“Vintage Roses” & *“Pearls & Crystals” Mica Sets; Darice: *“Mosaic Butterfly” Embossing Folder; *Embossing Essentials “Oblong Frames,” & *Embossing Essentials “Oblong Doily Frames;” Dress My Craft: *“Classic Doily” & *“Crochet Doily” Dies; Buttons Galore: *“28 Lilac Lane;” Ranger Opaque Matte Texture Paste; StazOn “Olive Green” StazOn “Royal Purple” Ranger/Tim Holtz: Distress Oxide Spray “Dried Marigold” Distress Oxide “Speckled Egg” Distress Oxide “Squeezed Lemonade” Distress Oxide “Kitsch Flamingo” Distress Oxide “Villainous Potion” Distress Ink “Villainous Potion” Distress Ink “Speckled Egg” Ranger/Wendy Vecchi: Archival Ink “Watering Can” idea-ology/Tim Holtz “Small Talk” Concord & 9th “Lucky” Die Set, Heidi Swapp: “Imagine” Die, “Document” Die, Memory Dex Dies (Oval) Memory Dex Punch & Memory Dex Spinner (Black) Spellbinders Tool ‘n One & Standard Circle Nestabilities; We R Memory Keepers 3-Way Corner Punch & Tab Punch; Sizzix: Big Shot Plus (Big Shot Plus Starter Kit) Sizzix/Tim Holtz: “Tattered Florals” & “Bird Branch” Bigz Dies, & “Stitched Slots” Thinlits; Sakura Gelly Roll Moonlight & Gelly Roll Souffle Pens; Scrapbook Adhesives 12×12 Adhesive Sheet; Aleene’s Tacky Glue; Krylon Workable Fixatif; JudiKins Diamond Glaze & MicroGlaze; Art Glitter Glue; adhesive foam squares; Tonic/Tim Holtz Stamp Platform; We R Memory Keepers 3-way Corner Punch; Unbranded Memory Dex/Rolodex Dies; blending brushes; 1/4” & 1/8” double sided tape, craft foam; *spray bottle; 3×5 index cards

Tres Jolie Kit Club–Anything Book–October 2021 Cards, Tags, & More Kit

Hey, all! Welcome back to my corner!

For my final Tres Jolie Kit Club project of October, I’m bringing you an “Anything Book.” I call it an anything book because you could easily use it as a mini-album, mini art journal, mini notebook, etc. Personally, I really wanted a mini art journal with pockets and flip-outs.

FRAMED-20210919_173350

My inspiration for this project came from Pinkstrawberryz “No Binding Easy Mini Album.” It was just one of those “You might like” recommendations that randomly popped up on YouTube, so I decided to have a look! As soon as I watched the video I had ideas brewing! Check out my video to see how I put my Anything Book together. (Below the video you will find photos of the inside and the measurements for my pages.)


Video:


Here is a look at some of the pages I started preparing:

FRAMED-20211003_110402 FRAMED-20211003_110424

After my book was together I used clear and white gessoes to prepare the pages. With my gesso dry, I was then able to start laying down mediums to prepare working backgrounds. I just grabbed up various paints and started laying them down! To make the book cover, I grabbed up some burlap trim, cut it to length, and stitched it in place during assembly.

FRAMED-20211003_110443 FRAMED-20211003_110455

Some areas have acrylic paint and some have watercolors. I started drawing on a couple of the pages—flowers in some places, and this face above. I also grabbed a few pens and outlined the flowers from the paper pack.

FRAMED-20211003_110513 FRAMED-20211003_110527

I didn’t always use a brush with my paints, some times I just used a palette knife to scrape it on! I also grabbed up some of my Dina Wakely Scribble Sticks and added some…well…scribbles! I have a short flip-though of my mini art journal (as far as it had been “finished” at the time of filming!) over on my Instagram post for this project.


Measurements (in order of page in book):

2021-09-17_18.14.152021-09-17_18.15.302021-09-17_18.16.112021-09-17_18.16.36


In my video, I talk about the process of making the cover using some Amazing Cast Resin and the embossing folder!FRAMED-20211003_110345

Thank you for joining me here in my corner! I hope you enjoyed this project and it gave you some ideas of what you can make using items found in this month’s Cards, Tags, & More Kit!
Stay Crafty, Friends


Did you get a kit? Share what you made in our Facebook Group!

Thank you for joining us here at Tres Jolie Kits!


Tres Jolie can be found at the following places:

Tres Jolie Facebook

Tres Jolie Instagram

Tres Jolie Website

Tres Jolie Subscriptions

Tres Jolie Blog

Tres Jolie YouTube

Tres Jolie Pinterest


October Cards, Tags, & More Kit:

cardsKit-Oct21

In addition to items found in this month’s Cards, Tags, & More Kit (*from previous Tres Jolie Kits), I used:

Prima/Finnabair: Heavy White Gesso, “Sweet Rose” Metallique Wax, “Shabby Pink” Matte Wax; *Prima: Metallic Pastel Accents & Waterbrushes; Ranger/Dina Wakley: *“Peacock,” *“Ocean,” *“Turquoise,” *“Lemon,” & Olive Acrylic Paint and “Eggplant” Scribble Stick; Ranger/Tim Holtz: *“Bundled Sage” Distress Oxide Spray & “Speckled Egg” Distress Paint; *49 & Market “Cream” Burlap Trim; Ranger: Heat-It Tool, Amazing Cast Resin; EK Tools Scoreboard; 2-1/2” Recollections Circle Punch; E6000; Art Glitter Glue; Scotch ATG; twine; needle; awl; Aen Art Green Pen; Sakura Souffle XPGB# 950 (White Pen), Glaze XPGB# 824 (Purple Pen), & Moonlight 10 XPGB10# 421 (Pink Pen); Liquitex Clear Gesso

Tres Jolie Kit Club–Mini Flip Album-October Cards, Tags, & More Kit

Hey, all! Welcome back to my corner! For my first Tres Jolie Kit Club project of October I’m bringing you a Mini Flip Album I made using mostly only the kit. I have a few staple (white cardstock, glue, ribbon) and reusable (tools) items, but, for the most part, I did stick to the kit.

FRAMED-20210919_173210

With just four (I think only four!) sheets of white cardstock & a bit of ribbon from my stash, plus the Cards, Tags, & More Kit, I created this Mini Flip Album! Check out my video to see how I did it. Plus, under the video you’ll find the measurements for the cardstock and some close-up photos!


Video:


Measurements:

20210911_105441

As you can see, I have x2 on each set, because I made two of each size. The dashed lines are for scoring, and I have the measurement for how far from the left edge I went in for the score line.


Now, for the close-ups:

FRAMED-20210919_173740 FRAMED-20210919_173758

On the inside cover I have a flip-out with a narrow pocket and a pocket with a thumb-slot on the facing page (pages 1-2). The next two pages have a “belly band” (which slipped when I was sewing it, so it’s crooked!) and a pocket (pages 3-4).

FRAMED-20210919_173811 FRAMED-20210919_173826

The next set of pages has a pocket and a “belly-band” (pages 5-6) followed by a page with a “belly-band” under a flip out and a large flip up page (pages 7-8).

FRAMED-20210919_173841 FRAMED-20210919_173859

This next page I left blank for notes, photos, or memorabilia, and a pocket on the next page (pages 9-10). On the final two pages I have “belly-bands” on each of them (pages 11-12).

FRAMED-20210919_173920 FRAMED-20210919_173720

Here are photos of the back and front cover. I left the chipboard natural because I really liked how it went with the muted tones of the papers. Finally, I have a shot of the album opened up, where you can see a couple of those flip-out pages.

FRAMED-20210919_173616

Thank-you for joining me here at my corner! I hope you enjoyed this project and it gave you some ideas of what you can do with items found in this month’s Cards, Tags, & More Kit!

Stay Crafty, Friends


Did you get a kit? Share what you made in our Facebook Group!

Thank you for joining us here at Tres Jolie Kits!


Tres Jolie can be found at the following places:

Tres Jolie Facebook

Tres Jolie Instagram

Tres Jolie Website

Tres Jolie Subscriptions

Tres Jolie Blog

Tres Jolie YouTube

Tres Jolie Pinterest


cardsKit-Oct21

In addition to the October Cards, Tags, & More Kit, I used”:

Colorbok white cardstock; Liquitex Super Heavy Matte Gel Medium; EK Tools Scoreboard; awl; needle; 1/4” green gingham ribbon; We R Memory Keepers: Foam Mat & Tab Punch; Fiskars 1” Circle Punch; Scotch ATG; Art Glitter Glue; white thread & sewing machine

Tres Jolie Kit Club-June 2021 Cards, Tags, & More Kit-Samples!-ATCs, Memorydex, and a Card & Envelope

Hey, all! Welcome back to my little corner!

Today I’m bringing you my third (and final) project this month using the June Cards, Tags, & More Kit from Tres Jolie Kit Club; a sampler of smaller projects—ATCs, Memorydex®, and a notecard & envelope.

20210507_190148-FRAMED

With my three projects this month, I used up every little bit of the June Cards, Tags, & More Kit, and had a fabulously fun time doing it! Check out my video below to see how my samples came together!


Video:


First up, my ATCs:

20210507_185257-FRAMED

I used Tim Holtz’s “Crackling Campfire” and “Salvaged Patina” for the color scheme of my ATCs. The bases are Prima ATCs, dyed some white tulle with Distress Oxide Stain, and I used the clockfaces, butterflies, phrases, and flowers (my flowers were different!) from the kit to top them.

Here are some close-ups of each ATC:

20210507_185314-FREAMED

20210507_185321-FRAMED

20210507_185327-FRAMED


Next, my Memorydex cards:

20210507_185542-FRAMED

Since these cards are meant to go onto a Memorydex®, I kept them a bit flatter than the ATCs. Three of the card’s color scheme are Tim Holtz’s “Blueprint Sketch” & “Mustard Seed” and three are the same as the ATCs, “Salvaged Patina” & “Crackling Campfire.” I grabbed up some sisal for four of the cards and actually just used my wax seals to hold it in place! I used my last butterfly and gears from the kit and added some cut out pieces from the Stamperia paper pack. (Note: At the time I didn’t have the June Mixed Media Kit yet, so I used some Nuvo Gilding Flakes from my stash. As a reminder, the June Mixed Media Kit comes with a jar of Finnabair’s “Steampunk” Metallic Flakes!)

Close-ups of the individual Memorydex® cards:

20210507_185642-FRAMED

20210507_185652-FRAMED

20210507_185700-FRAMED

20210507_185710-FRAMED

20210507_185718FRAMED

20210507_185735-FRAMED


And finally, my notecard and envelope:

20210507_185849-FRAMED

For my envelope I was 100% inspired by Nathifa (Pronounced: na-tee-fa) from Juicy Christians Studios (in my video I only refer to her Instagram handle because I hadn’t heard her say her name or read the pronunciation yet, and I didn’t want to pronounce it wrong!). I am completely obsessed with watching her make envelopes! When I got down to having only pieces from the cut apart sheet left, I figured I’d try my hand at making an envelope.

I used some Kraft paper from my stash, turned a stencil into a stamp, cut out Every. Last. Piece. of the cut apart sheet, and layered things up—using my black Stabilo to create my shadows! I wrote my name on the back flap, to show where a return address would go, and used a silver marker to create the recipient’s address box. Now I may have finally found a use for all the cut apart sheets I’ve collected over the years! (Fussy cutting isn’t my most favorite activity!)

Here are close-up of the front and back of the envelope:

20210507_185922-FRAMED 20210507_190024-FRAMED

Thank you for joining me today! I hope you enjoyed these sample projects and they give you some ideas of what can be done with items from this month’s Cards, Tags, & More Kit!

Stay Crafty, Friends!


Did you get a kit? Share what you made in our Facebook Group!

Thank you for joining us here at Tres Jolie Kits!


Tres Jolie can be found at the following places:

Tres Jolie Facebook

Tres Jolie Instagram

Tres Jolie Website

Tres Jolie Subscriptions

Tres Jolie Blog

Tres Jolie YouTube

Tres Jolie Pinterest


In addition to items from this month’s Cards, Tags, & More Kit (*from previous Tres Jolie Kits), I used:

*Creative Embellishments “Crackled Brick” Stencil, Fabrika Decoru “Rings” Stencil, Ranger-Tim Holtz Distress Paint “Salvaged Patina” & *”Crackling Campfire,” Distress Spray Stain “Salvaged Patina” & “Crackling Campfire,” Distress Oxide Spray “Salvaged Patina” & “Crackling Campfire,” “Blueprint Sketch,” & “Mustard Seed,” Distress Embossing Glaze “Salvaged Patina” & “Crackling Campfire,” Distress Oxide “Salvaged Patina” & “Crackling Campfire,” Ranger Emboss It Reinker, *Ranger-Dina Wakley Black Gesso, Ranger Archival Ink “Jet Black,” StazOn “Jet Black,” Prima-Finnabair *Clear Gesso, *Opal Magic Wax “Turquoise Satin, Metallique Wax “Vintage Gold,” “Old Paperwork” Cling Stamps, *Prima ATC Cards, The Paper Studio Everyday Kraft Paper Stack, *TCW Mini Specimens Stencil, Nuvo Gilding Flakes “Silver Bullion,” “Sunkissed Copper,” & “Radiant Gold,” Liquitex Matte Super Heavy Gel, *Darice Embossing Essentials “Oblong Frames,” idea-ology-Tim Holtz Tiny Attacher, Heidi Swapp Memory Dex Dies, Bic Mark-it “Woodsy Brown,” STA Metallic Color Pen “Silver,” Ranger Heat-It Tool, Ranger Brayer, Miluakeee Heat Gun, We R Memory Keepers 3-Way Corner Punch & Envelope Punch Board, Unbranded Rolodex Dies (4), Unbranded Sisal, Yoption Amazon Store For the Wax Seal Stamps, Anezus (Amazon) Sealing Wax Kit, Gel Press 8×10 Gel Plate, Unbranded Address Guide, Black Stabilo

Best Bed Ever!

Hey, all! Welcome back to my corner!

For my final project for the month of April, I have a layout that will (most likely) be getting mounted in a shadow box. I couldn’t resist turning this photo of my husband & our granddaughter into a star filled project! This project is full of dreamy blues for the Creative Embellishments April 2021 Challenge – Monochrome & Washi (I have Tim Holtz Tissue Tape along the edges!).

20210427_075117-EDIT-WM

Check out my video to see how this came together!

Video:

monthly_challenge
AP-CHAL-224x300

20210427_075227-EDIT-WM

I used a sheet of Fabrika Decoru Golden Mini Drops Mysterious Garden Sky 12×12 paper as my base for my starry sky. Then added some stenciled stars and some “Unicorn’s Hair” Sparks splatters for even more of a dreamy, starry sky.

20210427_075150-EDIT-WM 20210427_075247-EDIT-WM
20210427_075127-EDIT-WM 20210427_075221-EDIT-WM

Under and around the photo I have resin pieces from the Finnabair Stars & Moons Mould, chipboard and flair/buttons from Creative Embellishments, white gardenias from ASC Supplies, dusty blue and white roses from ReneaBouquets, and some glass glitter from Darice. All working with a variety of paints from Finnabair, some Old White Matte Wax, and Nuvo gold gilding flakes.

20210427_075140-EDIT-WM

Thank you for joining me here in my corner! I hope you enjoyed this project and it inspired you to go get your craft on!

Red heart C.J.


Products:

Creative Embellishments Music Note Borders & Music Bar Flair; ReneaBouquets Mini Dusty Blue & Ivory Roses; Hip Kit Club Stars Stencil; ASC Supplies White Gardenia’s; Prima-Finnabair Stars & Moons Mould, Clear Gesso, Matte Wax “Old White,” Metallique Paint “Royal Blue,” Opal Magic Paint “Yellow-Blue,” Sparks Paint “Unicorn’s Hair,” Fabrika Decoru Golden Mini Drops Mysterious Garden Sky (UAH 18); Ranger-Tim Holtz Distress Oxide “Weathered Wood;” Ranger Dina Wakley Media Black Gesso; Ranger Blending Tool; Ranger Sticky Embossing Powder; Nuvo “Radiant Gold” Gilding Flakes; idea-ology – Tim Holtz Tissue Tape “Symphony;” Darice Glass Glitter “Vintage Gold;” LineCo PVA Glue, JudiKins Diamond Glaze, Liquitex Matte Super Heavy Gel, Amazing Cast Resin (White); Pro Marine Supply Epoxy (Clear)

Spring Butterfly Canvas-March 2021 MMP Mood Board Challenge

Hey, all! Look at me, I’m back! After having to take a little bit of a hiatus, I have managed to put a project together! It felt good to get paint stuck to me again. And, if we’re being honest, I really missed the smell of my Finnabair waxes!

For my first project to bring me back into the fray, I have a Spring Butterfly Canvas for the March 2021 Mixed Media Place Challenge. The canvas and doily are from a couple of years ago that was originally supposed to be something Christmas-y, but it failed. After the failure, I decided to coat the whole thing in Kilz spray primer and set the canvas aside until inspiration struck. That inspiration finally struck, over two years later! LOL!


photostudio_1617569837320-WM


I was worried I would have somehow forgotten everything I’ve learned over the years during my hiatus, but I’m happy to report I was able to access the creative storage in my brain and get this put together. Check out my process in the video below:


Video:


Check out this beautiful mood board for the challenge! It really got me in the mood for spring!

moodboard-mmp-3-2021


Now, how about some close-ups!

photostudio_1617569948905-WM

Here you can see I added some shine to the green lily using some of my Unicorn’s Hair Sparks paint. I didn’t add the Sparks to all of the flowers, I kept it to the green, white, & off-white flowers.

photostudio_1617569992720-WM

Here you can see how those gold microbeads really set off the wing! I love how my butterfly came out! So many layers of paint and wax! I was worried I wasn’t going to get it “just right,” until I came across my beads!

photostudio_1617570045670-WM

Here is the whole butterfly! You can see how the color changes depending on the light. Even though this photo was taken straight on, with the light coming from the right, the left wing shows up as more purple, and the shine really stands out!

photostudio_1617569902387-WM

Look at those beautiful glass beads! I didn’t need a lot and I love how they give an almost magical look to the piece!

photostudio_1617570103937-WM

Thank you for joining me here in my little corner! Hopefully, it won’t be too long before I have another project up for you!

Red heart C.J.


Products:

ASC Supplies: White & Green Lily’s, Unknown: Flowers (off-white) from a swap, Unbranded Yellow Roses Large & Small, Darice: Yellow Roses, Prima: “Life Time Collection” Flowers (purple), Resin Frame “Montchamp Imperial, Prima-Finnabair: Clear Gesso, Heavy White Gesso, Metallique Paint “Ancient Coin,” Opal Magic Paint “Green-Gold,” Sparks Paint “Unicorn’s Hair,” Opal Magic Waxes “Royal Robes” & “Green Brocade,” Metallique Waxes “Heather Hills” & “Vintage Gold,” “Spark” Stencil (on the original attempt, but it still shows so I’m listing it!), Ranger-Tim Holtz: Distress Paint “Rustic Wilderness,” ReneaBouquets: Glass Beautiful Beads “Dark Purple,” JudiKins Diamond Glaze, Liquitex Gloss Gel & Super Heavy Matte Gel, Tim Holtz Distress Splatter Brush, Ranger Heat-It Craft Tool, Unknown Gold Microbeads, Upcycled Butterfly & doily, Unknown canvas, texture paste & crackle paste on the original attempt, Kilz Original Spray Primer

Tres Jolie Kit Club-September 2020 Reveal

Hey, all! Welcome to the September 2020 Kit Reveal!

The September 2020 kit is filled with  gorgeous new to us products from ScrapBoys. These papers scream fall and are great for masculine pages. You will find a lovely assortment of patterned papers and perfectly coordinated embellishments. These kits are for the beginner to the advanced, clean and simple to mixed media maven. No matter your style, there is something for everyone. We know you are going to love it!


Presenting the Tres Jolie September 2020 kits:

scrapbook kit*Scrapbook Kit*

Mixed media kit
*Mixed Media Kit*

Card kit*Cards, Tags and More kit*


Don’t forget to stop by the Tres Jolie YouTube channel and see our video reveal of all our kits.

Love them, right! You can still get one of your own (some kits are in very limited quantities).

Become a subscriber and you will never miss out on our gorgeous, coordinated kits. Just visit  Tres Jolie subscribe.


The designers at Tres Jolie have created some amazing layouts/projects with this kit.

Here are a few little teases from me using the Mixed Media Kit:

DSC_0002-FRAMED

DSC_0008-FRAMED

DSC_0017-FRAMED

Please stop by the other designers blogs and check out their sneak peaks. They are listed below:

Cris Cunningham

Rae Moses

Jeanne Rodriguez

Michelle Saunders


For the monthly challenge we have a gorgeous mood board. The mood board can easily be used to create a card, tag, layout or even an altered project. The challenge is open to everyone, however we would love to see what you do with our kit(s) and our mood board.

Here is the mood board:

collage

Place your entries in the September 2020 challenge folder on Tres Jolie Kit Club Cafe Facebook page. This challenge ends on September 30th, 2020 at 11:59 pm CST.


Don’t forget that Tres Jolie can be found in the following places:

Facebook: https://www.facebook.com/groups/121919621993809/

Instagram: https://www.instagram.com/tresjoliekits/

Tres Jolie website: https://tresjoliekits.com/

Tres Jolie subscriptions: https://tresjoliekits.com/services/

Tres Jolie blog: https://tresjoliekits.com/blog/

Tres Jolie YouTube: https://www.youtube.com/channel/UCVBFOOKxZzsXs2tl4MMqSKg?view_as=subscriber

Tres Jolie Pinterest: https://www.pinterest.com/tresjoliekits/


All the designers will be revealing their projects on the Tres Jolie blog all month long. Make sure you join us for tons of inspiration, including video and photo tutorials

Tres Jolie Kit Club-August Cards, Tags, & More Kit

Hey, all! Welcome back to my little corner!

Today I’m bringing you an album I made using the August 2020 Cards, Tags, & More kit from the Tres Jolie Kit Club! This kit was aimed towards an album, providing the chipboard and album base pages needed to get you going with the paper & embellishments! And well the kit may have included a set of split rings and the pages were pre-marked for holes, I went a different route and used part of the chipboard to create a hard spine.

DSC_0038-FRAMED

Due to technical difficulties with sections of the process video, I decided to just create a walkthrough/flip-through of the final album. Check it out!


Video:


I used some White Artisan Cardstock from Country Craft Creations to build my cover and on my photo sleeves because it is a linen cardstock, making it nice and sturdy for creating hinges. To insert the pages, I used some Linen Hinging Tape from LineCo. It’s nice and thin, but because it is linen it will be able to take being used as a hinge! After I had my base put together I started adding in the patterened paper from the kit, then worked my way up to adding in the photo sleeves and card flip-outs. Finally, I added the embellishments I wanted on the inside pages before turning my attention to the cover.

For the cover I used the pearl strips from the kit, spacing them two inches to the center. Finally I created my flower cluster on the front cover and added on of the resin pieces where the seam binding was attached.

Now, how about some photos? I have the front and back covers first, followed by the pages in the order they are in the album.

DSC_0037-FRAMED

DSC_0046-FRAMED

DSC_0040-FRAMED

DSC_0041-FRAMED

DSC_0042-FRAMED

DSC_0043-FRAMED

DSC_0044-FRAMED

DSC_0045-FRAMED

Some of my flaps close with magnets (from my stash) and some have tie closures using the seam binding found in this months kit!

DSC_0039-FRAMED

Here are the measurements for the photo inserts. For reference, “Solid Cardstock” with the circles is the light purple cardstock in my album that I used from my stash, “Patterened Paper” with the circles is the paper from the kit, and the solid rectangles is the white linen cardstock from my stash that have an extra one-half inch for the flips.

AlbumPhotoInserts

I hope you enjoyed this project and that it gave you some ideas of what can be done using the items in this month’s Cards, Tags, & More Kit!


Did you get a kit? Share what you made in our Facebook Group!

Thank you for joining us here at Tres Jolie Kits!


Tres Jolie can be found at the following places:

Facebook: https://www.facebook.com/groups/121919621993809/

Instagram: https://www.instagram.com/tresjoliekits/

Tres Jolie Website: https://tresjoliekits.com/

Tres Jolie subscriptions: https://tresjoliekits.com/services/

Tres Jolie blog: https://tresjoliekits.com/blog/

Tres Jolie YouTube: https://www.youtube.com/channel/UCVBFOOKxZzsXs2tl4MMqSKg?view_as=subscriber


August 2020 Cards, Tags, & More Kit:

Card kit

In addition to items from the kit, I also used:

EK Tools Score Board, Country Craft Creations White Artisan Cardstock, Ranger/Wendy Vecchi “Fern Green” Embossing Powder, Spellbinders Tool ‘n One, We R Memory Keepers Craft Knife, Simon Says Stamp Clear Embossing Ink, LineCo 1.25” Linen Hinging Tape, BEST Double Sided Tape 1” & 1/4”, LineCo PVA Glue, Art Glitter Glue, Ranger Brayer, Basic Grey Magnetic Discs (Large), Unbranded Magnetic Discs (Small), 8.5”x11” Lavender Cardstock, Liquitex Matte Super Heavy Gel, Krylon Triple Thick Crystal Clear Glaze

Tres Jolie Kit Club-August Mixed Media Kit-Altered Paintbrush

Hey, all! Welcome back to my little corner!

This week I have used items from the Tres Jolie Kit Club’s August Mixed Media kit, along with items from my stash, to create this altered paintbrush.

DSC_0106-FRAMED

I used the Prima Modeling Material with the Finnabair Mould to create the bust and flourishes, which I “painted” with the Lindy’s “Bayou Boogie Gold” Magical Powder, and after I prepared my paintbrush I used the Distress Oxide Sprays to add the background color. Check out my process video to see how everything came together!


Video:


DSC_0113-FRAMED DSC_0126-FRAMED

I used some Prima/Finnabair Crackle Texture Paste on my background (from my stash) with a couple of stencils I have collected from previous Tres Jolie kits! After the paste had dried I used the three Distress Oxide Sprays from this month’s kit to give the background some color. Plus, I finished off two packs of flowers, both of which I had been hoarding from previous Tres Jolie kits.

DSC_0109-FRAMED DSC_0108-FRAMED

I love the mould that came in the kit this month, and I especially love that it is an item I will be able to keep in my stash to use over and over again! Some items, like the glitter I sprinkled about from a previous Tres Jolie kit, will (eventually) run out, but that mould will be in my stash forever!

DSC_0105-FRAMED

I hope you enjoyed this altered paintbrush and I hope it gave you some ideas of what can be done with items from this month’s Mixed Media kit! Stay crafty!


Did you get a kit? Share what you made in our Facebook Group!

Thank you for joining us here at Tres Jolie Kits!


Tres Jolie can be found at the following places:

Facebook: https://www.facebook.com/groups/121919621993809/

Instagram: https://www.instagram.com/tresjoliekits/

Tres Jolie Website: https://tresjoliekits.com/

Tres Jolie subscriptions: https://tresjoliekits.com/services/

Tres Jolie blog: https://tresjoliekits.com/blog/

Tres Jolie YouTube: https://www.youtube.com/channel/UCVBFOOKxZzsXs2tl4MMqSKg?view_as=subscriber


August Mixed Media Kit:

Mixed Media kit

In addition to items from the August Mixed Media Kit (*from previous Tres Jolie kits), I used:

*Prima Flowers Item# 642730, *Prima Stencil Item#564278, *Prima/Finnabair Stencil Item# 966676, Prima/Finnabair Heavy White Gesso, Prima/Finnabair White Crackle Texture Paste, *49 & Market Blossom Blends “Aloe”,” *Darice Gold Glitter, Ranger Glossy Accents, Liquitex Matte Super Heavy Gel, Krylon Workable Fixatif, 4-inch paintbrush