Tres Jolie Kit Club–Anything Book–October 2021 Cards, Tags, & More Kit

Hey, all! Welcome back to my corner!

For my final Tres Jolie Kit Club project of October, I’m bringing you an “Anything Book.” I call it an anything book because you could easily use it as a mini-album, mini art journal, mini notebook, etc. Personally, I really wanted a mini art journal with pockets and flip-outs.

FRAMED-20210919_173350

My inspiration for this project came from Pinkstrawberryz “No Binding Easy Mini Album.” It was just one of those “You might like” recommendations that randomly popped up on YouTube, so I decided to have a look! As soon as I watched the video I had ideas brewing! Check out my video to see how I put my Anything Book together. (Below the video you will find photos of the inside and the measurements for my pages.)


Video:


Here is a look at some of the pages I started preparing:

FRAMED-20211003_110402 FRAMED-20211003_110424

After my book was together I used clear and white gessoes to prepare the pages. With my gesso dry, I was then able to start laying down mediums to prepare working backgrounds. I just grabbed up various paints and started laying them down! To make the book cover, I grabbed up some burlap trim, cut it to length, and stitched it in place during assembly.

FRAMED-20211003_110443 FRAMED-20211003_110455

Some areas have acrylic paint and some have watercolors. I started drawing on a couple of the pages—flowers in some places, and this face above. I also grabbed a few pens and outlined the flowers from the paper pack.

FRAMED-20211003_110513 FRAMED-20211003_110527

I didn’t always use a brush with my paints, some times I just used a palette knife to scrape it on! I also grabbed up some of my Dina Wakely Scribble Sticks and added some…well…scribbles! I have a short flip-though of my mini art journal (as far as it had been “finished” at the time of filming!) over on my Instagram post for this project.


Measurements (in order of page in book):

2021-09-17_18.14.152021-09-17_18.15.302021-09-17_18.16.112021-09-17_18.16.36


In my video, I talk about the process of making the cover using some Amazing Cast Resin and the embossing folder!FRAMED-20211003_110345

Thank you for joining me here in my corner! I hope you enjoyed this project and it gave you some ideas of what you can make using items found in this month’s Cards, Tags, & More Kit!
Stay Crafty, Friends


Did you get a kit? Share what you made in our Facebook Group!

Thank you for joining us here at Tres Jolie Kits!


Tres Jolie can be found at the following places:

Tres Jolie Facebook

Tres Jolie Instagram

Tres Jolie Website

Tres Jolie Subscriptions

Tres Jolie Blog

Tres Jolie YouTube

Tres Jolie Pinterest


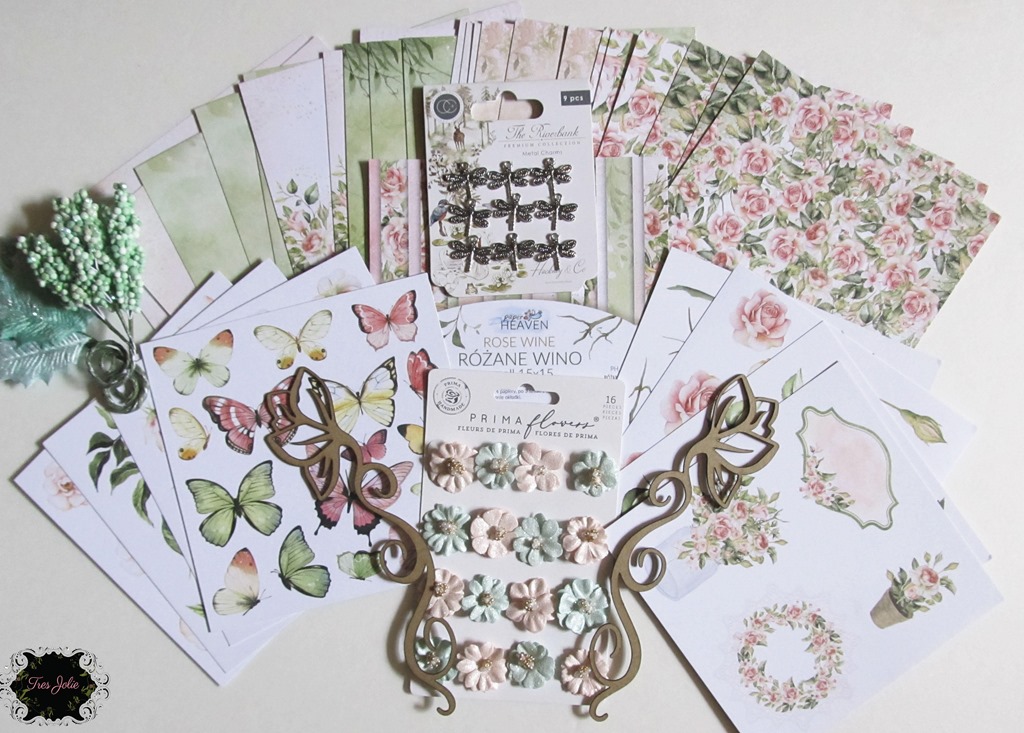
October Cards, Tags, & More Kit:

cardsKit-Oct21

In addition to items found in this month’s Cards, Tags, & More Kit (*from previous Tres Jolie Kits), I used:

Prima/Finnabair: Heavy White Gesso, “Sweet Rose” Metallique Wax, “Shabby Pink” Matte Wax; *Prima: Metallic Pastel Accents & Waterbrushes; Ranger/Dina Wakley: *“Peacock,” *“Ocean,” *“Turquoise,” *“Lemon,” & Olive Acrylic Paint and “Eggplant” Scribble Stick; Ranger/Tim Holtz: *“Bundled Sage” Distress Oxide Spray & “Speckled Egg” Distress Paint; *49 & Market “Cream” Burlap Trim; Ranger: Heat-It Tool, Amazing Cast Resin; EK Tools Scoreboard; 2-1/2” Recollections Circle Punch; E6000; Art Glitter Glue; Scotch ATG; twine; needle; awl; Aen Art Green Pen; Sakura Souffle XPGB# 950 (White Pen), Glaze XPGB# 824 (Purple Pen), & Moonlight 10 XPGB10# 421 (Pink Pen); Liquitex Clear Gesso

Tres Jolie Kit Club–October 2021 Moodboard–Texture ATCs!

Hey, all! Welcome back to my corner! I’m here today with my project for this month’s Tres Jolie Kit Club moodboard challenge—some ATCs that were inspired by all the yummy textures found on the moodboard! I used items from the October Cards, Tags, & More Kit, Mixed Media Kit, and lots of goodies from previous kits!

FRAMED-20211012_113258

I have some weaving on a couple of the ATCs, some lines inspired by the lines in the sand, and some sisal inspired by the wool! Check out my video to see how I put everything together and keep scrolling down to check out the moodboard, photos of each ATC, and a product list!


Video:


October 2021 Moodboard:

Moodboard-Oct21


Now for some close-ups to show all those textures!

FRAMED-20211012_094319

I didn’t have any plan going into this project, I just knew I wanted to really get some textures on my ATCs! The background of this ATC was created using some “White Sand” Finnabair Texture Paste and a texture tool by Making Memories that I’ve had for Y-E-A-R-S!!

FRAMED-20211012_094336

Here is one of the ATCS that has some weaving for the background and some sisal (in place of wool)! I just used my Lindy’s spray to turn the natural sisal into pink sisal!

FRAMED-20211012_094423

On all the ATCs I added some machine and hand stitching, used a black Stabilo to give some depth to the different layers, and added a Tres Jolie Chipboard button from the Cards, Tags, & More Kit—topped with Finnabair Metallic Flakes—for some shine.

FRAMED-20211012_094355

ATCs don’t have to remain vertical, and I liked a horizontal orientation for this ATC better! This was the ATC I completed in the video, so it had more dry time, which really makes it look like those Art Stones are just sitting on the card!

FRAMED-20211012_094440

I really love this palmistry hand from the Tim Holtz ephemera pack here! The sisal on this ATC was sprayed with the green Lindy’s before being tucked in, and, like all the others I have my stitching, Stabilo, art stones, and button added on.

FRAMED-20211012_094246

Thank you for joining me here in my corner! I hope you enjoyed these ATCs and they gave you some ideas how to use this month’s moodboard and what you can make using items found in the Cards, Tags, & More and Mixed Media Kits.

Stay Crafty, Friends!


Did you get a kit? Share what you made in our Facebook Group!

Thank you for joining us here at Tres Jolie Kits!


Tres Jolie can be found at the following places:

Tres Jolie Facebook

Tres Jolie Instagram

Tres Jolie Website

Tres Jolie Subscriptions

Tres Jolie Blog

Tres Jolie YouTube

Tres Jolie Pinterest


October Cards, Tags, & More and Mixed Media Kits:

cardsKit-Oct21

mmKit-oct21

In addition to items from the Cards, Tags, & More Kit & Mixed Media Kits (*from previous Tres Jolie Kits), I used:

*13@rts: “Rosalie” Ephemera Pack; *49 & Market: “Sage” Washi Strips & “Coral” Washi Strips; *StudioLight Jenine’s Mindful Art Collection Rice Paper RICEJMA22; *idea-ology/Tim Holtz: “Keepsakes” Ephemera Pack; Prima/Finnabair: 3D Matte Gel, *Texture Paste-“White Sand,” *Metallic Flakes-“Steampunk;” Ranger Sticky Embossing Powder; *Ranger/Tim Holtz: Distress Collage Medium “Matte;” *Prima Waterbrush; Simon Says Stamp Clear Embossing Ink; Liquitex Clear Gesso; DMC Embroidery Floss: 209 & 938; Light Purple Thread; Art Glitter Glue; UHU stic; Scotch ATG; Black Stabilo; Krylon Workable Fixatif; *palette knives; Martha Stewart Fringe Scissors; Making Memories Texture Tool

Tres Jolie Kit Club–Shaker “Envelope Gift Mini Album”-September Cards, Tags, & More Kit

Hey, all! Welcome back to my corner!

For my final Cards, Tags, & More Kit project for the Tres Jolie Kit Club this month, I’m bringing you an “Envelope Gift Mini Album” using a Paige Taylor Evans cut file. (Links to PTE’s tutorial & the Silhouette Store ID# in the product list.)

I used the cut file as my base, and decided it needed to become a *shaker* envelope mini album! In my video, you’ll get to see how I worked through that process (which means you’ll get to see how to do it the hard way, LOL!).

FRAMED-20210819_113757

Check out my video! Hopefully it makes sense – I was working out the process as I went along!


Video:


Close-ups with some explanations:

FRAMED-20210819_115254

FRAMED-20210819_115322

For the album (and the inside envelope) I used some Paige Taylor Evans papers from my stash, but used papers from the kit as my ‘accent’ pieces and to make the bow. To make this into a shaker, I grabbed up a 12×12 page protector, inserted the album cut, and started stitching to make the pockets. After all the stitching was completed I trimmed off the excess page protector.

FRAMED-20210819_115422 FRAMED-20210819_115356

Here you can see the inside envelope, I added little magnets just to help keep the flap down. It wasn’t really necessary, I just found it helped keep the flap down for when I folded the album up. You can see I used the Altair Art papers from the kit to make my inside panels, with some doily’s added in that were made using the Dress My Craft Die from the kit.

FRAMED-20210819_115530

When I first decided to add in some stamping from the Bo Bunny stamp set I thought I would have a lot more, but as soon as I added these little edges I thought it was enough! Sometimes less is more!

FRAMED-20210819_115445 FRAMED-20210819_115343

I just had to add in these beautiful Tres Jolie Chipboard leaves from the kit! I found the angle of the leaves made a perfect match up for the flap of the envelope. The addition of the leaves, however, are also the reason I added a button a twine closure, like the one on the right flap, under the outside bow and band closure!

FRAMED-20210819_115222

Thank you for joining me here in my corner. I hope you enjoyed this project and it gave you some ideas of what you can make using items from this month’s Cards, Tags, & More Kit!

Stay Crafty, Friends!


Did you get a kit? Share what you made in our Facebook Group!

Thank you for joining us here at Tres Jolie Kits!


Tres Jolie can be found at the following places:

Tres Jolie Facebook

Tres Jolie Instagram

Tres Jolie Website

Tres Jolie Subscriptions

Tres Jolie Blog

Tres Jolie YouTube

Tres Jolie Pinterest


Card kit sept 2021

In addition to items from this month’s kit, I used:

“Envelope Gift Mini Album”Silhouette Store ID# 240883 by Paige Taylor Evans; Pink Paislee/Paige Taylor Evans: 19 & Turn The Page 08; Prima/Finnabair: Heavy White Gesso; Ranger/Tim Holtz: “Picket Fence” Distress Paint, “Salvaged Patina” Distress Oxide & Embossing Glaze; Simon Says Stamp Clear Embossing Ink; pink & white bakers twine; Scotch ATG; white thread; E6000; magnets; Art Glitter Glue

Tres Jolie Kit Club-Paperclay & a Tag Booklet-Aug. 2021 Cards, Tags, & More Kit

Hey, all! Welcome back to my corner!

This week I’m bringing you a two part project using the August 2021 Cards, Tags, & More Kit from Tres Jolie Kit Club – part one: paperclay + moulds + paper; part two: tag booklet!

FRAMED-20210721_121034

As I was sitting and looking at the cut-apart sheet from the kit, I couldn’t help but wonder if I could make the wreaths more dimensional. Then it dawned on me – they looked like the would fit in the Stamperia Mould from the July 2021 Mixed Media Kit! Check out my video to see how I used the papers with some different moulds and how I put the quick tag booklet together!


Video:


Now for a few photos. First up, the paperclay pieces I created:

FRAMED-20210721_121457

FRAMED-20210721_121320

The photo on the left shows two wreaths I created using the July Stamperia Mould and papers from this month’s Cards, Tags, and More Kit. The photo on the right shows all the pieces I made using various moulds from my stash!

Next up, the quick little tag booklet:

FRAMED-20210721_120919

FRAMED-20210721_121001

The round wreath was just the right size to add to the front of my tag booklet, and with just a few small embellishments it was all done! Look below for a photo series of making the pockets, plus a link to the original post I got the folding idea from! (*Note: Tag Size: 2-3/8”x3-3/8”)

20210720_111627 20210720_111654
The dashed lines are the folds. The side that is the “back” of the folds is also the side that will show on the front pockets.
20210720_111848 20210720_111825
Add a thin line of clue for to make the

slide-through pocket.

Fold your corners in and add a little glue to

tack them in place.

20210720_111953 20210720_112114
Glue lines if the larger side will be your top

piece.

Glue lines if the smaller side will be your top

piece.

**Original Fabrika Decoru Instagram post where the pocket idea came from! (The 6th slide in the post has a video)

FRAMED-20210720_143958

Thank you for joining me here in my little corner, I hope you enjoyed this project and it gave you some ideas of what you can do with the items found in the August Cards, Tags, & More Kit!

Stay Crafty, Friends


Did you get a kit? Share what you made in our Facebook Group!

Thank you for joining us here at Tres Jolie Kits!


Tres Jolie can be found at the following places:

Tres Jolie Facebook

Tres Jolie Instagram

Tres Jolie Website

Tres Jolie Subscriptions

Tres Jolie Blog

Tres Jolie YouTube

Tres Jolie Pinterest


August 2021 Cards, Tags, & More Kit

In addition to items from this month’s Cards, Tags, & More Kit (*from previous Tres Jolie Kits), I used:

*Stamperia Frames Maximould; *Little Birdie “Aqua Sheen” Metallic Wax; Prima/Finnabair Moulds: “Skull & Bones,” “Birds & Bats,” “Nocturnal Elements,” & *“Fairy Garden;” Creative Paperclay; LineCo PVA Glue & Linen Hinging Tape (1.25”); Art Glitter Glue; Liquitex Matte Super Heavy Gel; X-Acto Knife; We R Memory Keepers Crop-A-Dile & Crop-A-Dile Corner Chomper; EK Tools Score Board; Tim Holtz Tiny Attacher; sheer ribbon; *Lace

Tres Jolie Kit Club-Magnets-August 2021 Cards, Tags, & More Kit

Hey, all! Welcome back to my corner!

This week I’m bringing you some ideas for magnets using pieces of this month’s Cards, Tags, & More Kit from the Tres Jolie Kit Club, along with items from my stash.

FRAMED-20210717_181045

A couple of the magnets I made using the Finnabair “Elisian Clockworks” Mould, and the rest were made from some unfinished wood drawer/door knobs. Check out my video to see how I created my magnet set!


Video:


Now for some individual photos:

FRAMED-20210717_181105

FRAMED-20210717_181230

These two magnets were created using the Elisian Clocks mould and some Amazing Cast Resin. I filled the mould about half way and after that half hardened, I added my magnets and finished filling the mould with more resin.

After coating my pieces with gesso, paint, and paste, I added my embellishment clusters, then a bit of gold wax for some accent.

FRAMED-20210717_181116

FRAMED-20210717_181149

FRAMED-20210717_181222

FRAMED-20210717_181139

FRAMED-20210717_181159

On my drawer/door knobs I added some smaller mould pieces using paper clay, followed the same painting, embellishment, wax process as the resin magnets, but then also added some Nuvo Crystal Drops for a bit more texture on the “plain” edges.

FRAMED-20210717_181256

Thank you for joining us here at Tres Jolie! I hope you enjoyed these magnets and they gave you some ideas of what can be done with items from this month’s Cards, Tags, & More Kit.

Stay Crafty, Friends!


Did you get a kit? Share what you made in our Facebook Group!

Thank you for joining us here at Tres Jolie Kits!


Tres Jolie can be found at the following places:

Tres Jolie Facebook

Tres Jolie Instagram

Tres Jolie Website

Tres Jolie Subscriptions

Tres Jolie Blog

Tres Jolie YouTube

Tres Jolie Pinterest


August 2021 Cards, Tags, & More Kit:

In addition to items from this month’s Cards, Tags, & More Kit (*from previous Tres Jolie Kits), I used: Creative Paperclay; Amazing Cast Resin; Prima Moulds: “Seashore Treasure,” “Curio Trinkets,” & “Elisian Clockworks;” Prima/Finnabair: Heavy White Gesso, *Metallique Wax “Vintage Gold,” *Rust Effect Paste “Cool Grey;” Ranger/Tim Holtz Distress Paint “Speckled Egg;” *Nuvo Crystal Drops “Wedgewood Blue;” Unfinished Wooden Drawer/Door Knobs; magnets; Liquitex Matte Super Heavy Gel; Baby Powder

Tres Jolie Kit Club-Cards, Cards, Cards!-July 2021 Cards, Tags, & More Kit

Hey, all! I hope you had a craft-astic July and we were able to inspire you to go out and create!
For my third Cards, Tags, & More Kit project, I have a few cards, a few different ways!

FRAMED-20210619_095329

Check out my video to see my thoughts and process for all these cards!


Video:


Now for the close-ups and a few details for each card!

FRAMED-20210619_095551

FRAMED-20210619_095609

These two cards are some basic, “flat” cards. The “Happy Birthday” card is a 4-3/4”x4-3/4” square with just a piece of the striped cardstock, a doily die cut, and a piece of vellum with the greeting embossed. The “Let’s Celebrate!” is just stamped straight on the cardstock. I used a die from my stash with the Sizzix Emboss & Transfer set to add a little dimension to those birds being “pushed through” the gold cardstock.

FRAMED-20210619_095448

FRAMED-20210619_095730

The flowers from the kit get featured with these two cards! The “Hooray” cards is a little more fun with the flourish coming out from under the flower! The vertical card is more elegant, with some bits of lace dangling with the leaves.

FRAMED-20210619_095628

FRAMED-20210619_095650

Both of these cards of pieced together background, using strips of cardstock I had leftover from my previous projects! I cut some rosettes for the slimline card—giving it the “Party” feeling. The “imagine” card is another “flat” card, but those stars are just perfect to “make a wish” on.

FRAMED-20210619_095423

FRAMED-20210619_095528

These two cards sum up my feelings about cake! Lucky and Yay!! For the card on the left I used the negative cuts from the sheet of cardstock from my first project and added in some doliy cuts to create the background. I used my hexagon punches and any bit of “scrap” cardstock I could find to create the background for the card on the right. To cards with the same greetings, but totally different looks!

FRAMED-20210619_095817

I hope you enjoyed this project, and all of the projects this month, and they gave you some ideas of what you can do with the July Kits from Tres Jolie!

Stay Crafty, Friends


Did you get a kit? Share what you made in our Facebook Group!

Thank you for joining us here at Tres Jolie Kits!


Tres Jolie can be found at the following places:

Tres Jolie Facebook

Tres Jolie Instagram

Tres Jolie Website

Tres Jolie Subscriptions

Tres Jolie Blog

Tres Jolie YouTube

Tres Jolie Pinterest


In addition to items from this month’s Cards, Tags, & More Kit (*from previous Tres Jolie Kits), I used:

*Prima Rub-On Foils, *lace trim, Spellbinders “Flower Garden” Die, Heidi Swapp “Imagine” Die, Concord & 9th “Lucky” Dies, Sizzix/Tim Holtz “Rosettes” & “Skeleton Leaves,” Fiskars Hexagon Punches 1” & 1-1/2”, Martha Stewart “Carnelian” Glitter, Sizzix Big Shot Plus, Sizzix Emboss & Transfer Set, Ranger Embossing Powders “White” & “Gold,” *Gary M. Burlin Co. “Patina Bronzed Copper” Embossing Powder, Simon Says Stamp Clear Embossing Ink, StazOn “Timber Brown,” Scotch ATG, hot glue gun, double-sided sticky foam squares, Tim Holtz Stamp Platform, Art Glitter Glue, FabriTac, Scrapbook Adhesives 12×12 Adhesive Sheets, Ranger Brayer, Spellbinders Tool ‘n One, EK Tools Scoreboard, various cardstock for card bases, orange sequins, Lawn Fawn Stamp Shammy, scrap vellum (some of it Bazzill), adhesive foam sheet

Art Journal-Hero & Paint-June MTW Challenge

Hey, all! Welcome back to my corner!

Today I have an Art Journal spread I created for the June More Than Words Challenge “Hero & Paint.”

WM-20210622_201758

I wasn’t sure if I’d come up with something this month for the MTW Challenge, I wasn’t feeling very layout-ish, and I wasn’t able to really narrow down a personal hero. One day I just pulled out my DWM Journal and grabbed a few brighter paints. Then I sat there staring! I think things finally came together when I got a “picture” in my mind of some stenciling. I didn’t have anything like what I was picturing, so I cut one out of some heavy cardstock.


Video:


June 2021 Main


I suppose, if you wanted to really get down to the nitty-gritty, I think I had problems thinking of a hero because I tend to lean to a “I’ll do it myself” attitude. I’m not saying I won’t let people do things for me, I just find doing it myself faster! LOL!


Some close-ups of the spread:

WM-20210622_201853

The silver on the background is from sheets of Prima Run-On Foils. I used my homemade stencil with some Finnabair “Gold Dust” Jewel Effect Paste, and then freehanded some paint highlights!

WM-20210622_201840 WM-20210622_201903 WM-20210622_201944

I used some DWM “Eggplant” & “Lemon” that I had from the October 2020 Tres Jolie Kit Club Mixed Media Kit, and some Vicki Boutin “Juicy Pear.”

WM-20210622_201949

All of the papers have been in my “scraps” pile for ages, and none of them had the border with the manufacturer on them anymore, so I couldn’t even begin to guess where they came from now!

WM-20210622_201910 WM-20210622_201935

I just tore a bit of corrugated cardboard from a box, coated it in some DWM Gesso I’ve had since the April 2019 Tres Jolie Mixed Media Kit (I had an open container way back then already, and with black gesso, I’ve learned a little bit goes a long way!); I then layered my stamped papers, punched circles, and label on top of the cardboard.

WM-20210622_202023

I hope you enjoyed this project. I love getting my Art Journal out because I gives me a chance to do a project without always having to plan ahead or prepare too much! With just a little guideline, “Hero & Paint” I was able to do a project and relax!

Stay Crafty, Friends

Red heart C.J.


Products:

Dina Wakley Media: Journal, Black Gesso, “Eggplant” & “Lemon” Acrylic Paint, “Essential Silhouettes” Stamp + Stencil Set; Prima Rub-On Foils; Finnabair Jewel Effect Paste “Golden Dust;” Vicki Boutin: “Juicy Pear” Paint & “All The Good Things” Watercolor Stickers; Recollections 2.5” Circle Punch; Fiskars 1.5” & 1” Circle Punches; Ranger Heat-It Tool; Staedtler Black Permanent Super Fine Tip; ArtPen: black glitter pen; Sakura: GellyRoll Moonlight 10 (dark pink), Soufflé XPGB# 920 (light pink); KaiserCraft Glitter Gel Pen (pink glitter); Tim Holtz Tiny Attacher; StazOn “Jet Black;” Liquitex Gloss Gel; Various paper scraps; homemade stencil

Faces of You-May 2021 More Than Words Challenge

Hey, all! Welcome back to my little corner!

Today I am bringing you a (redone) layout. I originally did “Faces of You” 10+ years ago, and of all the layouts I’ve done, this is one I remembered! (Seriously, when looking for the layout I came across too many layouts I have no recollection of!) Anyhow, when I saw that this month’s More Than Words Challenge was “Faces & Kraft,” I knew I’d (finally) redo “Faces of You.” (I have grand plans to redo most of my layouts from when I first started scrapbooking.)

20210523_111810-wm


Process video:


May2021MTWMain


Here is my original layout. I thought I was really getting fancy by adding stitching & ribbon! And, my goodness, there is almost some pattern going on with the light paper and the circles on that ribbon; I even overlapped the photos some! I remember when I started I was, more or less, afraid of colors and patterns! It was all too new. I didn’t add mediums; I didn’t even own mediums beyond a few to Tim Holtz’s Distress Ink pads, in varying shades of brown! A lot has changed since my early days.

20210516_131835-wm


And now, I have layers, embellishments of all kinds, mediums, and colors galore! Instead of being “afraid” of using “too much” I try to use as much as I can so I can work through my stash!

20210523_135201-wm


20210523_111821-wm

So many layers! I have my photos on foam, and the torn papers lifted with foam so the frame wouldn’t leave a weird lump.

20210523_111855-wm

I discovered long ago that I really LOVE cutting frames apart and having them look bigger than they actually are. It turns out, scissors are my friend, and I don’t have to be nervous about altering items!

20210523_111951-wm

I just used some white texture paste with my Fabrika Decoru stencil and used some Distress Oxide sprays as my paint!

20210523_111909-wm

I went through my stash, pulled out a lot of different choices, and eventually worked out what I wanted to add to this layout!

Thank you for joining me here, I hope you enjoyed this remake of one of my original layouts and it inspires you to be more daring with colors and mediums or to redo something!

Stay Crafty, Friends

Red heart C.J.


Products:

Project Life “Kraft Edition,” The Paper Studio “Everyday Kraft,” Ranger-Tim Holtz Distress Oxide Sprays “Evergreen Bough,” “Pine Needles,” “Candied Apple,” & “Wild Honey,” Fabrika Decoru “Leaves” Stencil (FDTR 162), Maggie Holmes “Chasing Dreams” Ephemera, Maggie Holmes “Willow Lane” Frame, Pretty Little Studio “Sunny Memories” Fresh Phrases, Echo Park “The Story of Fall” Enamel Dots, AC Shimelle “Box of Crayons” Stickers/Folder, Teresa Collins “Summer Stories” Die Cut Borders, Pink Fresh Studio “Life Noted” Puffy Alpha Stickers, Pink Fresh Studio “Escape the Ordinary” Chipboard Stickers, Fancy Pants Designs “Off to School” Sticker Sheet, Queen & Co Alphabits “Orange,” Hip Kit Club Stickers, Prima-Finnabair Clear Gesso, TCW Light & Fluffy Modeling Paste, Fabri-Tac, Art Glitter Glue, Variegated Thread, Unknown Red “XOXO” Frame

Fairy House-MMP April Challenge

Hey, all! Welcome back to my little corner!

I am bringing you a little project I put together, inspired by the Mixed Media Place’s April Challenge. I don’t often work with pinks, but I really loved the mood board this month, and decided it was a good time to pull out my pink paints!

20210519_120715-WM 20210519_120431-WM

Video:


moodboard-mmp-4-2021

Aren’t the colors for the April Challenge absolutely wonderful? I couldn’t help but want to make something pink!


Now, how about a few close-ups?

20210519_120450-WM 20210519_120611-WM

The fairy’s house is actually a repurposed bed riser! My youngest moved from his dorm to an apartment and didn’t need them anymore, so he gave them to me! My family has learned I will take anything and repurpose it into a craft project!

20210519_120504-WM 20210519_120519-WM

My little door is from Creative Embellishments, coated in Vintage Gold wax with some ReneaBouquet’s glitter glass as the window. I used a variety of random pieces for my foliage: Christmas berries and leaves from JoAnn’s that I’ve had a couple of years, and some Styrofoam “shapers” with some wire that I thought would look interesting!

20210519_120528-WM 20210519_120554-WM 20210519_120540-WM

The figurines I found a couple of years ago at Dollar Tree and picked them up to have when the right project presented itself!

I hope you enjoyed this project! I had fun putting it all together, even if I did make a massive mess!


Products:

Creative Embellishments Fairy Door Set 2, ReneaBouquets Chunky Glitter Glass “Diamond,” 13@rts “Old Gold” XS Microspheres, Shimmerz Paints AcriTonez “Pinkadelic,” AC-Vicki Boutin “Sugared Strawberry” & “Coral Macaroon” Paints, idea-ology-Tim Holtz Sanding Block, Ranger-Tim Holtz “Kitch Flamingo” Distress Paint & Spray Stain, Prima-Finnabair “Paper” Texture Paste, Heavy White Gesso, “Burnt Sienna” Liquid Acrylic, “Green-Gold,” “Aqua-Rose,” & “Rose-Gold” Opal Magic, “Enchanted” Sparks, Waxes: “Vintage Gold,” “Mint Sparkle,” “Turquoise Satin,” “Royal Robes,” “Green Brocade,” “French Lavender,” “Sage Leaves,” & “Shabby Pink,” Liquitex Matte Super Heavy Gel, Mod Podge Stiffy, Unknown “Spider Web” Material, Creative Paper Clay, Unbranded Styrofoam Flower Shaper/Center, Floral Wire, Plastic Leaves, Berries, Teal Sisal, Pink/Bronze Beads, Fairy Garden Figurines, JudiKins Diamond Glaze