Tres Jolie Kit Club–Mecha Love – February 2023 Mixed Media Kit

Hey, y’all! I hope you’re having a fabulous February and have had a chance to play with your kits! This week I have a project for you I made using the February Mixed Media Kit! I grabbed up my kit, added some extra mould pieces, mechanicals, and paints from my stash, and created my Mecha Love mixed media piece!

Make sure to check out my video to see what I did!

feb23-mmKit-01


feb23-mmKit-04 feb23-mmKit-05

To start building up some texture, I added some of the sand texture paste using the stencil from the kit onto the canvas board. I didn’t cover the entire surface with stenciling, I just added the stenciling to a few random areas. In the video, you will see that I added black gesso after the sand texture paste had dried, but that was because I hadn’t planned on adding the cheesecloth so soon! If I had thought I would be adding the cheesecloth to fill in the areas without the stenciling I would have waited to add my gesso. Anyhow…I had been rust-staining fabric around the same time I received my February kits, so my cheesecloth got sucked into the process – even if that rust staining doesn’t show much on this canvas – and while I was playing with different ways to build my canvas, I just happened to lay the cheesecloth down in a way that sparked inspiration! I ran with this new inspiration and used some matte gel to adhere some of the cheesecloth to my canvas.

feb23-mmKit-07 feb23-mmKit-02

Since my cheesecloth led me on a slightly different path than what I had planned originally, I decided I wasn’t going to add gesso again until I had the majority of my mould pieces in place. I grabbed up a variety of gear mould pieces from my stash – made from a wide range of materials since I tend to pre-create pieces when I have extra resin or clay from a different project or I just need to use up old material – and started layering them up using some 3D Matte Gel. I had some broken bits and pieces in the mix, so I just used them as filler to create some lift under areas they wouldn’t be seen, you could just as easily use scraps of cardboard or chipboard as filler! After I had all my gears in place I added the resin frame from the kit and topped it with the large heart from Finnabair’s “Love Machine” Mould (from my stash). I let the 3D Gel dry overnight, then I came back with my matte gel and some more cheesecloth, adding more to the background and laying it across a few areas of the mould cluster. After the matte gel had dried, I added black gesso to everything.

feb23-mmKit-09 feb23-mmKit-10

Now it was finally time to start getting my colors built up! I started with some “Linen” Impasto and a lot of water! All I knew was I wanted to create some type of gradient or ombre effect, so I kept the layer of Impasto heavier on the top half(ish) of the canvas and more watered down on the bottom half(ish).

After the Impasto had dried, I mixed some Tres Jolie “Red” Acrylic Paint and DWM “Fuchsia” Glossy Spray and added this mix to the canvas.

When my paint and glossy spray mix had dried, I came back with more cheesecloth and added it to areas of my resin pieces and canvas. You can see some of the rust-stained cheesecloth on the finished piece still because this final layer of cheesecloth didn’t get completely covered by mediums!

After the matte gel had semi-dried (being fully dry wasn’t necessary!), I returned with some of the Copper and Graphite texture paste from this month’s kit and used them more like paint than paste. I added the copper to a few areas (very few!) of the cheesecloth I had just placed and the gears on the heart, and I added the graphite to the gears. I didn’t want a lot of build-up, I just wanted a bit of color.

feb23-mmKit-03 feb23-mmKit-06

After those pastes had dried, I came in with the Platinum Crackle Paste from the kit and added it to the bottom half(ish) of my canvas, then I set everything off to air dry for about 24 hours. When I came back, I had lovely crackles and it was finally time to get the Brown, Red, and Yellow Rust Effect Paste on the (mould) gears, the resin frame from the kit, and slightly spread out onto the canvas.

When I had my rust how I wanted it, I added some “Red Wine” Metallique Paint to my heart and on the top half(ish) of the canvas background. For the background, I really kept the metallique paint watered down, I didn’t want to completely cover what was already there, I just wanted to add a bit of variation.

Once the “Red Wine” was dry, I added some “Vintage Silk” and “Indian Pink” Finnabair waxes to highlight a few areas on the heart. Finally, I grabbed up the (partial) package of Mechanicals from my stash, kept them “as is,” and adhered them to the gears “on” the heart mould using 3D Matte Gel.

feb23-mmKit-08

Thank you for joining me here today on the blog! I hope this project gave you some inspiration and ideas of what you can do with the items in this month’s Mixed Media Kit! I tried to use the texture pastes in a variety of ways to help you see them in action if you haven’t experienced the joy of crackles and rust effect pastes yet!

Stay Crafty, Friends


Did you get a kit? Share what you made in our Facebook Group!

Thank you for joining us here at Tres Jolie Kits!


Tres Jolie can also be found at:

Tres Jolie Facebook

Tres Jolie Instagram

Tres Jolie Website

Tres Jolie Subscriptions

Tres Jolie Blog

Tres Jolie YouTube

Tres Jolie Pinterest


Tres Jolie Insta Square Frame

In addition to this month’s Mixed Media Kit, I used (from previous Tres Jolie Kits):

Finnabair Moulds: “Love Machine,” “Large Gears,” “Machine Parts,” “Steampunk Hearts,” Finnabair “Steampunk Gears” Mechanicals, Finnabair Heavy Black Gesso, Finnabair “Linen” Impasto, Finnabair “Red Wine” Metallique Paint, Finnabair “Indian Pink” Metallique Wax, Finnabair “Vintage Silk” Opal Magic Wax, DWM “Fuchsia” Gloss Spray, Tres Jolie Red Acrylic Paint, DecoArt Black Gesso, Liquitex Matte Gel

Tres Jolie Kit Club–Steampunk Top Hat–September 2022 Mood Board + Scrapbooking Kit

Hey, y’all! Have you checked out the Tres Jolie Kit Club September Scrapbooking Kit yet? Seen this month’s mood board? Both are fabulous! The kit has the “Gilded Steampunk” Collection from 3 Quarter Designs – the perfect fit for the “Shabby Steampunk” mood board challenge!

Now, I love, L-O-V-E, Steampunk, and while I’m not a 100% Shabby Chic type of person, there are aspects I really love about that style too. This week, for my mood board inspired project, I have a Shabby-Steampunk Top Hat I created using a cut file I designed, the “Gilded Steampunk” Collection from the kit, a couple of moulds, and lots of mediums from my stash – quite a few that are from previous Tres Jolie Kits!

SeptMoodboard-TopHat-01

It wasn’t until I was editing the video that I realized this project isn’t all too “complicated.” The majority of the time spent working on it was really just “busy work” – i.e. rolling clay, gluing, painting, etc. Once I had my base together, and finally figured out where this hat was headed, it went together rather smoothly! Check out my video and see what I mean!


Don’t forget to join the Tres Jolie Mood Board Challenge this month! Make sure to place your entry in the September 2022 Challenge folder on the Tres Jolie Kit Club Café Facebook page by 11:59pm CST on September 30, 2022, for your chance to win a prize!
Tres Jolie Mood Board

moodBoard


Alright! Time to get talkin’ about this Shabby-Steampunk Top Hat!

SeptMoodboard-TopHat-14 SeptMoodboard-TopHat-07

The first thing to do was to put my base together. There aren’t too many pieces – I tried to keep it as simple as possible while creating the size I wanted while using my 12” x 12” cutting mat and cardstock. There really is only one way everything fits together, but I have included a photo for reference using the cut file.

topHat-aligned

After my cardstock base was together, I added some black gesso to all of the areas that I thought may or may not get covered by the patterned paper pieces – I did it mostly because I had used white cardstock, if I had used a darker cardstock or a coordinating cardstock, I don’t know if I would have added the gesso. However, it did also give a little extra stiffness to the base, so that was a bonus I hadn’t really thought of! And, even though it is no longer noticeable, I also added a layer of “Halo Pink Gold” Metallic Paint on top of the black gesso – just to be prepared in case any of those areas didn’t get covered in the later stages.

I didn’t know exactly what I wanted to do for the inside of the hat, I just knew I didn’t want to just give it a coat of paint. Finally, I decided to see if I could do a paint pour – on some tissue paper – to create a liner! It was messy, but it worked! And I was able to use that paint pour on the inside, sides. For the inside top, I just mixed up a little more to pour and dumped it right in.

SeptMoodboard-TopHat-06 SeptMoodboard-TopHat-15

I wanted to get as many pieces ready for assembly as possible before sitting down to start the process, so I used some leather-effect polymer clay to create the “leather” underside of the brim and I used some metallic and glitter polymer clay in a couple of embossing folders to create the sheets of “metal” to fill between the leather-clay and to use along the outer edge of the brim.

The final set of pre-assembly pieces I made were the patterned paper panels and the pink band for the hat. For the pink band, I just cut the half-sheet from the paper pack in half and connected the ends to make one long strip.

For the top, side, and brim patterned paper panels, I partly eyeballed, partly measured approximately where the cut would be – especially for the pieces that have the mannequins, hot air balloon, etc. – and cut them all out. Much like the base pieces, there are not a lot of ways for the pieces to fit all together, but I will add a reference photo here for the panel locations on the base.

topHat-outside-alighned

As I sat staring at all my pieces, trying to decide how to use those chipboard and cut-apart pipes, I thought of windows; little steampunk windows to see the “inner workings” of the hat. I grabbed up some circle dies, picked a few places around the brim and on top of the hat, and cut the circles out of the patterned paper.

SeptMoodboard-TopHat-13

I used a couple of stencils with a couple TCW Stencil butters to add some dimension and texture to the circles I cut out, coated the chipboard pipes in copper embossing powders, and added some Beads In A Bottle to create a little dimension and bolts/rivets to the chipboard. Then I started the assembly process while I waited for my resin to set up in my gilding flake coated, polymer clay window frames.

After all my pipes were in place I gave them a coating of clear gesso so I’d be able to add my paints to create the illusion of depth with shadows.

SeptMoodboard-TopHat-02 SeptMoodboard-TopHat-11 SeptMoodboard-TopHat-10

Now it was finally time to add my patterned paper panels! I also added the pink band, and I created the inside band using the half-sheet of paper from the pack that looks like leather. I finished adding all my clay pieces to the underside of the rim and added them to the outer edge of the brim.

So now I had all of the pieces of the hat together – except the windows – and started my work on filling any gaps and smoothing it all out. I used a mix of gold Stencil Butter, gold Beads In A Bottle, and 3D Matte Gel to smooth along the edge of the brim with all the layers, and to fill in any spaces that I thought needed it. To prepare for the addition of the windows, I added a ring of Beads In A Bottle around the circles on the hat brim and top.

SeptMoodboard-TopHat-05

While my hat sat off to let that gold mix dry, I got to work on putting the focal point of the hat together. I grabbed up some mould pieces and used 3D Matte Gel to hold them in place, and after adding my gesso, I started adding the first layers of paint. While the gears and heart were setting up, I put my pipe pieces together and added the first layers of paint to them. I added the heart and gears to the pipes using more 3D Matte Gel, and set it off to let it set up while I added my lace bits and gilding flakes to my hat base. Before I got too much further along, I added a coat of Workable Fixatif so when the time came to add my final paints there would be a layer of protection on the patterned paper that would keep the wet from just soaking right in.

I laid my hat on its side, using whatever I had on hand to hold it in place and prop it up so the side I wanted to add the heart and pipes to was, at least mostly, level. I made sure to do this close to bedtime, so the 3D Matte Gel I used to hold the resin pieces in place had time to set up – without me becoming impatient and checking it too soon! I also started adding some art stones to the areas I could get at with the hat on its side.

SeptMoodboard-TopHat-12 SeptMoodboard-TopHat-16

Now it was finally time to add on the windows in preparation for the final layers of paint, art stones, and waxes.

I added more paint to my resin pieces, being careful when I was near my windows so they wouldn’t get splatter on them, and then just started working my way down from the top of the hat with more art stones and my paints. I let all the paint dry before flipping my hat over and adding some paint to the underside of the brim.

SeptMoodboard-TopHat-03 SeptMoodboard-TopHat-09

The final touches on this Shabby-Steampunk Top Hat were the addition of a few Finnabair waxes to the top, sides, art stones, lace, and the top and underside of the brim.

SeptMoodboard-TopHat-17 SeptMoodboard-TopHat-08

Thank you for joining me here in my corner! I hope you enjoyed my Shabby-Steampunk, mood board inspired, Top Hat and it gave you some ideas and inspiration for how you can use this month’s Scrapbooking Kit and/or find inspiration for your own mood board project!

Stay Crafty, Friends


Did you get a kit? Share what you made in our Facebook Group!

Thank you for joining us here at Tres Jolie Kits!


Tres Jolie can also be found at:

Tres Jolie Facebook

Tres Jolie Instagram

Tres Jolie Website

Tres Jolie Subscriptions

Tres Jolie Blog

Tres Jolie YouTube

Tres Jolie Pinterest


Tres Jolie Insta Square Frame

In addition to this month’s Scrapbooking Kit (*from previous Tres Jolie Kits), I used:

**(Disclaimer: Some [non-Tres Jolie] items may contain an affiliate link, allowing me to earn a small commission at no extra cost to you!**

Corner Scraps Studio Top Hat Digital Cut File , Finnabair Black Gesso , Finnabair Clear Gesso , Finnabair 3D Matte Gel , Finnabair “Ink Black” Liquid Acrylic Paint , Finnabair “Burnt Sienna” Liquid Acrylic Paint , Finnabair “Machinery” Stencil , Finnabair “Love Machine” Mould , Finnabair “Steampunk Hearts” Mould , Finnabair “Enchanted” Sparks Paint , Finnabair “Rose-Gold” Opal Magic Paint , Finnabair “Soft Satin” Metallique Paint , Finnabair “Steampunk” Metallic Flakes , Finnabair “Shabby Pink” Matte Wax , Finnabair “Sepia” Antiquing Wax , Finnabair “Indian Pink” Metallique Wax , Finnabair Art Stones , Finnabair Mini Art Stones , Nuvo Mica Mist “Antique Gold” , Tim Holtz “Foundry” 3D Texture Fades , Tim Holtz “Diamond Plate” Texture Fades , Distress Paint “Salvaged Patina” , Distress Foundry Wax “Mined” , Distress Foundry Wax “Statue” , TCW “Grecian Gold” Modeling Paste , TCW “Sterling Silver” Modeling Paste , TCW “Fuchsia” Stencil Butter , Katy Sue Designs “Rusty Pipes” Mould , Jacquard Lumiere “Halo Pink Gold” Metallic Paint , Ranger Iced Enamels “Relique Glitz Copper” Embossing Powder , Gary M Burlin Co. “Patina Bronzed Copper” Embossing Powder , Tulip “Copper” Beads In A Bottle , Tulip “Gold” Beads In A Bottle , Ranger Big Emboss It , Liquitex Pouring Medium , Liquitex Matte Medium , Staedtler Fimo Leather Effect “Berry” , Staedtler Fimo Leather Effect “Nut” , Creative Embellishments “Riveted” Stencil , Spellbinders Standard Circle Nestabilities , white cardstock , Fabri-Tac , Liquitex Matte Gel , spray bottle , Amazing Clear Cast Epoxy , Amazing Casting Resin , E6000 , Aleene’s Tacky Glue , Krylon Workable Fixatif , lace tidbits

Reveal Day!–September 2022 Tres Jolie Kits!

Welcome to September and the reveal of this month’s kits!! Make sure to get yours before they’re gone!

Be sure you are following us on all social media platforms (Tres Jolie Kit Club links at end of the post; Corner Scraps links to the right) and have joined the Tres Jolie Kit Club Facebook Café so you won’t miss a single announcement or project created with these kits.

Kit Reveal Banner

Did someone say Steampunk? Yes, please! The September 2022 Scrapbooking Kit has the Gilded Steampunk collection from 3 Quarter Designs. Don’t worry though, it isn’t all gears and metal; pipes and cogs – there are beautiful roses and shabby script as well. The September 2022 Scrapbooking Kit will amazing for all your upcoming projects. Shabby or steampunk (hint, hint for the mood board!), you will find a lovely assortment of patterned papers and perfectly coordinated embellishments.

Do you love getting messy and finding out what happens when you mix a little bit of this and a little bit of that together? Then the Mixed Media Kit is for you! This month we have a canvas board and embroidery hoop all ready for you to take to the next level with the DecoArt and Cosmic Shimmer mediums in this month’s kit. And the best part? The kits can be used with each other! I already combined the mediums from the Mixed Media Kit with my Cards, Tags, & More Kit to make some mixed media cards!

You’ll find our Cards, Tags, & More Kit filled with papers from The Paper Boutique, flowers and trim from Prima Marketing, and a fabulous four-piece die set from Creative Expressions! The September 2022 Cards, Tags, & More Kit is filled with what you need to create your beautiful summery, romantic cards and tags. Who doesn’t like being able to create a variety of projects from one kit?

These kits are for the beginner to the advanced; from clean and simple – to mixed media maven. No matter your style, there is something for everyone. We know you are going to love it!


And now (drumroll, please) the September 2022 Kits from Tres Jolie:

Tres Jolie Insta Square Frame

Scrapbooking Kit

Tres Jolie Insta Square Frame

Mixed Media Kit

Tres Jolie Insta Square Frame

Cards, Tags, & More Kit


Don’t forget to stop by the Tres Jolie YouTube channel and see our video reveal for all our kits.

Love them, right?!?! You can still get one of your own (some kits are in very limited quantities). Become a subscriber and you will never miss out on our gorgeous, coordinated kits. Just visit Tres Jolie Subscribe.


The designers at Tres Jolie have created some amazing layouts and projects with this kit. Here is a little tease from me using the Cards, Tags, & More Kit:

Sept22-popUpCards-sneak

Sept22-foldOutCards-sneak

Sept22-MMcards-sneak

Please stop by the other designer’s blogs (listed below) and check out their sneak peeks:


We have a new mood board challenge for the month, with the following rules and guidelines:

Tres Jolie Mood Board

moodBoard

Place your entries in the September 2022 challenge folder on the Tres Jolie Kit Club Café Facebook page. This challenge ends on September 30th, 2022 at 11:59 pm CST. All entries must be in this folder to be eligible for the prize (to have everyone eligible to win, we are limiting the same winner to once every 3 months).


Did you get a kit? Share what you made in our Facebook Group!

Thank you for joining us here at Tres Jolie Kits!


Tres Jolie can also be found at:

Tres Jolie Facebook

Tres Jolie Instagram

Tres Jolie Website

Tres Jolie Subscriptions

Tres Jolie Blog

Tres Jolie YouTube

Tres Jolie Pinterest


All the designers will be revealing their projects on the Tres Jolie Blog all month long. Make sure you join us for tons of inspiration, including video and photo tutorials. Also, make sure you check out the newest Tres Jolie Chipboard designs that were just added to the store.

Tres Jolie Kit Club–Grungy Journal-August 2022 Mood Board & Scrapbooking Kit

Hey, y’all! After much toil and trouble, I finally got this grungy journal put together! You see, mentally I have an order of operation for my projects – my first project of the month for Tres Jolie Kit Club focuses on the Cards, Tags, & More Kit, and my second project is for the mood board – this month ran a little different though because <gestures at everything>!

Anywho…I finally finished my mood board project! I’m GenX and that means I lived through Nirvana and weird metal jewelry and all things flannel, so I couldn’t help but get excited about the papers this month – Grunge Reinvented by 3 Quarter Designs.

Aug22-GrungeJJ-01

The general construction of this journal is like most junk journals, so my video focuses on how I put the cover together, a bit about the open spine, and some highlights on what is in the signatures.


Video As Soon As All The Technical Difficulties Stop!!!


Tres Jolie Mood BoardTres Jolie Insta Square Frame
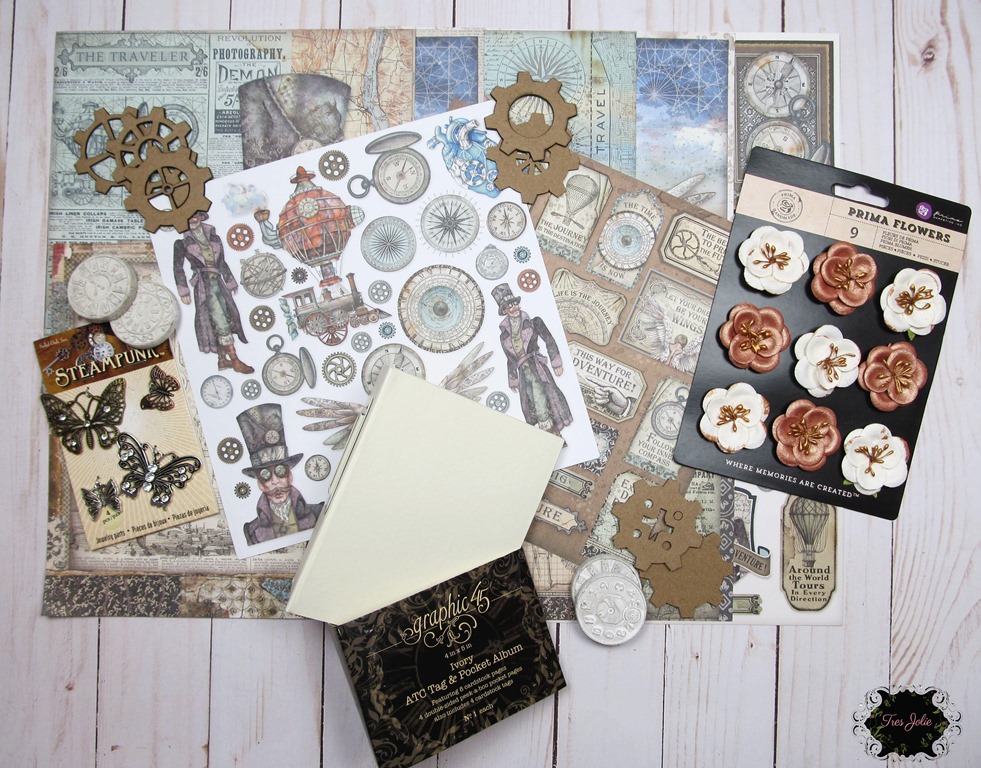
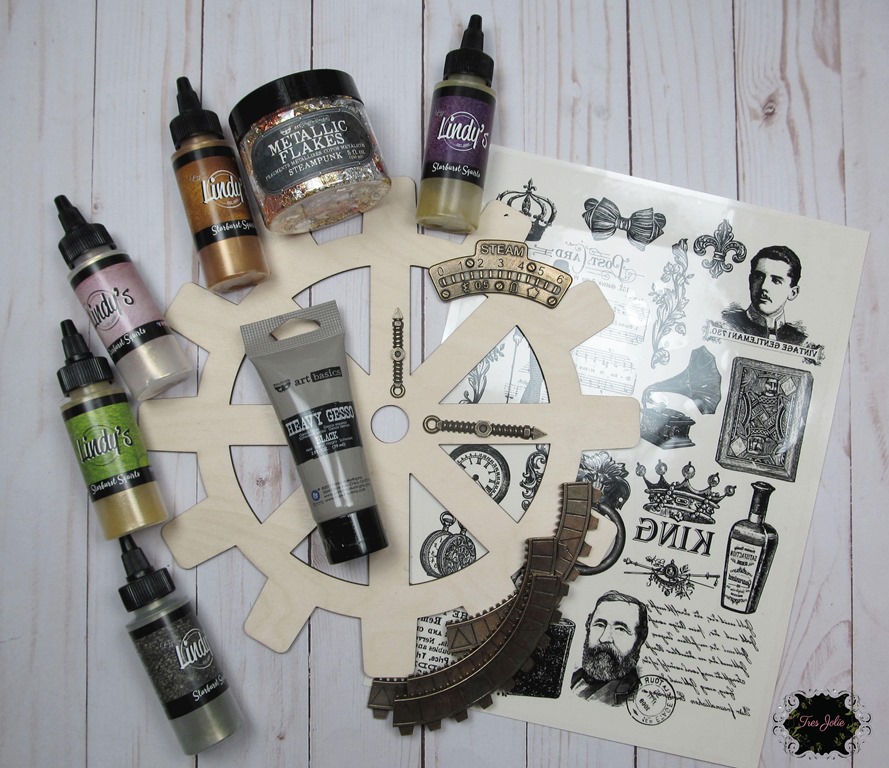
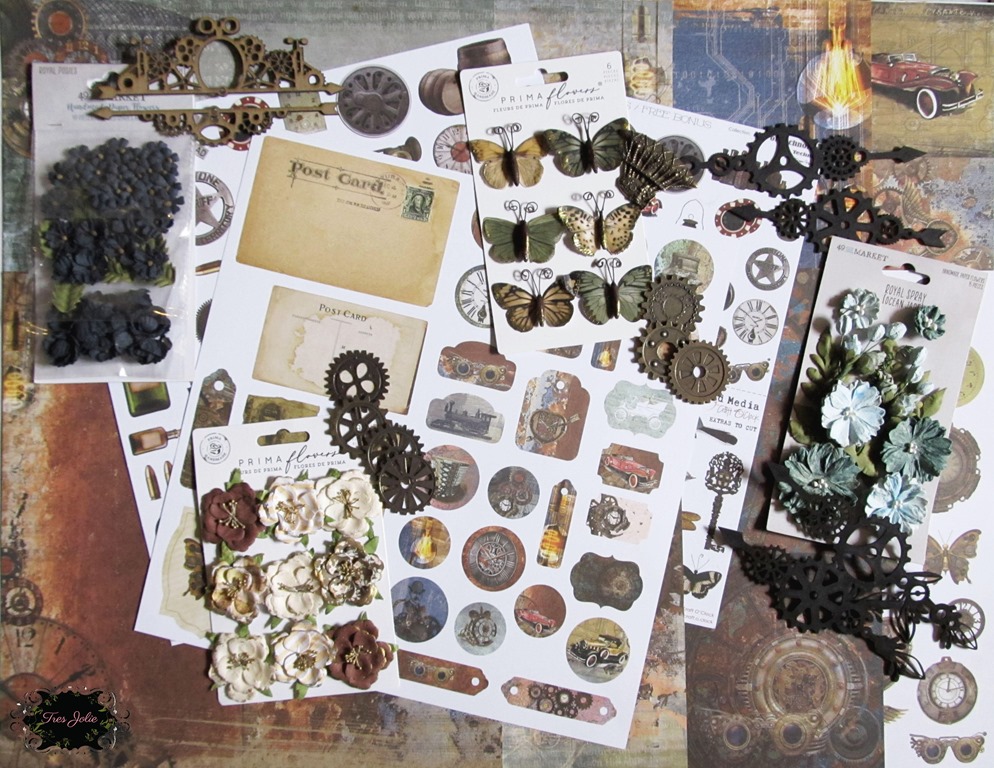
Isn’t the mood board fabulous? Rust, film, watches – so much grungy and/or steampunk inspiration here! Make sure to join in this month and share your creation in the August Mood Board Folder by the end of the month.


Aug22-GrungeJJ-07 Aug22-GrungeJJ-05 Aug22-GrungeJJ-08

My cover consists of corrugated cardboard, chicken wire, chipboard, cardstock, decorative paper, and tons of mediums. I shaped my corrugated cardboard, dyed my white Artisan (linen blend) cardstock, added some Finnabair decorative paper to it, glued everything together, poked the ends of my chicken wire through so they wouldn’t stick out, and added layer upon layer of paints, stains, powders, and pastes to the cover until I got a color combination I was happy with.

I added some resin stars made with my Finnabair “Stars and Moons” mould, and coated them with some of the “Statue” Foundry Wax. I added multiple layers of embossing powder to the cardstock phrase and used the “Statue” Foundry Wax to create a “frame” around it. Then I used the “Sterling” Foundry Wax to create splatters on the cover and the phrase.

Aug22-GrungeJJ-10 Aug22-GrungeJJ-04

When I started this Grungy Journal, I didn’t know exactly how an open spine would work, and I wanted to make sure the herringbone binding had something sturdy to hang on to, so I used the metal hangers that I had removed from the hanging folders to wrap the binding around, then I used some JB Weld epoxy to really make sure it was a sturdy and solid attachment to the chipboard cover pieces.

I used a variety of alcohol inks and mixatives to stain my herringbone binding to grunge it up and found this “Exposed Tape Binding” open spine tutorial by Molly Brooks inspirational and very easy to follow along with (this was my first open spine!). However, because my signatures weren’t going to be evenly stacked – as seen in Molly’s tutorial – I added a single stitch through the herringbone binding to keep my signatures in place.

Aug22-GrungeJJ-06 Aug22-GrungeJJ-09

I used some sari silk to create my tie closure – sewing it as a tube, knoting one end and leaving a few inches unsewn so I could lay it flat between the chipboard and mixed media cover I created. While I did make sure there was a lot tucked in and glued down, as I kept working on my journal, I decided I wanted to reinforce the edges where the strain would be.

sketch sketch2

For the reinforcement, I folded the sari silk back on itself and added some E6000 and bookbinding tape.

Then I punch two holes through, making sure to go through the layers of sari silk, added some Chicago [style] screws (they look like the posts from traditional post-bound scrapbooks), and a couple of washers – with some more E6000 – to make sure I had a tight fit and some Loctite for the threads.

Aug22-GrungeJJ-15 Aug22-GrungeJJ-02 Aug22-GrungeJJ-11

With all the different junk journal tutorials available for construction, I am just going to highlight what can be found within my Grungy Journal. I have the standard variety of papers and envelopes, and I made clusters to use as decorations and/or tuck-in spots. For the button images from the cut-apart sheet, I used my awl to poke the thread holes out, then added some of the bookbinding thread I had cut off after I tied my signatures in place – and topped it with some Glossy Accents to create a faux enameled/epoxy surface. In fact, I added Glossy Accents to a lot of the cut-apart pieces to give them that faux surface, which really gives a sense of depth to the images!

For the chipboard filmstrips from the Grunge Reinvented collection, I layered up four different embossing powders. First I used some Lawn Fawn “Fake Tan” ink, added some Rocky Road & Ancient Amber Baked Textures, and while it was still hot and sticky I added more Rocky Road, melted that, added some Chunky Rust Baked Texture, and then finally some Rusty Hinge Embossing Glaze – always on top of the still hot previous layers.

For my clusters, tuck-ins, and pockets, I used a combination of glue, my tiny attacher, and stitching to put them together and attach them. When I did use the tiny attacher, I made sure the underside of the staples would be covered, that way they wouldn’t come out (as easily!) and there wouldn’t be any rough edges.

Aug22-GrungeJJ-12 Aug22-GrungeJJ-17

I used a combination of papers from the scrapbooking kit, papers from my stash, and even pieces from the hanging folders that had been cut off when I was cutting them down to size.

I have a variety of textures throughout the journal – using paper doilies, vintage crocheted squares, stitching, and a variety of fibers and trims.

Aug22-GrungeJJ-16 Aug22-GrungeJJ-03

In addition to my tuck-in spots and pockets, I added in some envelopes and belly bands. I even have some pieces of grungy handmade paper in a few spots!

Aug22-GrungeJJ-13 Aug22-GrungeJJ-14

To make sure there was ample writing space, my middle signature is filled with papers that have no decorations, pockets, or tuck-in spots. I just stitched two pieces of sari silk together (they have light interfacing on them to give them a little stability) and ran the whole stack through my sewing machine before adding the holes for the bookbinding thread to attach it to the open spine.

Aug22-GrungeJJ-18

Thank you for joining me here in my corner. I hope you enjoyed this Grungy Junk Journal and it gave you some inspiration on what you can do with this month’s Scrapbooking Kit and some ideas on how to interpret this month’s mood board!

Stay Crafty, Friends


Did you get a kit? Share what you made in our Facebook Group!

Thank you for joining us here at Tres Jolie Kits!


Tres Jolie can also be found at:

Tres Jolie Facebook

Tres Jolie Instagram

Tres Jolie Website

Tres Jolie Subscriptions

Tres Jolie Blog

Tres Jolie YouTube

Tres Jolie Pinterest


Tres Jolie Insta Square Frame

In addition to this month’s Scrapbooking Kit & the Foundry Waxes from this month’s Mixed Media Kit (*from previous Tres Jolie Kits), I used:

Disclaimer: Some [non-Tres Jolie] items may contain an affiliate link, allowing me to earn a small commission at no extra cost to you!
*Dress My Craft “Gentleman Accessories” Transfer Me , *KaiserCraft 12”x12” Corrugated Cardboard , *LemonCraft “Leaves” A4 Basic Paper Pad , Distress Embossing Glaze “Rustic Wilderness” , Distress Paint “Rustic Wilderness” , Distress Oxide Spray “Rustic Wilderness” , Distress Grit Paste “Crypt” , Distress Texture Paste “Grave” , Distress Grit Paste “Translucent” , Distress Ink “Brushed Corduroy” , Distress Oxide “Brushed Corduroy” , Distress Embossing Glaze “Rusty Hinge” , Tim Holtz “Bubbles” Stamp , Tim Holtz “Textile Surfaces” , Tim Holtz Long Fasteners Brads , Tim Holtz Tiny Attacher & Tiny Attacher Refills , Tim Holtz “Film Strip Ribbon” ,  Tim Holtz Sanding Block , Tim Holtz Naturals – Black/Cream Trimmings , Distress Collage Medium , Lawn Fawn “Fake Tan” Dye Ink , green bakers twine , *Nuvo “Seaweed Quartz” Glimmer Paste , *Nuvo “Black Ash” Embellishment Mousse , Country Craft Creations “White” Artisan Cardstock , Darice “Rusty” Chicken Wire Ribbon , Finnabair “Sparkling Onyx” Jewel Effect Paste , *Finnabair “Burnt Sienna” Liquid Acrylic Paint , *Finnabair “Ink Black” Liquid Acrylic Paint , Finnabair “Green” & “Rusty” Rust Effect Paste , *Finnabair “Graphite” Texture Paste , Finnabair “Cream” Texture Effect Paste , Finnabair “Stars and Moons” Mould , *Finnabair “Romantica” Decorative Paper , *Finnabair Heavy Black Gesso , Finnabair 2” Silicone Brush , Finnabair Clear Gesso , Finnabair 3D Matte Gel , Seth Apter Baked Texture “Rocky Road” , Seth Apter Baked Texture “Dirty Sand” , Seth Apter Baked Texture “Chunky Rust” , Seth Apter Baked Texture “Ancient Amber” , Ranger Emboss It Ink Refill , Ranger Big Emboss It , Ranger Ultra Thick Clear Embossing Powder , Ranger “Frosted Crystal” Embossing Antiquities , Taylored Expressions “Corrugated” Embossing Folder , various papers: ledger pages, vintage music, piano roll paper , etc. , hanging folders, patterned papers , Tea Bag Paper , paper doilies: white , silver , *black , EK Tools Binding Edge Punch , Amazing Casting Resin , 1/2” Herringbone Binding , Liquitex Matte Medium , E6000 , JudiKins Diamond Glaze , Fabri-Tac , Art Glitter Glue , Ranger Glossy Accents , Aleene’s Tacky Glue , BookGuard 3” Black Book Binding Tape , JB Weld , Selocky Chicago Screws , washers , Loctite Thread Lock , Ranger Heat-It Tool , We R Memory Keepers Envelope Punch Board , Craft Knife , Crop-A-Dile II , Hole Reinforcer Punch , Corner Chomper , Fiskars 1” Circle Squeeze Punch , 1” & 1/8” double-sided tape , eyelets ,  Pellon 805 Wonder-Under Iron-On Adhesive , LineCo PVA , Dritz Fray Check , book binding thread , needles , awl , blending brushes , various sari silk remnants , Krylon Workable Fixatif , Rust-Oleum Semi-Gloss Clear

Cover Colors (used on the white Artisan cardstock): Lindy’s Gang Starburst Squirts *“Maple Syrup Bronze,” *“Hocky Puck Black,” & *“Beaver Tail Brown” , *“Cathedral Pines Green” Magical Shaker , “Bratwurst Brown” Magical Shaker , *“Black Hole Black” Magical Powder , *Finnabair “Burnt Sienna” Liquid Acrylic Paint , Liquitex “Transparent Raw Sienna” Liquid Acrylic Ink , Liquitex “Transparent Raw Umber” Liquid Acrylic Ink , Ranger Perfect Pearls “Forever Green”

Open Spine Strips: Alcohol Blending Solution , Tim Holtz “Latte” Alcohol Ink , “Gold” Mixative , “Silver” Mixative , “Gunmetal” Mixative , 91% Isopropyl Alcohol

Reveal Day! – Check out the August 2022 Tres Jolie Kits!

Welcome to August and the reveal of this month’s kits!! Make sure to get yours before they’re gone!

Be sure you are following us on all social media platforms (Tres Jolie Kit Club links at end of the post; Corner Scraps links to the right) and have joined the Tres Jolie Kit Club Facebook Café so you won’t miss a single announcement or project created with these kits.

Kit Reveal Banner

Where is my GenX crowd? Because the August 2022 Scrapbooking Kit is filled with the Grunge Reinvented collection from the new-to-us company 3 Quarter Designs. Don’t worry though, because even though these papers have a fabulous grungy and masculine feel to them they will still be amazing for all your upcoming projects – they have fabulous autumn colors and leaves. You will find a lovely assortment of patterned papers and perfectly coordinated embellishments.

Love getting messy? Want to give the new Tim Holtz Distress Foundry Waxes a try? Then the Mixed Media Kit is for you! There are Prima bases and a stencil, some DecoArt Sand Paste, and a set of Distress Foundry Waxes. And the best part? The kits can be used with each other! I know I’m already thinking of how to combine the Scrapbooking Kit with the Mixed Media Kit!

You’ll find our Cards, Tags, & More Kit filled with papers, embellishments, and a stamp set from Craft Consortium and goodness – so you can create beautiful summery, romantic cards and tags. Who doesn’t like being able to create a variety of projects from one kit?

These kits are for the beginner to the advanced; from clean and simple – to mixed media maven. No matter your style, there is something for everyone. We know you are going to love it!


And now (drumroll, please) the August 2022 Kits from Tres Jolie:

Tres Jolie Insta Square Frame

Scrapbooking Kit

Tres Jolie Insta Square Frame

Mixed Media Kit

Tres Jolie Insta Square Frame

Cards, Tags, & More Kit


Don’t forget to stop by the Tres Jolie YouTube channel and see our video reveal for all our kits.

Love them, right?!?! You can still get one of your own (some kits are in very limited quantities). Become a subscriber and you will never miss out on our gorgeous, coordinated kits. Just visit Tres Jolie Subscribe.


The designers at Tres Jolie have created some amazing layouts and projects with this kit. Here is a little tease from me using the Cards, Tags, & More Kit:

Aug22-CTM-LetsHaveAWedding-05

Aug22-CTM-miniAlbum-19

miniplanner-sneak

Please stop by the other designer’s blogs (listed below) and check out their sneak peeks:


We have a new mood board challenge for the month, with the following rules and guidelines:

Tres Jolie Mood Board

Tres Jolie Insta Square Frame

Place your entries in the August 2022 challenge folder on the Tres Jolie Kit Club Café Facebook page. This challenge ends on August 31st, 2022 at 11:59 pm CST. All entries must be in this folder to be eligible for the prize (to have everyone eligible to win, we are limited the same winner to once every 3 months).


Did you get a kit? Share what you made in our Facebook Group!

Thank you for joining us here at Tres Jolie Kits!


Tres Jolie can also be found at:

Tres Jolie Facebook

Tres Jolie Instagram

Tres Jolie Website

Tres Jolie Subscriptions

Tres Jolie Blog

Tres Jolie YouTube

Tres Jolie Pinterest


All the designers will be revealing their projects on the Tres Jolie Blog all month long. Make sure you join us for tons of inspiration, including video and photo tutorials. Also, make sure you check out the newest Tres Jolie Chipboard designs that were just added to the store.

Tres Jolie Kit Club – Mecha Steam Queen – July 2022 Mixed Media Kit

Hey, y’all! Have you checked out the July Mixed Media Kit from Tres Jolie Kit Club yet? It has some fabulous Finnabair Tissue Paper, heavy black gesso, and Pixie Dust, along with some Lindy’s Magical’s, DecoArt Crackle Paint, Tres Jolie Chipboard, and a canvas board to get you started!⁠

I was fortunate enough to receive the newest Finnabair Moulds in the mail the same day I was starting my project, so I have that fantastic Mecha Moth on here, along with a ton of other Finnabair mould pieces from both old and new designs!

I used a couple of stencils from previous kits with the crackle paint from the kit and some Finnabair “Crushed Crystals” Jewel Effect Paste. Then I loaded up and layered up all my colors using some of the Liquid Acrylic Paints from February’s Mixed Media Kit and the Lindy’s from this month’s kit.⁠

Jul-22-MMKit-01

Check my video out to see what I did to put this Mecha Steam Queen together!


Video:


Jul-22-MMKit-06 Jul-22-MMKit-08

To get my background started, I layered it up with some of the “Bavarian Blue” Lindy’s Magical’s from the kit and (part of) one sheet of the Finnabair tissue paper, using my Liquitex Matte Medium to adhere the paper. After I had my initial layer, I tore the remainder of the sheet of tissue paper into strips and layered them up, only adding the Magical Shaker as the initial bottom layer under all the tissue paper.

After my matte medium was fully dried, I came in with my stencils. I used my “Flourish” stencil with the crackle paint from this month’s kit, and my “Screwed” stencil with some “Crushed Crystal’s” Jewel Effect Paste. I just used my finger to dab on and blend a thin layer of the crackle paint along the edges and in the corners of the canvas and to soften the edges of the stenciling some.

After my “Flourish” stenciling was dry, I added a layer of clear gesso to help protect my crackle paint (it was going to be a wet, messy job!) and to make my subsequent layers of mediums easier to flow and roll around along the top of the stenciling and between the cracks. Because of the nature of the Jewel Effect Paste – when it dries it is more like the matte medium – I didn’t need to add any gesso to it.

With all of my background mediums dry, I come in with the “Bavarian Blue” Lindy’s, sprinkle it on, and really water it down so it will flow between all of the cracks. From here on out, I don’t let my mediums air dry on my background, I use my heat guns to make sure everything stays where I put it!

Jul-22-MMKit-03 Jul-22-MMKit-10 Jul-22-MMKit-17

On all of my various mould pieces, I coated them with black gesso – either the heavy gesso from the kit or my “regular” gesso on the more detailed pieces. If you only have the heavy gesso and want to get it into detailed areas a little easier, you can just mix in a little water to thin it some. After my gesso layers dried, I coated everything in some TCW “Sterling Silver” Modeling Paste. It says “Sterling Silver,” but it is more like sterling silver that has begun to tarnish – and I love it!

I used my 3D Matte Gel to hold my Mecha Steam Queen together before adding her gesso and modeling paste. I can say, all I knew was I really wanted to use the new Mecha Moth, and everything was built around that. I keep a bunch of pre-made mould pieces handy, so I grabbed them up and started playing around when suddenly I saw how fantastic my “Queens of Steam” piece looked on that big moth body! I added another layer of wings from the “Nocturnal Insects” Mould, and gave her a “Clockfaces” crown.

While I let that 3D Matte Gel set up, I went to work on deciding which gears I wanted to use and picked one of the “Baroque Frames” to set behind my Mecha Steam Queen. On my gears, after the modeling paste was dry, I added some “Texture Powder” to rough them up a bit, added some extra color to them using the two Lindy’s Magical’s from the kit, and I added some “Ink Black” Liquid Acrylic Paint. On my mould pieces, I allowed the mediums to air dry to allow everything to mix and flow together naturally. On the frame, I just mixed some of the “Bavarian Blue” Lindy’s with some Liquid Color Fluid Medium to keep it from being able to reactivate after it was dry.

Jul-22-MMKit-18 Jul-22-MMKit-11

To build up my background, I started with some corrugated cardboard (I just happened to find “hidden” behind a pile of other *stuff* – it must have fallen down some time ago and I forgot to fetch it then!). Anyhow, I used the heavy gesso on it and added some of the crackle paint to it. Then to deepen the black, I added the “Black Hole Black” Magical Powder to it, just using some water to activate the powder and added some of the “Pixie Dust” spray to it. To adhere it to the canvas board, I fully coated the back with some matte gel, placed it where I wanted it and weighed it down to make sure it dried flat. Fully coated the back of that cardboard doesn’t just make sure it is well attached, it seals it up so it won’t become soggy from the back side as I continue working.

Now it was time to start building up all of the mould pieces. I started with the bottom layer of gears, using my 3D Gel to adhere everything and to hold up the edges that extended over the edge of the cardboard so everything would be (relatively) even. I added my frame next and then set everything off to dry.

I hadn’t originally planned on the second layer of gears, but after I had my chain pieces and Mecha Steam Queen already dried in place, I realized it really needed another layer. Fortunately, some of my gears were made from air-dry clay (I often use what I have on hand or need to use up when I decide to get some pieces pre-made) so I was able to break them apart and get them to fit around the corner of the frame (top) and under the wings (bottom right).

Jul-22-MMKit-13 Jul-22-MMKit-19 Jul-22-MMKit-16

With everything finally in place, it came time to start adding the final layers of color, but before I did that, I added a layer of Krylon’s Workable Fixatif, just as a precaution for a little extra protection since it was about to get super wet and messy!

I started with some “Ink Black” Liquid Acrylic Paint and the “Black Hole Black” Lindy’s, and watered it all down, moved the canvas about to get it flowing, and dried as I went. So long as it was still wet, I could reactivate the Lindy’s (and paint) and continue moving it around.

For the wings on my Queen, I used the “Bavarian Blue” powder and some Liquid Color Fluid Medium to hold it in place once it dried.

Jul-22-MMKit-14 Jul-22-MMKit-07

Because I had to break my second gear up some, it left a few small gaps, so I decided to use it as an opportunity to add a bit more sparkle, and used the “Crushed Crystal’s” paste to fill in the gaps and added a touch to the ends of the wings.

To start bringing up the details of my Queen, I added some of the “Ink Black” paint and the “Black Hole Black” Lindy’s and watered it down so it would flow into all of the details.

To intensify the blue on my gears, wings, and Queen, I added some Liquitex “Phthalocyanine Blue” Acrylic Ink, watered it down a little to help it flow, added some of the blue mica powder from Finnabair’s “Pearls & Crystals” Mica set to add a little bit of variation to the shading, and dried it completely so it would stay put!

Jul-22-MMKit-02 Jul-22-MMKit-09 Jul-22-MMKit-12

With all of my blacks and blues in place, it came time to add the final details. To start I used some “Burnt Sienna” Liquid Acrylic Paint to create my shadow effects. It is an absolutely perfect color to create a vintage effect and fabulous shadows to really give a piece some depth. After all my mediums had dried, I came in and gave the whole piece a coating of the “Pixie Dust” Fixative from this month’s kit.

After the “Pixie Dust” had dried, it was time to add some various waxes to highlight various areas on the piece. After my waxes, the final step was adding my beads. I used some “Midnight Magic” Iridescent Beads from ReneaBouquets along the gears and frame, and some 13@arts “Brown Microspheres” to give the final shadowy detail to the layers of my Queen.

Jul-22-MMKit-15

Thank you for joining me here in my corner, I hope you enjoyed the building of my “Mecha Steam Queen” and it gave you some ideas of how you can use the various mediums from not only this month’s kit but previous Tres Jolie Kits as well! That’s what makes Tres Jolie Kits so fabulous – it allows you to build your stash!

Stay Crafty, Friends


Did you get a kit? Share what you made in our Facebook Group!

Thank you for joining us here at Tres Jolie Kits!


Tres Jolie can also be found at:

Tres Jolie Facebook

Tres Jolie Instagram

Tres Jolie Website

Tres Jolie Subscriptions

Tres Jolie Blog

Tres Jolie YouTube

Tres Jolie Pinterest


Tres Jolie Insta Square Frame

In addition to the items from this month’s Mixed Media Kit (*from previous Tres Jolie Kits), I used:

**Disclaimer: Some [non-Tres Jolie] items may contain an affiliate link, allowing me to earn a small commission at no extra cost to you!**

Prima “Flourish” Stencil , Finnabair Jewel Effect Paste “Crushed Crystals” , Finnabair “Ink Black” Liquid Acrylic , Finnabair “Burnt Sienna” Liquid Acrylic , Finnabair White Texture Powder , Finnabair Liquid Color Fluid Medium , Finnabair “Pearls & Crystals” Mica Set , Finnabair “Charcoal Black” Matte Wax , Finnabair “Old White” Matte Wax , Finnabair “Faded Demin” Matte Wax , Finnabair “Old Demin” Wax Cire Cera , Finnabair Moulds: “Queens of Steam” , “Large Gears” , “Machine Parts” , “Mechanica” , “Pieces of Underworld” , “Clockfaces” , “Baroque Frames” , “Nocturnal Insects” , “Mecha Moth” , “Love Machine” , Finnabair Clear Gesso , Finnabair 3D Matte Gel , TCW “Sterling Silver” Modeling Paste , 13@rts Brown Microspheres , Tim Holtz “Screwed” Stencil , Stamperia “Metallic Black” Wax , Little Birdie “Aqua Sheen” Metallic Wax , ReneaBouquets “Midnight Magic” Iridescent Beautiful Beads , DecoArt Black Gesso , Krylon Workable Fixatif , JudiKins Diamond Glaze , Liquitex Matte Gel , Liquitex Matte Medium , Liquitex “Phthalocyanine Blue” Acrylic Ink , spray bottle , Ranger Heat-It Tool , Milwaukee Heat Gun , corrugated cardboard, Mont Marte Terra Cotta Air Dry Clay , Sculpy Air Dry Clay , Sculpy White Polymer Clay , ProMarineSupply Epoxy Resin , Alumilite Amazing Casting Resin , Alumilite Amazing Clear Cast Epoxy


Tres Jolie Kit Club-June 2021 Cards, Tags, & More Kit-Samples!-ATCs, Memorydex, and a Card & Envelope

Hey, all! Welcome back to my little corner!

Today I’m bringing you my third (and final) project this month using the June Cards, Tags, & More Kit from Tres Jolie Kit Club; a sampler of smaller projects—ATCs, Memorydex®, and a notecard & envelope.

20210507_190148-FRAMED

With my three projects this month, I used up every little bit of the June Cards, Tags, & More Kit, and had a fabulously fun time doing it! Check out my video below to see how my samples came together!


Video:


First up, my ATCs:

20210507_185257-FRAMED

I used Tim Holtz’s “Crackling Campfire” and “Salvaged Patina” for the color scheme of my ATCs. The bases are Prima ATCs, dyed some white tulle with Distress Oxide Stain, and I used the clockfaces, butterflies, phrases, and flowers (my flowers were different!) from the kit to top them.

Here are some close-ups of each ATC:

20210507_185314-FREAMED

20210507_185321-FRAMED

20210507_185327-FRAMED


Next, my Memorydex cards:

20210507_185542-FRAMED

Since these cards are meant to go onto a Memorydex®, I kept them a bit flatter than the ATCs. Three of the card’s color scheme are Tim Holtz’s “Blueprint Sketch” & “Mustard Seed” and three are the same as the ATCs, “Salvaged Patina” & “Crackling Campfire.” I grabbed up some sisal for four of the cards and actually just used my wax seals to hold it in place! I used my last butterfly and gears from the kit and added some cut out pieces from the Stamperia paper pack. (Note: At the time I didn’t have the June Mixed Media Kit yet, so I used some Nuvo Gilding Flakes from my stash. As a reminder, the June Mixed Media Kit comes with a jar of Finnabair’s “Steampunk” Metallic Flakes!)

Close-ups of the individual Memorydex® cards:

20210507_185642-FRAMED

20210507_185652-FRAMED

20210507_185700-FRAMED

20210507_185710-FRAMED

20210507_185718FRAMED

20210507_185735-FRAMED


And finally, my notecard and envelope:

20210507_185849-FRAMED

For my envelope I was 100% inspired by Nathifa (Pronounced: na-tee-fa) from Juicy Christians Studios (in my video I only refer to her Instagram handle because I hadn’t heard her say her name or read the pronunciation yet, and I didn’t want to pronounce it wrong!). I am completely obsessed with watching her make envelopes! When I got down to having only pieces from the cut apart sheet left, I figured I’d try my hand at making an envelope.

I used some Kraft paper from my stash, turned a stencil into a stamp, cut out Every. Last. Piece. of the cut apart sheet, and layered things up—using my black Stabilo to create my shadows! I wrote my name on the back flap, to show where a return address would go, and used a silver marker to create the recipient’s address box. Now I may have finally found a use for all the cut apart sheets I’ve collected over the years! (Fussy cutting isn’t my most favorite activity!)

Here are close-up of the front and back of the envelope:

20210507_185922-FRAMED 20210507_190024-FRAMED

Thank you for joining me today! I hope you enjoyed these sample projects and they give you some ideas of what can be done with items from this month’s Cards, Tags, & More Kit!

Stay Crafty, Friends!


Did you get a kit? Share what you made in our Facebook Group!

Thank you for joining us here at Tres Jolie Kits!


Tres Jolie can be found at the following places:

Tres Jolie Facebook

Tres Jolie Instagram

Tres Jolie Website

Tres Jolie Subscriptions

Tres Jolie Blog

Tres Jolie YouTube

Tres Jolie Pinterest


In addition to items from this month’s Cards, Tags, & More Kit (*from previous Tres Jolie Kits), I used:

*Creative Embellishments “Crackled Brick” Stencil, Fabrika Decoru “Rings” Stencil, Ranger-Tim Holtz Distress Paint “Salvaged Patina” & *”Crackling Campfire,” Distress Spray Stain “Salvaged Patina” & “Crackling Campfire,” Distress Oxide Spray “Salvaged Patina” & “Crackling Campfire,” “Blueprint Sketch,” & “Mustard Seed,” Distress Embossing Glaze “Salvaged Patina” & “Crackling Campfire,” Distress Oxide “Salvaged Patina” & “Crackling Campfire,” Ranger Emboss It Reinker, *Ranger-Dina Wakley Black Gesso, Ranger Archival Ink “Jet Black,” StazOn “Jet Black,” Prima-Finnabair *Clear Gesso, *Opal Magic Wax “Turquoise Satin, Metallique Wax “Vintage Gold,” “Old Paperwork” Cling Stamps, *Prima ATC Cards, The Paper Studio Everyday Kraft Paper Stack, *TCW Mini Specimens Stencil, Nuvo Gilding Flakes “Silver Bullion,” “Sunkissed Copper,” & “Radiant Gold,” Liquitex Matte Super Heavy Gel, *Darice Embossing Essentials “Oblong Frames,” idea-ology-Tim Holtz Tiny Attacher, Heidi Swapp Memory Dex Dies, Bic Mark-it “Woodsy Brown,” STA Metallic Color Pen “Silver,” Ranger Heat-It Tool, Ranger Brayer, Miluakeee Heat Gun, We R Memory Keepers 3-Way Corner Punch & Envelope Punch Board, Unbranded Rolodex Dies (4), Unbranded Sisal, Yoption Amazon Store For the Wax Seal Stamps, Anezus (Amazon) Sealing Wax Kit, Gel Press 8×10 Gel Plate, Unbranded Address Guide, Black Stabilo

Tres Jolie Kit Club-June 2021 Moodboard-Scrapbooking & Mixed Media Kits Combo

Hey, all! Welcome back to my little corner!

Today I’m bringing you my moodboard inspired project using both the June Mixed Media Kit and Scrapbooking Kit from Tres Jolie Kit Club!

FRAMED-20210610_101240

I love steampunk! It is in my top three list of themes I could play with all day long! Check out my video to see how I put this together.


Video:


moodboard


Now a few close-ups:

FRAMED-20210610_101311

On my metal pieces I used some clear gesso from my stash and added some color using the Starburst Squirts—Hockey Puck Black & Polite People Purple—from this month’s Mixed Media Kit. (Note: I forgot to mention the Polite People Purple in my video, Sorry!!)

On the wooden gear I adhered some of the metallic flakes and then aged them with more of the Starburst Squirts and clear gesso!

FRAMED-20210610_101330 FRAMED-20210610_101349

These black chipboard arrows are from this month’s Scrapbooking Kit, and I absolutely love them! I love them so much I ordered two more sets to keep on hand (Tres Jolie Chipboard).

FRAMED-20210610_101359

First I used some foam squares to raise the car up a bit, then to add more depth I used the Maple Syrup Bronze Starburst Squirt to create a shadow effect behind the car.

FRAMED-0210610_101251

I used a few of the transfers from the Mixed Media Kit, added some color with more of the Starburst Squirts, and layered them with the car. As a final touch, I grabbed up a few of the flowers and one of the butterflies from the Scrapbooking Kit and added them to my piece!

FRAMED-20210610_101322

I hope you enjoyed this project and it gave you some ideas of what you can do using this month’s kits and the moodboard!

Stay Crafty, Friends


Did you get a kit? Share what you made in our Facebook Group!

Thank you for joining us here at Tres Jolie Kits!


Tres Jolie can be found at the following places:

Tres Jolie Facebook

Tres Jolie Instagram

Tres Jolie Website

Tres Jolie Subscriptions

Tres Jolie Blog

Tres Jolie YouTube

Tres Jolie Pinterest


June Mixed Media Kit

June Scrapbooking Kit

In addition to items from the Mixed Media & Scrapbooking Kits (*from previous Tres Jolie Kits) I used:

*Prima-Finnabair Clear Gesso, *Ranger-Dina Wakley Black Gesso, Liquitex Matte & Gloss Gel, Liquitex Super Heavy Matte Gel, Art Glitter Glue, E6000