Tres Jolie Kit Club–June 2022 Mood Board-“Let Your Creativity Bloom” Junk Journal

Hey, y’all!

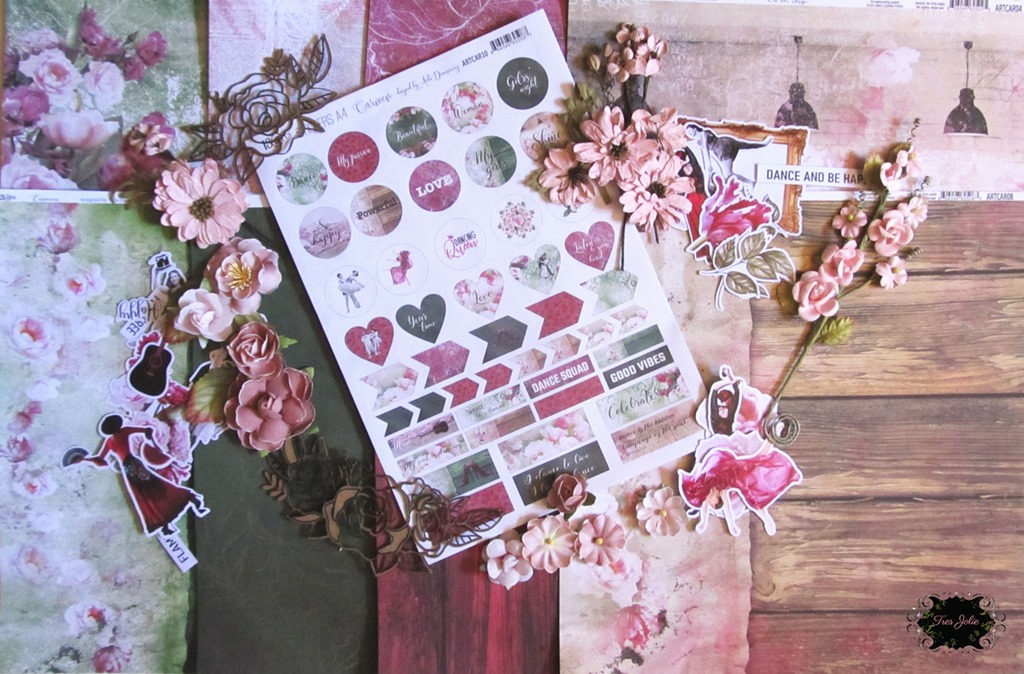
This week I turned the June Scrapbooking Kit from Tres Jolie Kit Club into a junk journal. The P13 papers and ephemera from their “Let Your Creativity Bloom” line had such beautiful colors – muted shades of pink and sage – and there was a photo of a book in this month’s mood board! What else would I think up for the challenge?!?!

I didn’t just put any old fabrics and papers together, I decided that to be extra messy, I needed to dye my fabrics exactly how I wanted and make my own (matching) paper – check out my video to see the process, or, if you want, you can just check out the flip-through.junkJournal-moodboard-jun22-01

On my cover, I layered up strips of fabric, so of the ones I dyed, some are scraps from my stash. I topped a part of one of the patterned papers with one of the Tres Jolie Chipboard pieces coated with some embossing powders, added a few of the flowers, and added some Distress Foundry Wax in “Sterling” as some accent color. Check out the video to see the process of my junk journal from start to finish!


Video:

Flip-through:


Have you checked out the June Mood Board yet? Beautiful pink flowers, galvanized steel bucket, Ball Mason jars, and a book – take a peek and see what creativity it inspires in you!

jun2022-moodboard

Make sure you join us for our June mood board challenge!

  • You can create any type of project for the challenge.
  • You MUST say what you were inspired by.
  • You MUST include the twist in your design.
  • We would love to see you USE AT LEAST 1 of Tres Jolie’s products on your projects but it isn’t required to play along.
  • It MUST be a new project.
  • The twist for this month is SPRING FLING.

Place your entries in the June 2022 challenge folder on the Tres Jolie Kit Club Café Facebook page. This challenge ends on June 30th, 2022 at 11:59 pm CST. All entries must be in this folder to be eligible for the prize (to have everyone eligible to win, we are limited the same winner to once every 3 months).


junkJournal-moodboard-jun22-02 junkJournal-moodboard-jun22-03 junkJournal-moodboard-jun22-05

This junk journal is thick! There are over 50 pages filled with lots of writing space, tuck-ins, and pockets – and a securely attached tie closure to keep it together.

junkJournal-moodboard-jun22-06 junkJournal-moodboard-jun22-26

On both the front and back covers I added a section of lace trim, lightly colored with Distress Oxides, as tuck in spots.

junkJournal-moodboard-jun22-09 junkJournal-moodboard-jun22-25

I turned envelopes into pockets, covered them with strips of fabric, and added closures to a couple of them – a zipper on one and a simple tie on another.

junkJournal-moodboard-jun22-11 junkJournal-moodboard-jun22-12 junkJournal-moodboard-jun22-24

I have tuck-in spots throughout the journal made up of layers of papers and ephemera. I have even added in some old book pages from a 1935 History of English Literature book – I thought this book fit well with the overall “Creativity” theme.

junkJournal-moodboard-jun22-07 junkJournal-moodboard-jun22-10 junkJournal-moodboard-jun22-13

I wanted to add a lot of texture and visual interest in this journal, so I have short pages, ledger papers, bits of fabric and lace, and tons of stitching in here. There is something to see and feel everywhere!

junkJournal-moodboard-jun22-14 junkJournal-moodboard-jun22-15

I turned this bit of patterned paper into a simple flip-up card using some lace as the hinge and adding a tab to the edge.

junkJournal-moodboard-jun22-17 junkJournal-moodboard-jun22-18

a sheet of patterned paper torn makes a wonderfully distressed pocket! And I just couldn’t bring myself to (fully) separate this stretch of flowers, I used the last bits of that particular lace to make hinges between four inch sections so it could be pulled out – and the image could stay together.

junkJournal-moodboard-jun22-08 junkJournal-moodboard-jun22-21

Old music sheets add a lovely aged touch while also making fabulous pockets. I even used the envelopes from the ephemera and tickets to create little tuck-in areas.

junkJournal-moodboard-jun22-19 junkJournal-moodboard-jun22-23

When I saw all that leftover dyed water from my fabrics, I couldn’t just let it go to waste, so I added scraps of paper and created my own custom-colored, dapple-edged sheets – either glued to decorated envelopes and pages, or straight into tuck spots to be written on (I suggest using markers, paint pens, or gel pens though, due to the uneven nature of handmade paper!)

junkJournal-moodboard-jun22-22 junkJournal-moodboard-jun22-20

I didn’t want to just simply cover my basic white envelopes, so I added fabric, lace, paper, and/or ephemera to create variety and interest. I used one of the Prima flower packs from the kit, and in addition to my cover decoration, I stitched flowers directly onto some of the tuck-ins.


As promised in the video, here is the “stitching guide” (I don’t know what else to call it!) for how I put my signatures in.

How I stitched in my signatures:

  • Out = from the inside –> out
  • In = from the outside –> in
  • First-Middle-Third = Signature from left to right
  • Top, Second, Middle, Fourth, Last = Hole, from top to bottom.
First Signature: Middle Signature: Third Signature:
Out – First – Middle

In – Third – Second

Out – Third – Top

In – First – Second

Out – First – Fourth

In – Third – Last

Out – Third – Fourth

In – First – Middle

Out – Middle – Middle

In – First – Second

Out – First – Top

In – Middle – Second

Out – Middle – Fourth

In – First – Last

Out – First – Fourth

In – Middle – Middle

Out – Third – Middle

In – Middle – Second

Out – Middle – Top

In – Third – Second

Out – Third – Fourth

In – Middle – Last

Out – Middle – Fourth

In – Third – Middle


junkJournal-moodboard-jun22-04 junkJournal-moodboard-jun22-16

Thank you for joining me here in my corner, I hope you enjoyed this junk journal and it gave you some inspiration and ideas of what you can do with this month’s Scrapbooking Kit!

Stay Crafty, Friends


Did you get a kit? Share what you made in our Facebook Group!

Thank you for joining us here at Tres Jolie Kits!


Corner Scraps can also be found at:

Corner Scraps Studio Etsy

Corner Scraps Instagram

Corner Scraps Facebook

Corner Scraps YouTube

Corner Scraps Pinterest

Tres Jolie can also be found at:

Tres Jolie Facebook

Tres Jolie Instagram

Tres Jolie Website

Tres Jolie Subscriptions

Tres Jolie Blog

Tres Jolie YouTube

Tres Jolie Pinterest


Tres Jolie Insta Square Frame

In addition to this month’s Scrapbooking Kit (*from previous Tres Jolie Kits), I used:

Some products (non-Tres Jolie) contain an affiliate link, where I earn a commission at no extra cost to you!

Lindy’s Gang: *Flat Fabio Spray “Sidewalk Chalk;” ReneaBouquets: “Scallop Shell Lace” & “Shabby Dream Pink Cotton Crochet Lace;” Prima: *Decorative Tape: “Poetic Rose” & Silver & Pink Charm; Finnabair: 3D Matte Gel & Matte Wax “Sage Leaves;” Ranger: Perfect Pearls “Perfect Pearl,” & Mini Round Blending Tool; Ranger/Tim Holtz – Distress Oxide Spray *Bundled Sage, Distress Oxide Spray “Saltwater Taffy,” Distress Oxide Spray “Kitsch Flamingo,” Distress Oxide Reinker “Saltwater Taffy,” Distress Oxide Reinker “Kitsch Flamingo,” Distress Oxide Reinker “Rustic Wilderness,” Distress Spray Stain “Saltwater Taffy,” Distress Spray Stain “Kitsch Flamingo,” Distress Paint “Saltwater Taffy,” Distress Paint “Kitsch Flamingo,” Distress Paint “Picket Fence,” Distress Stain “Picket Fence,” Distress Reinker “Saltwater Taffy,” Distress Reinker “Rustic Wilderness,” Distress Embossing Glaze “Saltwater Taffy,” Distress Embossing Glaze “Kitsch Flamingo,” Distress Ink “Kitsch Flamingo,” Distress Ink “Saltwater Taffy,” Distress Ink “Bundled Sage,” Distress Oxide “Kitsch Flamingo,” “Saltwater Taffy,” & “Bundled Sage,” & Distress Foundry Wax “Sterling;” Stampin’ Up “Rococo Rose” Ribbon; Fancy Pants Designs “Trend Setter” Decorative Paper Clips; Rit ColorStay Dye Fixative; We R Memory Keepers: Envelope Punch Board, Crop-A-Dile II, Tab Punch, Craft Knife, & 3-way Corner Punch; white cardstock; random fabric and lace scraps, bits, & pieces; old book cover; light peach & sage threads; eyelets; E6000; double sided tape; Fabri-Tac; Aleene’s Tacky Glue; Art Glitter Glue; blending brushes; awl; needles; book binding thread; green masking paper; paperclips; beads; charms

Tres Jolie Kit Club–Mini Junk Journal–April Cards, Tags, & More Kit

Hey, y’all! Welcome back to the Corner Scraps Blog!

For my fourth and final April, Tres Jolie Kit Club project I made a Mini Junk Journal using the Cards and Mixed Media Kits. I love mixing vintage and bright; “old” and “new;” and the muted tones of the 49 & Market Cards, Envelopes, and Tags in this month’s Cards, Tags, & More Kit were the perfect complement to the bright tones of the Dina Wakley Glossy Sprays in the Mixed Media Kit. Check out the video to see how this all went together!

Apr22-MiniJJ-30

My closure is a few layers of fabric and tulle with four large buttons added on and a section of a headband (unused!) sewn onto one end. I also added some simple hand stitches for a little extra interest.

Apr22-MiniJJ-29


Video:


Apr22-MiniJJ-28

Apr22-MiniJJ-01

I used some lightweight chipboard I found in my stash, the floral print from the packaging of the 49 & Market Card Kit, and some teal burlap-ish trim from my stash to create the cover of the journal. I then decorated it with the Tres Jolie Chipboard from the kit and some of the Dina Wakely Glossy Sprays.


These aren’t all of the pages in the journal – only about half – as examples of techniques I used in creating this project!

Apr22-MiniJJ-26

Apr22-MiniJJ-24

I created a few clusters made from bits of fabric and tulle, a tag from the 49 & Market Tag Pack, and a couple of fabric flowers. I used black thread in my sewing machine to stitch the layers together, then added some hand-stitched X’s and hand-stitched the button on. I then glued the clusters along one edge to use as tuck spots. I added a blanket stitch (sewing machine) along the majority of the pages to reinforce the edges and make sure the gel print papers and cardstock backing stayed together! (Even if I did use a lot of glue – I don’t like things coming apart!)

Apr22-MiniJJ-22

Apr22-MiniJJ-21

I didn’t close up the three sides of the envelope to make it, well, an envelope; instead, I left it so it could be all the way unfolded. Throughout the journal, I added in some wax seals – some on pages, some on paperclips.

Apr22-MiniJJ-17

Apr22-MiniJJ-16

Apr22-MiniJJ-13

Not every surface has gel printing on it! I did leave a few sides bare, plus the back of all of the tags – but most of the surfaces have glossy sprays on them, so to write in this journal I think a fine tip marker would work best.

Apr22-MiniJJ-11

On the tags, I used white thread, and instead of punching holes and adding the tag pulls, I crossed two staples from my Tim Holtz Tiny Attacher.

Apr22-MiniJJ-07

Apr22-MiniJJ-06

Lots of different patterns in this junk journal, but the bright Glossy Sprays work with their muted counterparts on the 49 & Market cards and envelopes – and to really tie it all together, I stuck to just using black and white thread.

Apr22-MiniJJ-04

Apr22-MiniJJ-02

From the front cover to the back cover there is a variety of patterns and colors. The fabric flowers worked fabulously during the gel plate printing process and made their way onto the finished product.

Apr22-MiniJJ-27

The spine of the journal has some scrap fabric, tulle, fabric flowers, and buttons from my stash on it. Like the other flowers throughout the journal, these flowers also have some Glossy Spray added to them.

Thank you for joining me here in my corner! I hope you enjoyed this project – and all of the projects this month – and they gave you some ideas of what you can do!

Stay Crafty, Friends


Corner Scraps can also be found at:

Corner Scraps Studio Etsy

Corner Scraps Instagram

Corner Scraps Facebook

Corner Scraps YouTube

Corner Scraps Pinterest


ctm-insta mm-insta

In addition to the April Cards, Tags, & More Kit & Mixed Media Kit (*from previous Tres Jolie Kits), I used:

*Tonic Nuvo Embellishment Mousse: “Coral Calypso” & “Mother of Pearl;” Tim Holtz tiny Attacher; Finnabair 3D Matte Gel; We R Memory Keepers Corner Chomper; Fiskars 1” Circle Punch; cardstock; Ranger Heat-It Tool; wax & wax seal stamps; bookbinding thread & needle; awl; foam mat; hair tie; large paperclips; fabric flowers; LineCo PVA Glue; Aleene’s Tacky Glue; UHU Stic; random scrap fabric; tulle; black & white threads; buttons; hot glue

Tres Jolie Kit Club–3 Cards, 3 “Difficulties”-April 2022 Cards, Tags, & More Kit

Hey, y’all! Welcome back to the Corner Scraps Blog!

Spring is here! Birds are chirping, butterflies are fluttering, and spring storms keep us on our toes!

For my first project of April, I have some sample cards; three cards, three “difficulties.” Check out my video below to see what I did to put them together.


Apr2022-CTM-Cards-08

The first card I make is a quick and easy card, using just the kit and a few bit of bling from my stash. The second card is a little more involved – I make a shaker card, and for the third card, I bring in the mixed media kit so I can talk about gel printing a little early in the month!


Video:


Quick & Easy Card:

Apr2022-CTM-Cards-04

For this card, I just grabbed up a couple of tags from the tag pack, added some foam dots to give a little lift, added a rub-on rose & the rub-on sentiment, and popped on a few flowers from the flower pack and some bling from my (hoarded) stash! I don’t think this card took even 5 minutes to complete!


Shaker Card:

Apr2022-CTM-Cards-05

For my shaker card, I cut out some foam circles to use as spacers and some heavy-duty clear packaging plastic to use as my shaker window. I have a rub-on under the shaker pieces, and I glued the flowers to the underside of the plastic! They are in the shaker, but they don’t move. My shaker pieces are some sequins and some chunky glitter.


Gel Print Card:

Apr2022-CTM-Cards-01

Apr2022-CTM-Cards-02

Apr2022-CTM-Cards-03

For my third and final card, I broke into this month’s mixed media kit and added some of the fabulous Dina Wakley Gloss Sprays to my card using the gel plate! I will be talking more about gel printing in other projects this month, but I wanted to get you going with a few little tips of what you can do with the sprays, paint, and gel plate from the mixed media kit.

I used the gel plate to make patches of color on my background and envelope, I turned the gel plate into a stamp pad so I could add some stamped text to my card front, and I went in with the Lime spray using my fingers as my brush on the envelope and added some Lime splatter to my card front. I have three tags layered for this card and tucked in a few flowers. It wasn’t a “hard” card to make, I merely consider it the more “difficult” of the three cards because there is more to be done to finish it! (Plus I bring in another of April’s Kits!)


Apr2022-CTM-Cards-06

Thank you for joining me here in my corner! I hope you enjoyed this project and it gave you some ideas for cards you can make using this month’s Cards, Tags, & More Kit. Keep an eye on the blog for more projects using this month’s kits!

Stay Crafty, Friends


Corner Scraps can also be found at:

Corner Scraps Studio Etsy

Corner Scraps Instagram

Corner Scraps Facebook

Corner Scraps YouTube

Corner Scraps Pinterest


ctm-insta

mm-insta

In addition to this month’s Cards, Tags, & More Kit & Mixed Media Kit (*from previous Tres Jolie Kits), I used:

*Finnabair Stamp# 967000; *Prima “Pretty Pale” Say It In Crystals; *Twinklets Diamond Dust; *Buttons Galore & More “28 Lilac Lane;” Nuvo “Buttermilk” Crystal Drops; Recollections 2.5” Circle Punch; Ranger Heat-It Tool; Scotch ATG; Fabri-Tac; Art Glitter Glue; JudiKins Diamond Glaze; Foam Adhesive Squares & Dots; foam (or thick chipboard—something to use as “rings” for the shaker); unknown Easter Egg stencil

Tres Jolie Kit Club–April 2022 Kit Reveals!

It’s April 1st, and that means it’s Reveal Day for Tres Jolie Kit Club! Get yours before they’re gone!

We are starting to implement our new year changes, so make sure you are following us on all Social Media platforms and are a part of the Facebook Cafe that way you won’t miss a single announcement or project created with these kits.


April 2022 Scrapbooking Kit, Mixed Media Kit, and Cards, Tags, & More Kit:

apr-22-revealBanner

The April 2022 Scrapbooking Kit is filled with gorgeous new papers from 49 & Market in beautiful peaches, pinks, and greens – as always, these papers will be amazing for all your upcoming projects, well beyond the initial spring feel. You will find a lovely assortment of patterned papers and perfectly coordinated embellishments.

Ever wanted to try your hand at gel printing? This month’s Mixed Media Kit contains a gel printing plate, brayer, paint, and sprays to get you going!

Our Cards, Tags, & More Kit is filled with more new papers from 49 & Market and goodness so you can create lovely cards and more. Who doesn’t like creating a variety of projects from one kit?

These kits are for the beginner to the advanced, clean and simple to mixed media maven. No matter your style, there is something for everyone. We know you are going to love it!


sb-kit

*Scrapbook Kit*

mm-kit

*Mixed Media Kit*

ctm-kit

*Cards, Tags, and More Kit*


Don’t forget to stop by the Tres Jolie YouTube channel and see our video reveal of all our kits.


Love them, right?! You can still get one of your own (some kits are in very limited quantities). Become a subscriber and you will never miss out on our gorgeous, coordinated kits. Just visit  Tres Jolie subscribe.


The designers at Tres Jolie have created some amazing layouts/projects with this kit.

Here is a little tease from me using this month’s Cards, Tags, & More Kit and Mixed Media Kit:

Cards-SneakPeek TagNotebook-SneakPeek April22-MiniJJ-SneakPeek

Please stop by the other designers’ blogs and check out their sneak peeks. They are listed below:

Rae Moses

Jeanne Rodriguez

Kim Heard


We have a new mood board challenge for the month. Here are the rules.

  • You can create any type of project for the challenge.
  • You MUST say what you were inspired by.
  • You MUST include the twist in your design.
  • The twist for this month is SPRINGTIME MADNESS.
  • We would love to see you USE AT LEAST 1 of Tres Jolie’s products on your projects but it isn’t required to play along.
  • It MUST be a new project.

Here is the April 2022 Mood Board:

moodboard

Place your entries in the April 2022 challenge folder on the Tres Jolie Kit Club Cafe Facebook page. This challenge ends on April 30th, 2022 at 11:59 pm CST. All entries must be in this folder to be eligible for the prize (to have everyone eligible to win, we are limited the same winner to once every 3 months).


Don’t forget that Tres Jolie can be found in the following places:

Tres Jolie Facebook

Tres Jolie Instagram

Tres Jolie Website

Tres Jolie Subscriptions

Tres Jolie Blog

Tres Jolie YouTube

Tres Jolie Pinterest


All the designers will be revealing their projects on the Tres Jolie blog all month long. Make sure you join us for tons of inspiration, including video and photo tutorials. Also, make sure you check out our newest chipboard designs that were just added to the store.

Tres Jolie Kit Club – Altered Embroidery Hoops – March 2022 Cards, Tags, & More Kit

Hey, y’all! Welcome back to the Corner Scraps Blog!

For my final March project for the Tres Jolie Kit Club, I have some more décor – altered embroidery hoops. I have my 3-inch hoops secured with some E6000 to a paper-covered, paperclay base. I added some picture hanging wire to the clay while it was still wet, and sped up the drying process (some) by putting the clay in my oven (200°F) for 15 minute intervals.

Check out my video to see how I put this all together – aside from the dry times, it went together rather quickly. I actually got it all together in less than a full day because I was able to work with my clay base sooner than a full air-dry time would have allowed!

AlteredHoops-Mar22CTM-02


Video:


As you saw in the video, I rolled out some paperclay to make my base. While my base was drying, I started to get to work on my embroidery hoops. I cut my rice paper down to circles, and added “V” shaped notches along the edges so they would fold over better and make it easier to keep wrinkles out.

AlteredHoops-Mar22CTM-08

I added some Distress Crackle Paste to my hoops carefully since I already had the rice paper in, and added some along the edge of my paper-topped paperclay base. I hadn’t originally planned on adding the mica powder to the base, but once I saw the pink, I had to go with it!

AlteredHoops-Mar22CTM-04 AlteredHoops-Mar22CTM-06

I also added some of the crackle paste to the Tres Jolie Chipboard, and when my mediums were dry – it didn’t take long at all – I started layering the chipboard ephemera up after I got my hoops into place.

AlteredHoops-Mar22CTM-07 AlteredHoops-Mar22CTM-01

I used my Finnabair 3D Matte Gel to hold all of my embellishments in place – it’s great for adding lift to pieces – and because the 3D gel is so durable, I moved right into adding my flowers onto the project. After I had my flowers on, I decided they were just too white, so I added some of the ink from the ink pad in the kit mixed with some of the mica. I didn’t want to make the flowers completely pink, so I watered the mix down so it would create a light tint.

AlteredHoops-Mar22CTM-03

The final addition was a splattering of some watered down white gesso. Now that everything is 100% dry (it’s been a couple weeks since I set this on a wire shelf to finish drying!) I am adding some protective finishes and will be posting it up in my Etsy shop!

Thank you for joining me here in my corner. I hope you enjoyed this project – and all of this month’s projects – and were inspired to go out and create! Don’t forget next Friday is the first of the month and that means NEW KITS!!

Stay Crafty, Friends


Did you get a kit? Share what you made in our Facebook Group!

Thank you for joining us here at Tres Jolie Kits!


Corner Scraps can also be found at:

Corner Scraps Studio Etsy

Corner Scraps Instagram

Corner Scraps Facebook

Corner Scraps YouTube

Corner Scraps Pinterest


mar22ctm-insta mar22mm-insta

In addition to items from this month’s Cards, Tags, & More Kit and Mixed Media Kit (*from previous Tres Jolie Kits), I used:

*Tim Holtz Crackle Distress Texture Paste; Creative Paperclay; Finnabair 3D Matte Gel; Daler Rowney White Gesso; Fabri-Tac; E6000; Krylon Matte Finish; Ranger Heat-It Tool; 3” Embroidery Hoops; picture hanging wire; iron-on fabric interfacing

Tres Jolie Kit Club–“Carmen” Junk Journal–February 2022 Mood board

Hey, all! Welcome back to the Corner Scraps Blog!

This week I have my Tres Jolie Kit Club mood board inspired project for you – a junk journal using this month’s Scrapbooking Kit! I had an old book cover that I had altered a while ago, just waiting for the right papers to come along to make a junk journal, and the “Carmen” line from 13@rts (13 Arts) was the perfect fit! I really love the combination of the dark pink with the deep green that is in these papers.

Feb2022-Mdbrd-CarmenJJ-15

I didn’t make a “How to make a Junk Journal” video for this project—there are tons of how-to videos to be found on YouTube already—I just go over what I’m doing to help give you some ideas of how this month’s kit can be used. Check out my video to see my thought process!


Video (full):

Video (starts at flipthrough):


February 2022 Tres Jolie Kit Club Mood Board:

4-moodboard

Check out this month’s Mood Board! Isn’t it fabulous? The twist this month is “Cabaret Life” – grab up your papers and glues and join in! Place your entries in the February 2022 challenge folder on Tres Jolie Kit Club Café Facebook page. This challenge ends February 28, 2022 at 11:59 pm CST. All entries must be in this folder to be eligible for the prize (to have everyone eligible to win, we are limited the same winner to once every 3 months).

Challenge Rules:

  • You can create any type of project for the challenge.
  • You MUST say what you were inspired by.
  • You MUST include the twist in your design.
  • We would love to see you USE AT LEAST 1 of Tres Jolie’s products on your projects but it isn’t required to play along.
  • It MUST be a new project.

Feb2022-Mdbrd-CarmenJJ-01

Feb2022-Mdbrd-CarmenJJ-11

I mixed up four different embossing powders (check the product list at the end of the post!) and added that mixture to the Tres Jolie Chipboard from the kit. I then added it as little tuck spots on the back cover and front page of the journal.

Feb2022-Mdbrd-CarmenJJ-12

Feb2022-Mdbrd-CarmenJJ-13

The spine of this cover was in pretty sad shape when I originally decided to do the alterations. I had to layer up some linen hinging tape and book binding tape to hold everything together again, and the outer layer still wanted to peel off – by the fabric and canvas layers I added to my junk journal gave this cover new life.

Feb2022-Mdbrd-CarmenJJ-10

In addition to the “Carmen” papers, I have some printables I created and some tea dyed papers I made in here. That music fabric in the above photo has one of the printables printed on it!

Feb2022-Mdbrd-CarmenJJ-02

Feb2022-Mdbrd-CarmenJJ-03

Feb2022-Mdbrd-CarmenJJ-08

Some of the pages in my journal are dyed with various pink inks/sprays. I have stitching throughout, along with little tuck spots made from corners or layers of paper and fabric/lace. If I wasn’t using bits of the ephemera pack in stitched clusters, I layered them up on a page to add some interest and detail.

Feb2022-Mdbrd-CarmenJJ-04

Feb2022-Mdbrd-CarmenJJ-09

In addition to the ephemera pack for bits of detail, I used the cut apart page from the “Carmen” paper pad. After I cut out the piece I used, I distressed the edges with scissors and added some “Frayed Burlap” Distress Ink. I think one of my favorite things about junk journals is the freedom they give to the creative process. A lot of the time I would just grab up some of the bits and pieces and just start layering them up – without trying to think if it looked “right.” More often than not, NOT overthinking created easy and wonderful results!

Feb2022-Mdbrd-CarmenJJ-05

Feb2022-Mdbrd-CarmenJJ-06

Feb2022-Mdbrd-CarmenJJ-07

Although I love the creative process of creating junk journals, they are journals! So I also make sure to leave lots of room for journaling – blank pages, tags, and lots of tucks and folds to hold loose bits.


Feb2022-Mdbrd-CarmenJJ-14

Thank you for joining me here in my corner, I hope you enjoyed this project and it gave you some ideas of what you can make using this month’s Scrapbooking Kit!

Stay Crafty, Friends!


Corner Scraps can also be found at:

Corner Scraps Studio Etsy

Corner Scraps Instagram

Corner Scraps Facebook

Corner Scraps YouTube

Corner Scraps Pinterest


In addition to this month’s Scrapbooking Kit (*from previous Tres Jolie Kits), I used:

*StudioLight Rice Paper (RICEJMA22); *Lindy’s Gang: “Terra Cotta Rust” & *“Bougainvillea Red Teal” Embossing Powders; *Prima “Blossom Bud” Fluid Chalk Ink; Ranger Antiquities “Frosted Crystal” Embossing Powder; Finnabair: *Elementals Resist Canvas (Prima Item# 960698), “Manuscript” & “Ornate Lace” Stencils, “Rusty Red” Matte Wax, & “Red Wine” Metallique Paint; *P13 “The Four Seasons: Spring” Stamp Set (this month’s Cards, Tags, & More Kit; in video, not actually used in journal); StazOn “Jet Black” (in video, not actually used in journal), Shimmerz: “Ruby” Spritz & “Pink Stilettos” Coloringz; Plain Jane Simply Sheer “Taupe;” Dylusions “Funky Fuchsia” Ink Spray; Tim Holtz “Tea Dye” Distress Oxide Spray, “Kitsch Flamingo” Distress Embossing Glaze, “Frayed Burlap” Distress Ink, Jute Sting, & “Symphony” Tissue Tape; Scotch: Expressions “Pink” Tape & ATG; Fabri-Tac; Art Glitter Glue; Simon Says Stamp Clear Embossing Ink; *DecoArt “Black” Gesso; We R Memory Keepers: Corner Chomper, Crop-A-Dile, & Crop-A-Dile II; book binding cloth; book binding tape, double-sided tape; Linen Hinging Tape; old book cover; Liquitex Matte Super Heavy Gel; tea dyed papers; printables created by me; piano roll paper; old news paper; old book pages; Recollections Blank Cards & Envelopes; various fabrics and trims from my plethora of fabrics and trims!; pink sewing thread; white book binding thread; large needle; awl; We R Memory Keepers Foam Mat (or something to use as a “cushion” for your awl—stack of paper, phone book, folded towel, etc.); chain; *Charm (this month’s Cards, Tags, & More Kit); pink threads; black thread

Tres Jolie Kit Club-Boxes & Tags-December 2021 Cards, Tags, & More Kit

Hey, all! Wow, Christmas is just two days away and soon 2022 will be here!

For my third, Cards, Tags, & More Kit project this month, I used a bunch of old cardstock from my stash, some cut files, and some dies to get some small boxes, tags, and rosettes made up! Need to add some more tags to gifts? Or get some last minute stocking stuffers taken care of? Then take a peek at these! (Or use them to get a head-start on next year! Because that’s what I say I’ll do every year and never do—but it sounds good! LOL)

FRAMED-20211117_164653

Check out my video to see a way to use up smaller pieces of paper you may have left over for some tags, or make yourself a small box or two if you need one in the next couple of days!


Video:


Boxes:

FRAMED-20211117_165019 FRAMED-20211117_164937

These first two boxes are both Snapdragon Snippet Designs that I found on the Silhouette Store. The one on the left is a 10-sided box, not too difficult to put together, but Snapdragon Snippets has “extra” flaps to reinforce the edges—which makes it much sturdier! The one with drawers is a little more time consuming to put together, but it isn’t overly difficult, and I think it would be cute for candy or small items! (Links to directions with the cut files.)

FRAMED-20211117_164901

This box is also from the Silhouette Store, by Paper Closet Designs. I didn’t look to see if there were directions anywhere since it is a rather straight forward cut and quick to put together. If you wanted to gift a crafter some glue, this box is just big enough for an 8oz bottle of FabriTac!

FRAMED-20211117_164959 FRAMED-20211117_164950

These last two boxes are probably the simplest of them all! The pill box on the left is the back cover of the paper pack! It has a template on it which you can use to make more pill boxes or, like I did, just turn that template into the pill box! It depends on how many you want or need! The box on the right is from a Sizzix die – I don’t know what the name is, or if it has one, it came in the box with my Big Shot Plus!


Toppers & Tags:

FRAMED-20211117_165223

Rosettes make cute gift toppers; or pop them on the end of a tag! I just used my Tim Holtz Mini Paper Rosette’s die and cranked these out! Using hot glue to hold them together means there is no dry time and they are good to go quicker!

FRAMED-20211117_165133

These tags were definitely the quickest of everything I made for this week! I didn’t measure, I just grabbed the scraps of cardstock and patterned paper and eyeballed them together. I used my We R Memory Keepers Corner Chomper for my angled cuts, but scissors would work just the same!


FRAMED-20211117_164724

Thank you for joining me here in my corner! I hope you enjoyed these ideas and they gave you some ideas of what you can do – some rather quickly – using this month’s Cards, Tags, & More Kit!

Have a happy holiday season and a safe & happy New Year!

Stay Crafty, Friends


Did you get a kit? Share what you made in our Facebook Group!

Thank you for joining us here at Tres Jolie Kits!


Tres Jolie can be found at the following places:

Tres Jolie Facebook

Tres Jolie Instagram

Tres Jolie Website

Tres Jolie Subscriptions

Tres Jolie Blog

Tres Jolie YouTube

Tres Jolie Pinterest


ct&mkit

*Dress My Craft “Crochet Doily” Die; DCWV “Latte,” “Mariposa,” & “Linen Closet” Stacks; Silhouette Cameo 3; Silhouette Design Store: Snapdragon Snippets-“Box 3D Hidden Bins” # 184741 & “Box 3D Ten Sided with Lid Doily” # 277164, and Paper Closet Designs-“Tall Christmas Box with 3D Bow # 389306; We R Memory Keepers Corner Chomper; Sizzix Big Shot Plus; Sizzix Box Die, Tim Holtz “Mini Paper Rosettes;” Art Glitter Glue; double sided tape; hot glue/hot glue gun; hole punch; Sakura pens – or anything to write on dark surfaces with if necessary!

Tres Jolie Kit Club–Advent Calendar-Moodboard Inspired Project

Hey, all! Welcome back to my corner!

I have, for my moodboard inspired project, an Advent Calendar using the Tres Jolie Kit Club’s Limited Edition Advent Calendar Kit, the December Scrapbooking Kit, and even some of the paint and glitter from the December Mixed Media Kit!

AdventCollage

Now, this project was a rather “hefty” project, and there was more than once I thought about stopping! LOL! But, I recorded my process, so I hope you find it helpful and enjoyable! It did turn into two, longer than I expected, videos though – one for the base, and one for the roof! Check them out!


Part 1 – the base:

Part 2 – the roof:


December 2021 Moodboard:

moodboard


For my base I created my own “stain” using the silver paint from the mixed media kit, the Distress Oxide from the Advent kit, and some clear gesso. I had to cover (practically) every surface of the calendar with it! I just couldn’t leave anything unfinished! Do you have to? No! The only surfaces I didn’t stain were the drawer fronts and the inside of the back panel of the roof – because they would be getting covered with gel medium and paper! (The measurements for my “stain” are approximately 1/3 cup clear gesso, between 1/4-1/3 of the bottle of silver paint, and 60 full squirts of the Distress Oxide Spray – and yes, I rubbed it in, I didn’t brush it on!)

FRAMED-20211202_222711

My drawer fronts are covered in paper from 49 & Market found in this month’s Scrapbooking Kit. I used two sheets of paper, and probably close to 2/3rds of the package of rub-on’s! (To make sure your paper(s) are centered, work from the center out!) At the bottom edge of the bottom row of drawers and the top edge of the top row, I added some of the Snow Glitter to “fill-in” the small gaps since the drawer fronts, when all together, are slightly larger than 12 inches. After the rub-on’s, and before the snow, I sprayed four layers of Krylon Matte Finish for some extra protection.

FRAMED-20211202_222602 FRAMED-20211202_222628

After the gel medium I used to attach the papers dried fully, I just started layering the rub-on’s (before the snow glitter). In the center of the Advent I added the large die cut wreath and roses from the paper pack and then came in with a few of the rub-on poinsettias. My “knobs” are Tim Holtz Hitch Fasteners (I pre-drilled my holes!) and, using jump rings, I hung the Tim Holtz Number Tokens that can be found in the Advent Kit.


Once I saw the watercolor tree paper I knew it belonged in the roof! It really shaped how the rest of my Advent Calendar came about. If you look closely at the trees, you can see where the pattern starts it’s repeat, I made that specific tree the center of my background. With careful cutting and placement, the seam is practically invisible – especially with the “distraction” of all the other trees in the top!

FRAMED-20211202_222701

I used a variety of Distress Crayons to add color to my trees and deer, I didn’t want to paint them, and I didn’t want to stain them – watery liquids will follow your wood grain and I wanted more control without having to seal the wood first and I still wanted the wood grain to show. The Distress Crayons gave me that control! I could control where my colors went and rub them in to still show the grain! (My deer and trees were also coated with the matte spray so the “snow” wouldn’t activate the water-reactive Crayons)

FRAMED-20211202_222937

FRAMED-20211202_222825

FRAMED-20211202_222949

If you watch the video, you will see that I “dye” my deer and trees before I ever add the crayons. I did this for a couple of reasons – 1) The color of the wood can effect the colors placed on top – like the difference of what happens when you use white or black gesso and 2) I rarely know exactly what I am going to be doing so I like to “be prepared”!

In addition to the Glitter Snow in the kit, I made my own snow paste! I just had to have snow everywhere!! I didn’t even mind the snow on the legs of the deer! Why? Have you ever walked through snow? That stuff will stick to you and I think it helps add to the illusion of movement – like the deer were really walking through.

FRAMED-20211202_222801 FRAMED-20211202_222804

I also added some white bottle brush trees from my stash and a small string of lights inside the roof. On the front panel, I had to add more snow! I finished drawing the snow mounds across, laid down a layer of white gesso, then added my snow pastes!

FRAMED-20211202_222637 FRAMED-20211202_222645

For my roof I wanted snow, but I also wanted the shingles to show – so I compromised using a stencil! After I stained my roof I added a few coats of sealer in hopes the pastes wouldn’t break through and absorb the stain. It worked – mostly! I added my stenciling to the roof, then the roof peak so I could blend it into the stenciling and while the paste was still wet, I added glitter.

FRAMED-20211202_222526 FRAMED-20211202_222751

Thank-you for joining me here in my corner! I hope you enjoyed this project and it gave you some ideas of what you can do using the Advent Calendar Kit and the Scrapbooking Kit!

Stay Crafty, Friends!


Did you get a kit? Share what you made in our Facebook Group!

Thank you for joining us here at Tres Jolie Kits!


Tres Jolie can be found at the following places:

Tres Jolie Facebook

Tres Jolie Instagram

Tres Jolie Website

Tres Jolie Subscriptions

Tres Jolie Blog

Tres Jolie YouTube

Tres Jolie Pinterest


ADVENT-CALENDAR-KIT unnamed mmkit

In addition to the Advent Calendar Kit and the December Scrapbooking & Mixed Media Kits (*from previous Tres Jolie Kits), I used:

*Lindy’s Gang “Sidewalk Chalk” Flat Fabio Spray; *Cosmic Shimmer Crackle Paste “Frosted Aqua;” *Tres Jolie Crackle Medium; TCW Light & Fluffy Modeling Paste; Ranger/Tim Holtz “Speckled Egg” Distress Paint, Distress Crayons: “Tree Lot,” “Iced Spruce,” “Snow Flurries,” “Empty Tomb,” “Crooked Broomstick,” “Old Paper,” “Wild Honey,” “Scattered Straw,” “Tea Dye,” “Black Soot,” “Speckled Egg,” “Frosted Juniper,” & “Weathered Wood;” Ranger Brayer; idea-ology/Tim Holtz Hitch Fastners; Prima/Finnabair Heavy White Gesso, “Bindweed Wallpaper” Stencil; Liquitex: Clear Gesso, Matte Gel, Gloss Super Heavy Gel, and Acrylic Inks: “Titanium White,” “Naphthol Crimson,” “Yellow Medium Azo,” & “Phthalocyanine Blue;” Krylon Workable Fixatif & Matte Finish; Daler Rowney White Gesso; 4mm & 8mm jump rings; foam snow; JoAnn’s Makers Holiday Littles White Bottle Brush Trees; Gorilla Wood Glue, double sided tape; Scotch Tape; E6000; Starry Lights: Warm White

Tres Jolie Kit Club-Autumn Cards-November 2021 Cards, Tags, & More Kit

Hey, all! Welcome back to my corner!

Today I’m bringing you a couple of quick and simple autumn cards using the Cards, Tags, & More Kit from Tres Jolie Kit Club. I used a couple of pre-made card bases and envelopes from Recollection’s (stash) and just added my own touch using the papers, ephemera, and chipboard from this month’s kit, as well as some other items from my stash.

FRAMED-20211024_121120

Need some quick cards? Check out my video to see how I put these together!


Video:


Simple, yes? Not all projects need hours of work to come out fabulous! And really, the Prima papers and Tres Jolie chipboard does most of the work here!


FRAMED-20211030_094414

My card bases are 6.5” x 5”, so I cut out 6.25” x 4.75” rectangles. Then I measured in 1/2” all the way around and, using my craft knife, I cut out my center rectangle! Two layers out of one rectangle!

I also just grabbed up a leaf stencil and some fluid chalk inks to add some decoration and color to the card bases and envelopes.


FRAMED-20211030_094108

FRAMED-20211030_094049

I have had that flocking in my stash for – a very long time! I would have to say over 10 years! I just never knew what to do with it. I finally decided it was time to pull it out and see if I could make it work! I used some fluid chalk ink and sticky embossing powder to start, but the flocking didn’t really stick down heavily—it came out more like fuzz—so I added some collage medium and added more flocking. I do like the “unevenness” of the flocking though! Some places are have a thinner layer which makes it look lighter, and some areas are nice and thick, which makes a darker area!


FRAMED-20211030_094302

Here is a close-up to really show the flocking. I added some clear beads as raindrops to this umbrella and just a few clear sequins on the pear card.


FRAMED-20211030_094010

Thank you for joining me here in my corner! I hope you enjoyed these cards and they gave you some ideas of what you can make using this month’s Cards, Tags, & More Kit!

Stay Crafty, Friends!


Did you get a kit? Share what you made in our Facebook Group!

Thank you for joining us here at Tres Jolie Kits!


Tres Jolie can be found at the following places:

Tres Jolie Facebook

Tres Jolie Instagram

Tres Jolie Website

Tres Jolie Subscriptions

Tres Jolie Blog

Tres Jolie YouTube

Tres Jolie Pinterest


Nov21-CT&Mkit

In addition to the Cards, Tags, & More Kit (*from previous Tres Jolie Kits), I used:

*Buttons Galore & More: “28 Lilac Lane;” *TCW: “Mini Art Deco Leaves” 6×6 Stencil; *Dress My Craft: Crochet Doily Die; *Ranger/Tim Holtz: Matte Distress Collage Medium; Ranger Sticky Embossing Powder; *Prima/Ingvild Bolme Quick Dry Fluid Chalk Ink: “Pastel Purple,” “Coldsfoot Petals,” & “Pastel Violet;” Recollections Value Pack Cards & Envelopes; purple flocking; doubled sided foam; Art Glitter Glue; X-Acto Knife