Tres Jolie Kit Club–March 2022 Mood board-Scrapbooking & Mixed Media Kits

Hey, y’all! Welcome back to the Corner Scraps blog!

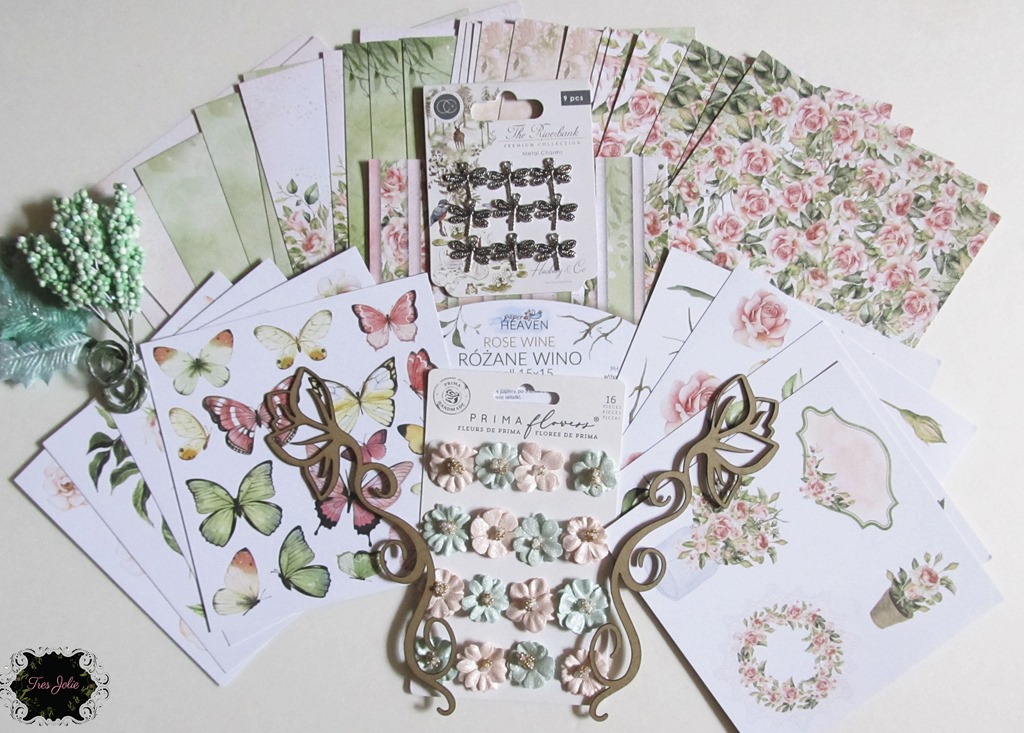
This week I have a mixed media canvas I made using both the March Mixed Media and Scrapbooking Kits from Tres Jolie Kit Club. The coordination between the micas and the papers was phenomenal! How could I resist using them together?!

I grabbed up a 9” x 12” canvas panel from my stash and started cutting and gluing and embossing! Check out my video to see it all come together.

Mar2022-Moodboard-01


Video:


Don’t be afraid to use your scissors! Chipboard, flowers, paper…nothing is immune from being cut, altered, and put back together! This project wasn’t too difficult, most of the time spent on it was spent drying or waiting for it to dry.


We have a new mood board challenge for the month. The rules are as follows:

  • You can create any type of project for the challenge.
  • You MUST say what you were inspired by.
  • You MUST include the twist in your design: OLD WORLD ELEGANCE.
  • We would love to see you USE AT LEAST ONE of Tres Jolie’s products on your projects but it isn’t required to play along.
  • It MUST be a new project.

Isn’t the mood board this month just beautiful?

PhotoRoom-20220308_090742_1

Place your entries in the March 2022 challenge folder on Tres Jolie Kit Club Café Facebook page. This challenge ends on March 31st 2022 at 11:59 pm CST. All entries must be in this folder to be eligible for the prize (to have everyone eligible to win, we are limited the same winner to once every 3 months).


Now, some close-ups of the different parts of my canvas:

Mar2022-Moodboard-02 Mar2022-Moodboard-03 Mar2022-Moodboard-14

Here are some images of the mix of embossing powders I made-this month’s Ultrafine Gold, April 2021’s Patina Bronzed Copper, and my Ranger Triple Thick from my stash-put on in two layers, then “cooked” many, many times to (purposely) create some roughness and knock down some shine.

Mar2022-Moodboard-07 Mar2022-Moodboard-08 Mar2022-Moodboard-09

In addition to embossing my chipboard, I added embossing to most of the paper pieces, including the background paper, to give some extra texture and interest to the canvas.

Mar2022-Moodboard-05

I used the lightest rose mica powder, mixed with the Liquid Color Fluid Medium and watered down, on my background paper. I also used the darkest rose mica, the (I think) next to lightest rose, and both green micas as paints to really make the background flowers and leaves pop as seen in the video.

Mar2022-Moodboard-06 Mar2022-Moodboard-10

This main cluster is the biggest reason I am going to wait a week to give my canvas the coat of Triple Thick Clear Glaze. There are so many layers and “globs” of gel mediums and lots of water, and more gel medium! I don’t want moisture getting stuck behind the glaze! I have so many layers of paper and liquid matte medium I don’t know if the moisture would make it out through the back! Better safe than soggy and foggy!!

Mar2022-Moodboard-11 Mar2022-Moodboard-12

I didn’t set out to use these beads, I was just digging through my stash when I cam across the piece of costume jewelry and the bags of pearl beads. I don’t even know where everything came from, but I thought it was fortunate that I had those dusty rose colored beads to match the papers and micas! (I forgot to mention it in the video, but I used E6000 on the necklace.)

The Burnt Sienna Liquid Acrylic from last month’s Mixed Media Kit is the perfect color to add some shadowy and vintage effects. Don’t forget, if you decide to use a heat gun to “play” with your pink Prima flowers, they start curling up quickly!


Mar2022-Moodboard-04

Thank you for joining me here in my corner. I hope you enjoyed this mixed media canvas project gave you some ideas of what you can do with this month’s Mixed Media and Scrapbooking Kits and inspiration for this month’s mood board!

Stay Crafty, Friends


Did you get a kit? Share what you made in our Facebook Group!

Thank you for joining us here at Tres Jolie Kits!


Corner Scraps can be found at the following places:

Corner Scraps Studio Etsy

Corner Scraps Instagram

Corner Scraps Facebook

Corner Scraps YouTube

Corner Scraps Pinterest

mar22sb-insta mar22mm-insta

In addition to this month’s Scrapbooking Kit & Mixed Media Kit (*from previous Tres Jolie Kits), I used:

*Gary M. Burlin Co. Embossing Powder “Patina Bronzed Copper”; Ranger Extra Thick Embossing Powder, Big Emboss It Ink Pad, Emboss It Dauber, Emboss It Refill, Heat-It Tool; Finnabair 3D Matte Gel, *Liquid Acrylic “Burnt Sienna” Paint; Liquitex Matte Acrylic Medium, Matte Gel; 9×12 Canvas Panel; Fabri-Tac; Judi-Kins Diamond Glaze; pearl beads; E6000

Tres Jolie Kit Club–Wall Hanging-January 2022 Cards, Tags, & More Kit

Hey, all! Welcome back to my little corner!

This week I have a sweet little wall hanging for you made with Tres Jolie Kit Club’s January 2022 Cards, Tags, & More Kit, the stencil from the January Mixed Media Kit, and some items from my stash.

FRAMED-WallHangingl-Jan22CT&M-01

I used two of the black chipboard pieces from this month’s kit as the base for this wall hanging, then added my textures and decorations. Check out how I did it in the video!


Video:


As you saw in the video, getting my chain idea to work out was the hardest part! Fortunately I keep the clear, sturdy packaging around when I get items; you just never know when that might come in handy!

FRAMED-WallHangingl-Jan22CT&M-06 FRAMED-WallHangingl-Jan22CT&M-09

I just used two sheets of the Simple Stories paper from this month’s kit on my base; one with a phrase, and one with a butterfly print. After I had these glued down, it was time to get my modeling paste on. The “Sterling Silver” modeling paste (TCW) that came in the (I think) May Mixed Media Kit was the perfect color to go with this month’s Simple Stories papers and the chain I had decided to use.


FRAMED-WallHangingl-Jan22CT&M-05

I layered my flowers and stickers — some from the sheet, some from the layered package – and tucked them in around my photo. I found that the center of my Tim Holtz “Weathered Clock” Bigz Die was the perfect size for my photo, and it gave me a “rough” edge that I thought just fit better with the muted, more vintage tones of the paper pack.


FRAMED-WallHangingl-Jan22CT&M-04 FRAMED-WallHanging-Jan22CT&M-SneakPeek

My stenciling was added randomly – where I felt it should go – but I was careful not to cover up the phrase or too many of the butterflies! I added some flower cluster on the left panel, as well as some of the butterfly stickers. On the right panel I added a large phrase sticker and a couple of smaller, layered stickers. I even tucked on one of the resin pieces to give emphasis to the “best ever” phrase.


FRAMED-WallHangingl-Jan22CT&M-02

I used my Crop-A-Dile to punch my holes and add my eyelets, and added some jump rings I repurposed from an old “worthless” chain I’ve had for years so I’d have something to attach my main chain on.

Thank you for joining me here in my corner, I hope you enjoyed this project and it gave you some ideas of what you can make using items from this month’s Cards, Tags, & More Kit!

Stay Crafty, Friends!


Did you get a kit? Share what you made in our Facebook Group!

Thank you for joining us here at Tres Jolie Kits!


Tres Jolie can be found at the following places:

Tres Jolie Facebook

Tres Jolie Instagram

Tres Jolie Website

Tres Jolie Subscriptions

Tres Jolie Blog

Tres Jolie YouTube

Tres Jolie Pinterest


ct&mKit

In addition to this month’s Cards, Tags, & More Kit & the stencil from the Mixed Media Kit (*from previous Tres Jolie Kits), I used:

*TCW: Sterling Silver Modeling Paste; Prima/Finnabair: 3D Matte Gel, & 2” Silicone Brush; Sizzix/Tim Holtz “Weathered Clock” Bigz Die; We R Memory Keepers Crop-A-Dile, eyelets, & Craft Knife; 1” double sided tape; Fabri-Tac; Liquitex Matte Gel; E6000; chain/twine/ribbon – something to use for hanging!; some thick, clear plastic

Tres Jolie Kit Club–Sleigh Bells-December Mixed Media Kit

Hey, all! Welcome back to my corner & Happy New Year Eve, Eve!

Did you get a chance to make your Mixed Media Kit Sleigh from the Tres Jolie Kit Club yet? If not, I have a project idea here for you today to wrap up 2021. I really wanted to keep the paint out of all the scroll work on the sleigh, so I pulled out my gel plate to create smooth, even layers—after “dyeing” the wood!

FRAMED-20211218_133841_03_saved

I knew I wanted to dye the deer, so since I was doing that, I decided to toss in the sleigh pieces so I’d have options. By “options” I mean, I rarely know what I’m going to be doing when I start a project, so I have to be prepared! LOL! Check out my video to see how this whole thing came together!


Video:


Here are some close-up photos! After the photos I have added my gel plate “recipes.” They sleigh has quite a few layers, inside and out, to get the look I wanted!

FRAMED-20211218_133841_09_saved FRAMED-20211218_133826_08_saved

I wanted the edges of the wood to show, but I also wanted to add some color to them, so, along with the dye process, I very lightly went in with some of the Stamperia Wax from the kit to give some shine. Don’t forget to gel plate paint the end of the tabs that will be showing when the sleigh is all together!


FRAMED-20211218_133813_05_saved FRAMED-20211218_134242_02_saved

There are two clusters in the sleigh—in fact, the majority of the inside is made of those clusters–they had the leaves, poinsettias, gifts, and ornaments already on them! (They came in the December 2018 Mixed Media Kit! I forgot I even had them!)

All I did is brush on some gel medium, sprinkle the glitter from this month’s kit, and add some excess snow paste and the pine cones from the Limited Edition Advent Calendar Kit! That was my cluster completion!

FRAMED-20211228-161910 FRAMED-20211218_133800_07_saved

My finishing touch’s were the bells from this kit, and the Stamperia acetate ephemera (from the Advent Kit). I grabbed up the neutral stars, ornaments, & “Let It Snow” pieces from the ephemera pack, and adhered them in place with some 3D Gel. I have three bells hanging from the back with some jewelry wire, and I popped the remaining two on clusters!


Here are my gel plate “recipes”:

Outside sleigh coloring layers:

A thin layer of silver paint topped with a thin layer of red paint, then a second layer of red paint to build it up some – do this three times.

Inside sleigh & reindeer “harness” coloring layers:

1. Brush on a layer of wax, top with a layer of silver paint, press down pieces

2. Add a layer of silver paint, press down pieces

3. Add a layer of clear gesso, add a layer of silver paint, press down pieces

4. Add a layer of silver paint, press down pieces

5. Add a layer of silver paint, press down pieces and let them stay for about 15-20 minutes (I added light weight to mine using acrylic blocks to distribute the weight of the containers

6. On a non-waxed section of the gel plate (or clean off the wax from the area you are going to use) add a layer of silver paint then a layer of clear gesso, let dry completely!

7. On a clean gel plate add a layer of silver paint, press pieces on, remove and let dry

Sleigh Tracks coloring:

Four layers of silver paint

Deer coloring layers:

Thin layer of silver paint, layer of clear gesso, coating of Distress Oxide Spray (“Walnut Stain”), I only “cleaned” the gel plate off with my piece of deli paper and did it all a second time.


FRAMED-20211218_133800_06_saved

Thank-you for joining me here in my corner! I hope you had a happy holiday season and have a safe and happy New Year!

Stay Crafty in 2022, Friends!


mmkit ADVENT-CALENDAR-KIT

In addition to items found in this month’s Mixed Media Kit and the Limited Edition Advent Calendar Kit (*from previous Tres Jolie Kits), I used:

*Folk Art “Sterling Silver” Metallic Acrylic Paint; *Darice Clusters; Prima/Finnabair 3D Matte Gel; Ranger Brayer; 8×10 Gel Press Gel Plate; Liquitex: Clear Gesso, Gloss Gel, Liquid Acrylic Inks – Titanium White & Naphthol Crimson; Gorilla Wood Glue; Krylon Triple-Thick Crystal Clear Glaze; jewelry making wire; artists masking tape

Tres Jolie Kit Club–Advent Calendar-Moodboard Inspired Project

Hey, all! Welcome back to my corner!

I have, for my moodboard inspired project, an Advent Calendar using the Tres Jolie Kit Club’s Limited Edition Advent Calendar Kit, the December Scrapbooking Kit, and even some of the paint and glitter from the December Mixed Media Kit!

AdventCollage

Now, this project was a rather “hefty” project, and there was more than once I thought about stopping! LOL! But, I recorded my process, so I hope you find it helpful and enjoyable! It did turn into two, longer than I expected, videos though – one for the base, and one for the roof! Check them out!


Part 1 – the base:

Part 2 – the roof:


December 2021 Moodboard:

moodboard


For my base I created my own “stain” using the silver paint from the mixed media kit, the Distress Oxide from the Advent kit, and some clear gesso. I had to cover (practically) every surface of the calendar with it! I just couldn’t leave anything unfinished! Do you have to? No! The only surfaces I didn’t stain were the drawer fronts and the inside of the back panel of the roof – because they would be getting covered with gel medium and paper! (The measurements for my “stain” are approximately 1/3 cup clear gesso, between 1/4-1/3 of the bottle of silver paint, and 60 full squirts of the Distress Oxide Spray – and yes, I rubbed it in, I didn’t brush it on!)

FRAMED-20211202_222711

My drawer fronts are covered in paper from 49 & Market found in this month’s Scrapbooking Kit. I used two sheets of paper, and probably close to 2/3rds of the package of rub-on’s! (To make sure your paper(s) are centered, work from the center out!) At the bottom edge of the bottom row of drawers and the top edge of the top row, I added some of the Snow Glitter to “fill-in” the small gaps since the drawer fronts, when all together, are slightly larger than 12 inches. After the rub-on’s, and before the snow, I sprayed four layers of Krylon Matte Finish for some extra protection.

FRAMED-20211202_222602 FRAMED-20211202_222628

After the gel medium I used to attach the papers dried fully, I just started layering the rub-on’s (before the snow glitter). In the center of the Advent I added the large die cut wreath and roses from the paper pack and then came in with a few of the rub-on poinsettias. My “knobs” are Tim Holtz Hitch Fasteners (I pre-drilled my holes!) and, using jump rings, I hung the Tim Holtz Number Tokens that can be found in the Advent Kit.


Once I saw the watercolor tree paper I knew it belonged in the roof! It really shaped how the rest of my Advent Calendar came about. If you look closely at the trees, you can see where the pattern starts it’s repeat, I made that specific tree the center of my background. With careful cutting and placement, the seam is practically invisible – especially with the “distraction” of all the other trees in the top!

FRAMED-20211202_222701

I used a variety of Distress Crayons to add color to my trees and deer, I didn’t want to paint them, and I didn’t want to stain them – watery liquids will follow your wood grain and I wanted more control without having to seal the wood first and I still wanted the wood grain to show. The Distress Crayons gave me that control! I could control where my colors went and rub them in to still show the grain! (My deer and trees were also coated with the matte spray so the “snow” wouldn’t activate the water-reactive Crayons)

FRAMED-20211202_222937

FRAMED-20211202_222825

FRAMED-20211202_222949

If you watch the video, you will see that I “dye” my deer and trees before I ever add the crayons. I did this for a couple of reasons – 1) The color of the wood can effect the colors placed on top – like the difference of what happens when you use white or black gesso and 2) I rarely know exactly what I am going to be doing so I like to “be prepared”!

In addition to the Glitter Snow in the kit, I made my own snow paste! I just had to have snow everywhere!! I didn’t even mind the snow on the legs of the deer! Why? Have you ever walked through snow? That stuff will stick to you and I think it helps add to the illusion of movement – like the deer were really walking through.

FRAMED-20211202_222801 FRAMED-20211202_222804

I also added some white bottle brush trees from my stash and a small string of lights inside the roof. On the front panel, I had to add more snow! I finished drawing the snow mounds across, laid down a layer of white gesso, then added my snow pastes!

FRAMED-20211202_222637 FRAMED-20211202_222645

For my roof I wanted snow, but I also wanted the shingles to show – so I compromised using a stencil! After I stained my roof I added a few coats of sealer in hopes the pastes wouldn’t break through and absorb the stain. It worked – mostly! I added my stenciling to the roof, then the roof peak so I could blend it into the stenciling and while the paste was still wet, I added glitter.

FRAMED-20211202_222526 FRAMED-20211202_222751

Thank-you for joining me here in my corner! I hope you enjoyed this project and it gave you some ideas of what you can do using the Advent Calendar Kit and the Scrapbooking Kit!

Stay Crafty, Friends!


Did you get a kit? Share what you made in our Facebook Group!

Thank you for joining us here at Tres Jolie Kits!


Tres Jolie can be found at the following places:

Tres Jolie Facebook

Tres Jolie Instagram

Tres Jolie Website

Tres Jolie Subscriptions

Tres Jolie Blog

Tres Jolie YouTube

Tres Jolie Pinterest


ADVENT-CALENDAR-KIT unnamed mmkit

In addition to the Advent Calendar Kit and the December Scrapbooking & Mixed Media Kits (*from previous Tres Jolie Kits), I used:

*Lindy’s Gang “Sidewalk Chalk” Flat Fabio Spray; *Cosmic Shimmer Crackle Paste “Frosted Aqua;” *Tres Jolie Crackle Medium; TCW Light & Fluffy Modeling Paste; Ranger/Tim Holtz “Speckled Egg” Distress Paint, Distress Crayons: “Tree Lot,” “Iced Spruce,” “Snow Flurries,” “Empty Tomb,” “Crooked Broomstick,” “Old Paper,” “Wild Honey,” “Scattered Straw,” “Tea Dye,” “Black Soot,” “Speckled Egg,” “Frosted Juniper,” & “Weathered Wood;” Ranger Brayer; idea-ology/Tim Holtz Hitch Fastners; Prima/Finnabair Heavy White Gesso, “Bindweed Wallpaper” Stencil; Liquitex: Clear Gesso, Matte Gel, Gloss Super Heavy Gel, and Acrylic Inks: “Titanium White,” “Naphthol Crimson,” “Yellow Medium Azo,” & “Phthalocyanine Blue;” Krylon Workable Fixatif & Matte Finish; Daler Rowney White Gesso; 4mm & 8mm jump rings; foam snow; JoAnn’s Makers Holiday Littles White Bottle Brush Trees; Gorilla Wood Glue, double sided tape; Scotch Tape; E6000; Starry Lights: Warm White

Tres Jolie Kit Club–December 2021 Reveals!

Welcome to the December 2021 Kit Reveal!

We are revealing our newest kits so make sure you are following on Social Media and are a part of the Facebook Cafe that way you won’t miss a single project created with these kits.

KitRevealBanner_dec21

The December 2021 kit is filled with gorgeous new papers and embellishment from 49 & Market. As always, these papers will be amazing for all your upcoming projects, even though they have a holiday feel to them. You will find a lovely assortment of patterned papers and perfectly coordinated embellishments.

Our card kit is filled with gorgeous papers from Graphic 45 and goodness so you can create a beautiful explosion box and more. Who doesn’t like creating a variety of projects from one kit?

These kits are for the beginner to the advanced, clean and simple to the mixed media maven. No matter your style, there is something for everyone. We know you are going to love it!


Presenting the Tres Jolie December 2021 kits:

unnamed

*Scrapbook Kit*


mmkit

*Mixed Media Kit*


ct&mkit

*Cards, Tags and More Kit*


Don’t forget to stop by the Tres Jolie YouTube channel and see our video reveal of all our kits.


Love them, right! You can still get one of your own (some kits are in very limited quantities). Become a subscriber and you will never miss out on our gorgeous, coordinated kits. Just visit Tres Jolie subscribe.


The designers at Tres Jolie have created some amazing layouts/projects with this kit.

Here is a little tease from me using the Cards, Tags, & More Kit:

FRAMED-20211117_165630 FRAMED-20211117_165657 FRAMED-20211117_165725

Please stop by the other designers blogs and check out their sneak peaks. They are listed below:

Rae Moses

Peggy Giovanetti

Kim Heard


We have a new mood board challenge for the month. Here are the rules.

*You can create any type of project for the challenge.

*You MUST say what you were inspired by.

*You MUST include the twist in your design.

*We would love to see you USE AT LEAST 1 of Tres Jolie’s products on your projects but it isn’t required to play along.

It MUST be a new project.

Here is the mood board:

moodboard

The twist for this month is HOLIDAY MEMORIES. Let’s see those projects created using HOLIDAY MEMORIES.


Place your entries in the November 2021 challenge folder on Tres Jolie Kit Club Cafe Facebook page. This challenge ends on December 31st 2021 at 11:59 pm CST. All entries must be in this folder to be eligible for the prize (to have everyone eligible to win, we are limited the same winner to once every 3 months).


Don’t forget that Tres Jolie can be found in the following places:

Tres Jolie Facebook

Tres Jolie Instagram

Tres Jolie Website

Tres Jolie Subscriptions

Tres Jolie Blog

Tres Jolie YouTube

Tres Jolie Pinterest


All the designers will be revealing their projects on the Tres Jolie blog all month long. Make sure you join us for tons of inspiration, including video and photo tutorials. Also make sure you check out our newest chipboard designs that were just added to the store.

Tres Jolie Kit Club–Autumn Tealights-November 2021 Cards, Tags, & More Kit

Hey, all! Welcome back to my corner!

For my final project of November for Tres Jolie Kit Club, I am bringing you some fabulous home décor—Tealight Lanterns—using the Cards, Tags, & More Kit and even a bit of the lavender paste from the Mixed Media Kit!

FRAMED-20211024_153345

With some dies and the beautiful “Hello Pink Autumn” papers from Prima from the kit, I put this autumn [flameless] tealight décor piece together. Check out my video to see how I did it!


Video:


FRAMED-20211024_154549 FRAMED-20211024_153512

After I cut my lanterns out and assembled them, I went back and carefully unfolded the bottoms and cut off the flaps so I could just pick them up and set them over the tealights. I also have some “Magic Potion” Effect Paste on the windows to add a little sparkle!

FRAMED-20211024_154604 FRAMED-20211024_154618

My stands are made from some cardboard tubes—the kind that is in the center of toilet paper & paper towel rolls—and since I used the same paper for the stands and the doily’s, I wanted to break it up a little, so I watered down some of the “Lavender” paste from this month’s Mixed Media Kit and just swiped it on around the tops of the stands before I added the doily’s.

FRAMED-20211024_154537 FRAMED-20211024_154630

I used my “Tattered Pinecone” Die on more paper and just rolled them up, then added some “Magic Potion” to them as well to keep the sparkle going!

After I had everything put together and it was dry, I added some sisal to the bottom for some more texture.


FRAMED-20211024_154655

Thank-you for joining me here in my corner. I hope you enjoyed this project and it gave you some ideas of what you can make using items from this month’s kits!

Stay Crafty, Friends


Did you get a kit? Share what you made in our Facebook Group!

Thank you for joining us here at Tres Jolie Kits!


Tres Jolie can be found at the following places:

Tres Jolie Facebook

Tres Jolie Instagram

Tres Jolie Website

Tres Jolie Subscriptions

Tres Jolie Blog

Tres Jolie YouTube

Tres Jolie Pinterest


Nov21-CT&Mkit

Nov21-MMkit

In addition to items from this month’s Cards, Tags, & More and Mixed Media Kits, I used (*from previous Tres Jolie Kits):

*Ranger/Tim Holtz: Matte Distress Collage Medium; *Dress My Craft “Classic Doily” Die; ; Sizzix/Tim Holtz Bigz Dies: Jumbo Tattered Pinecone & Lantern Box; Prima/Finnabair: 1” Silicone Brush, “Magic Potion” Effect Paste; *Natural Sisal; Hot Glue/Hot Glue Gun (Low Heat); Art Glitter Glue; Flameless Tealights; 1” double sided tape; Sizzix Big Shot Plus

Tres Jolie Kit Club–Anything Book–October 2021 Cards, Tags, & More Kit

Hey, all! Welcome back to my corner!

For my final Tres Jolie Kit Club project of October, I’m bringing you an “Anything Book.” I call it an anything book because you could easily use it as a mini-album, mini art journal, mini notebook, etc. Personally, I really wanted a mini art journal with pockets and flip-outs.

FRAMED-20210919_173350

My inspiration for this project came from Pinkstrawberryz “No Binding Easy Mini Album.” It was just one of those “You might like” recommendations that randomly popped up on YouTube, so I decided to have a look! As soon as I watched the video I had ideas brewing! Check out my video to see how I put my Anything Book together. (Below the video you will find photos of the inside and the measurements for my pages.)


Video:


Here is a look at some of the pages I started preparing:

FRAMED-20211003_110402 FRAMED-20211003_110424

After my book was together I used clear and white gessoes to prepare the pages. With my gesso dry, I was then able to start laying down mediums to prepare working backgrounds. I just grabbed up various paints and started laying them down! To make the book cover, I grabbed up some burlap trim, cut it to length, and stitched it in place during assembly.

FRAMED-20211003_110443 FRAMED-20211003_110455

Some areas have acrylic paint and some have watercolors. I started drawing on a couple of the pages—flowers in some places, and this face above. I also grabbed a few pens and outlined the flowers from the paper pack.

FRAMED-20211003_110513 FRAMED-20211003_110527

I didn’t always use a brush with my paints, some times I just used a palette knife to scrape it on! I also grabbed up some of my Dina Wakely Scribble Sticks and added some…well…scribbles! I have a short flip-though of my mini art journal (as far as it had been “finished” at the time of filming!) over on my Instagram post for this project.


Measurements (in order of page in book):

2021-09-17_18.14.152021-09-17_18.15.302021-09-17_18.16.112021-09-17_18.16.36


In my video, I talk about the process of making the cover using some Amazing Cast Resin and the embossing folder!FRAMED-20211003_110345

Thank you for joining me here in my corner! I hope you enjoyed this project and it gave you some ideas of what you can make using items found in this month’s Cards, Tags, & More Kit!
Stay Crafty, Friends


Did you get a kit? Share what you made in our Facebook Group!

Thank you for joining us here at Tres Jolie Kits!


Tres Jolie can be found at the following places:

Tres Jolie Facebook

Tres Jolie Instagram

Tres Jolie Website

Tres Jolie Subscriptions

Tres Jolie Blog

Tres Jolie YouTube

Tres Jolie Pinterest


October Cards, Tags, & More Kit:

cardsKit-Oct21

In addition to items found in this month’s Cards, Tags, & More Kit (*from previous Tres Jolie Kits), I used:

Prima/Finnabair: Heavy White Gesso, “Sweet Rose” Metallique Wax, “Shabby Pink” Matte Wax; *Prima: Metallic Pastel Accents & Waterbrushes; Ranger/Dina Wakley: *“Peacock,” *“Ocean,” *“Turquoise,” *“Lemon,” & Olive Acrylic Paint and “Eggplant” Scribble Stick; Ranger/Tim Holtz: *“Bundled Sage” Distress Oxide Spray & “Speckled Egg” Distress Paint; *49 & Market “Cream” Burlap Trim; Ranger: Heat-It Tool, Amazing Cast Resin; EK Tools Scoreboard; 2-1/2” Recollections Circle Punch; E6000; Art Glitter Glue; Scotch ATG; twine; needle; awl; Aen Art Green Pen; Sakura Souffle XPGB# 950 (White Pen), Glaze XPGB# 824 (Purple Pen), & Moonlight 10 XPGB10# 421 (Pink Pen); Liquitex Clear Gesso

Tres Jolie Kit Club–September 2021 Moodboard-Half Circle Journal

Hey, all! Welcome back to my corner!

This week I’m bringing you a half-circle journal I created using items from both the September Mixed Media Kit and Cards, Tags, & More Kit from Tres Jolie Kit Club –plus items from my stash. Below you will find some photos, this month’s moodboard, and two videos for this project (Part 1 is preparing and the cover work; Part 2 is assembly and finalizing!)

FRAMED-20210907_112918

I hadn’t originally even thought of doing a journal when I pulled out my circle canvas, but as I sat there staring at the canvas and the new “Circle Swirl” chipboard from Tres Jolie an idea began to take shape! Check out my videos to see how everything came together.


Part 1:

Part 2:


Look at these beautiful colors on the September Moodboard! (Twist: Vintage)

moodboard-sept2021


Now for a few close-ups:

FRAMED-20210907_113151

FRAMED-20210907_113207

I used my Tim Holtz Distress Crayons with a Heidi Swapp stencil. Sometimes adding the Crayon first and lifting through the stencil with a baby wipe; sometimes adding the Crayon through the stencil. I was able to layer my Crayon using some Krylon Workable Fixatif in-between.

FRAMED-20210907_113119

FRAMED-20210907_113248

I used the “Burnished Bronze” Nuvo Embellishment Mousse from the September Mixed Media Kit to add some shine to my spine and the “Circle Swirl” Tres Jolie Chipboard.

FRAMED-20210907_113402

I’ve been hoarding this lace for about three years, and I was finally able to bring myself to using it! I grabbed up my Linen Hinging Tape and just added it in a couple of places—almost like a page made of lace!

Here are a few photos of the inside:

FRAMED-20210907_113314

FRAMED-20210907_113548

I used some green masking paper to line the inside of the cover, and added some subtle Distress Crayon + Lattice Stenciling as well, using the same process as I did on the outside. The pink papers are from the Cards, Tags, & More Kit, I used some Kraft-stock from my stash for the pages and to back the pieces of ephemera.

FRAMED-20210907_113452

FRAMED-20210907_113520

I created a few mini-envelopes to add to my pages, leaving one side unattached so create a little pocket for some notecards I made using the same Kraft-stock as the pages, topped with the swirls from the “Circle Swirl” chipboard.

FRAMED-20210907_113052

Thank-you for joining me here in my corner! I hope you enjoyed this Half-Circle Journal and it gave you some inspiration and ideas of what you can create using items from this month’s Mixed Media and Cards, Tags, & More Kits.

Stay Crafty, Friends


Did you get a kit? Share what you made in our Facebook Group!

Thank you for joining us here at Tres Jolie Kits!


Tres Jolie can be found at the following places:

Tres Jolie Facebook

Tres Jolie Instagram

Tres Jolie Website

Tres Jolie Subscriptions

Tres Jolie Blog

Tres Jolie YouTube

Tres Jolie Pinterest


Card kit sept 2021

MM kit sept 2021

In addition to items found in the September Cards, Tags, & More Kit and Mixed Media Kit (*from previous Tres Jolie Kits), I used:

Tres Jolie Kit Club Chipboard: “Circle Swirl;” *All Laces; *8” Circle Canvas Board; Ranger/Tim Holtz Distress Crayons: “Frayed Burlap,” Victorian Velvet,” “Bundled Sage,” & “Milled Lavender;” Heidi Swapp 6×6 “Lattice” Stencil; idea-ology/Tim Holtz: Tiny Attacher; We R Memory Keepers: Crop-A-Dile II, Tab Punch, & Envelope Punch Board; Ranger: Blending Tool, Heat-It Tool, & 3.5” Brayer; Krylon Workable Fixatif; Mod Podge Matte Clear Acrylic Sealer; Liquitex: Clear Gesso & Matte Super Heavy Gel; LineCo: PVA Glue & 1.25” Linen Hinging Tape; 2” Bookbinding Tape; 1/4” & 1/8” double sided tape; awl; bookbinding thread & needle; green masking paper; Kraft-stock; Art Glitter Glue; pink thread; Scotch Advanced Tape Glider; pink zipper

Tres Jolie Kit Club-Paperclay & a Tag Booklet-Aug. 2021 Cards, Tags, & More Kit

Hey, all! Welcome back to my corner!

This week I’m bringing you a two part project using the August 2021 Cards, Tags, & More Kit from Tres Jolie Kit Club – part one: paperclay + moulds + paper; part two: tag booklet!

FRAMED-20210721_121034

As I was sitting and looking at the cut-apart sheet from the kit, I couldn’t help but wonder if I could make the wreaths more dimensional. Then it dawned on me – they looked like the would fit in the Stamperia Mould from the July 2021 Mixed Media Kit! Check out my video to see how I used the papers with some different moulds and how I put the quick tag booklet together!


Video:


Now for a few photos. First up, the paperclay pieces I created:

FRAMED-20210721_121457

FRAMED-20210721_121320

The photo on the left shows two wreaths I created using the July Stamperia Mould and papers from this month’s Cards, Tags, and More Kit. The photo on the right shows all the pieces I made using various moulds from my stash!

Next up, the quick little tag booklet:

FRAMED-20210721_120919

FRAMED-20210721_121001

The round wreath was just the right size to add to the front of my tag booklet, and with just a few small embellishments it was all done! Look below for a photo series of making the pockets, plus a link to the original post I got the folding idea from! (*Note: Tag Size: 2-3/8”x3-3/8”)

20210720_111627 20210720_111654
The dashed lines are the folds. The side that is the “back” of the folds is also the side that will show on the front pockets.
20210720_111848 20210720_111825
Add a thin line of clue for to make the

slide-through pocket.

Fold your corners in and add a little glue to

tack them in place.

20210720_111953 20210720_112114
Glue lines if the larger side will be your top

piece.

Glue lines if the smaller side will be your top

piece.

**Original Fabrika Decoru Instagram post where the pocket idea came from! (The 6th slide in the post has a video)

FRAMED-20210720_143958

Thank you for joining me here in my little corner, I hope you enjoyed this project and it gave you some ideas of what you can do with the items found in the August Cards, Tags, & More Kit!

Stay Crafty, Friends


Did you get a kit? Share what you made in our Facebook Group!

Thank you for joining us here at Tres Jolie Kits!


Tres Jolie can be found at the following places:

Tres Jolie Facebook

Tres Jolie Instagram

Tres Jolie Website

Tres Jolie Subscriptions

Tres Jolie Blog

Tres Jolie YouTube

Tres Jolie Pinterest


August 2021 Cards, Tags, & More Kit

In addition to items from this month’s Cards, Tags, & More Kit (*from previous Tres Jolie Kits), I used:

*Stamperia Frames Maximould; *Little Birdie “Aqua Sheen” Metallic Wax; Prima/Finnabair Moulds: “Skull & Bones,” “Birds & Bats,” “Nocturnal Elements,” & *“Fairy Garden;” Creative Paperclay; LineCo PVA Glue & Linen Hinging Tape (1.25”); Art Glitter Glue; Liquitex Matte Super Heavy Gel; X-Acto Knife; We R Memory Keepers Crop-A-Dile & Crop-A-Dile Corner Chomper; EK Tools Score Board; Tim Holtz Tiny Attacher; sheer ribbon; *Lace